Get to know Head Office Branch Settings
Use Head Office Branch Settings to publish settings with pre-configured values to your branches and subgroups.
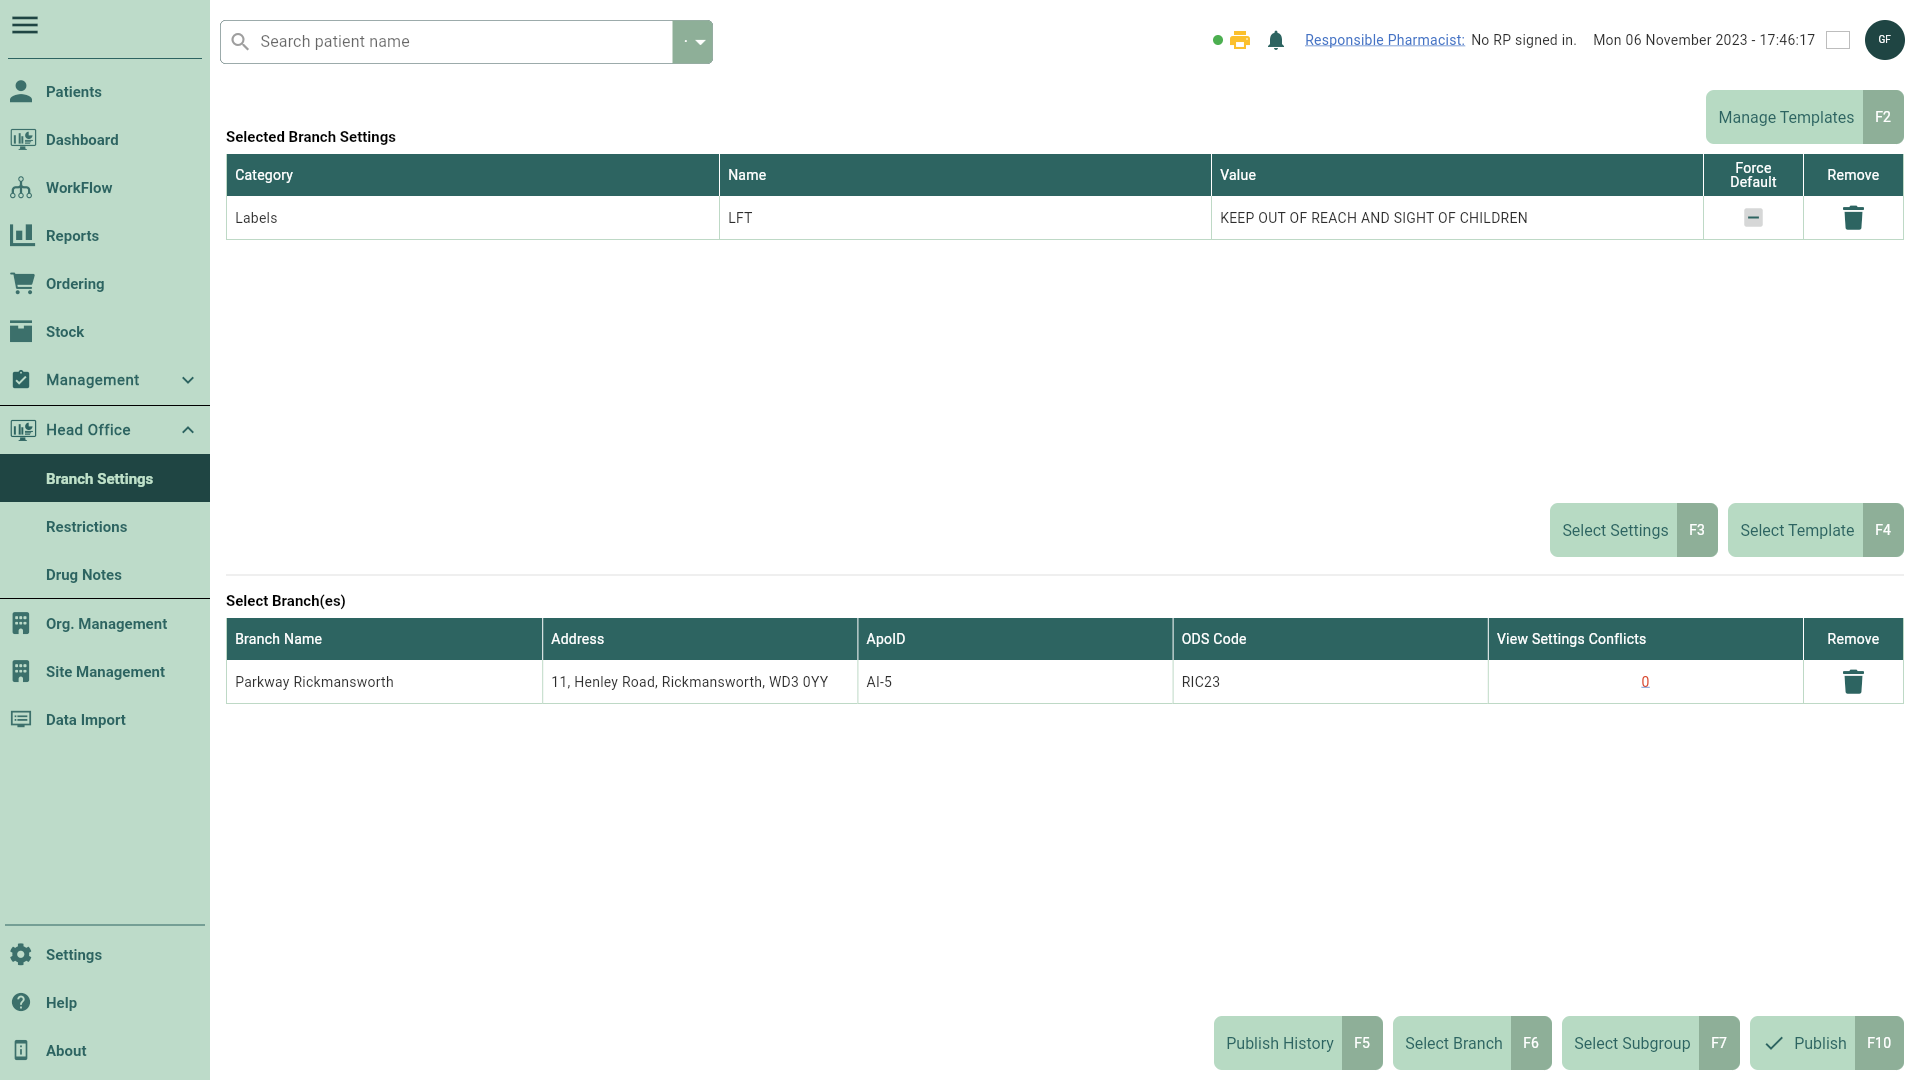
To access Head Office Branch Settings, select the Head Office dropdown menu from the left-nav and the Branch Settings menu item.
| Field | Description |
|---|---|
| [Manage Templates - F2] | Use this button to open the Manage Settings Templates window where you can add, edit and delete your branch settings templates. |
| Selected Branch Settings grid | The Selected Branch Settings grid displays all the settings that you have selected to publish to your branch(es). Using the Action icons, you can edit or delete settings within this grid. |
| [Select Settings - F3] | You can publish ad-hoc settings to your branches without the need for a template. Use the [Select Settings - F3] button to open the Select Settings window where you can configure and select settings to quickly publish to your branch(es) outside of using a branch settings template. |
| [Select Template - F4] | Use this button to open the Select Template window where you can select one or more templates to add to the Selected Branch Settings grid. |
| Select Branch(es) grid | The Select Branch(es) grid displays all the branches that will receive your settings once published. You can add branches to this grid using the [Select Branch - F6] and/or [Select Subgroup - F7] buttons, or remove branches using the adjacent  Delete icon found in the Action column. Delete icon found in the Action column. |
| View Settings Conflicts column | Apotec CRM will complete a comparison of your proposed settings values against the existing settings values held at each selected branch. By selecting the numeric badges in the View Settings Conflicts column within the Select Branch(es) grid, you can view a list of any conflicting New Values that you have configured in the Selected Branch Settings grid with the branches Current Values for each setting. |
| [Publish History - F5] | Open the Publish History window to view the details of all your published templates, including Date Published, Total Settings and the publish Status. You can use the filters within this window to refine the grid by Period or a custom date range, and the function keys to republish a template. |
| [Select Branch - F6] | Use this button to open the Select Branch window where you can search for and select all the branches you want to receive your settings once published. These will be added to the Select Branch(es) grid once confirmed. |
| [Select Subgroup - F7] | Use this button to open the Select Subgroup window where you can select all the subgroups of branches you want to receive your settings once published. Branches within your subgroups will be added to the Select Branch(es) grid once confirmed. |
| [Publish - F10] | Once you're happy with your configured settings, use the [Publish - F10] button to publish your settings to your selected branches. |