Adding patients
Patients will need to be added in Apotec CRM before you are able to perform any patient-related activities. To add a patient, you can enter their details in manually, perform a PDS search/validation to pull key details from the Patient Demographics Service, including the patient's name, date of birth, gender, contact numbers, and address, or use our patient match tool within Workflow to create a patient using the data from their incoming prescription. All three methods have been described in this article, you can use the contents to navigate between the step-by-step process for each.
Adding a patient using Patient Match in Workflow
You may download nominated prescriptions for patient's that cannot be accurately linked to a record in your CRM database. In this scenario, patient's will display on the New Rx tab within Workflow with a Patient Not Matched badge and will need to be linked to a record on your database before you can process their prescriptions. Following the steps to match a patient also provides a quick and easy way to add patients if they do not exist in your CRM database.
- To begin, open the New Rx tab in Workflow by selecting Workflow from the left-nav.
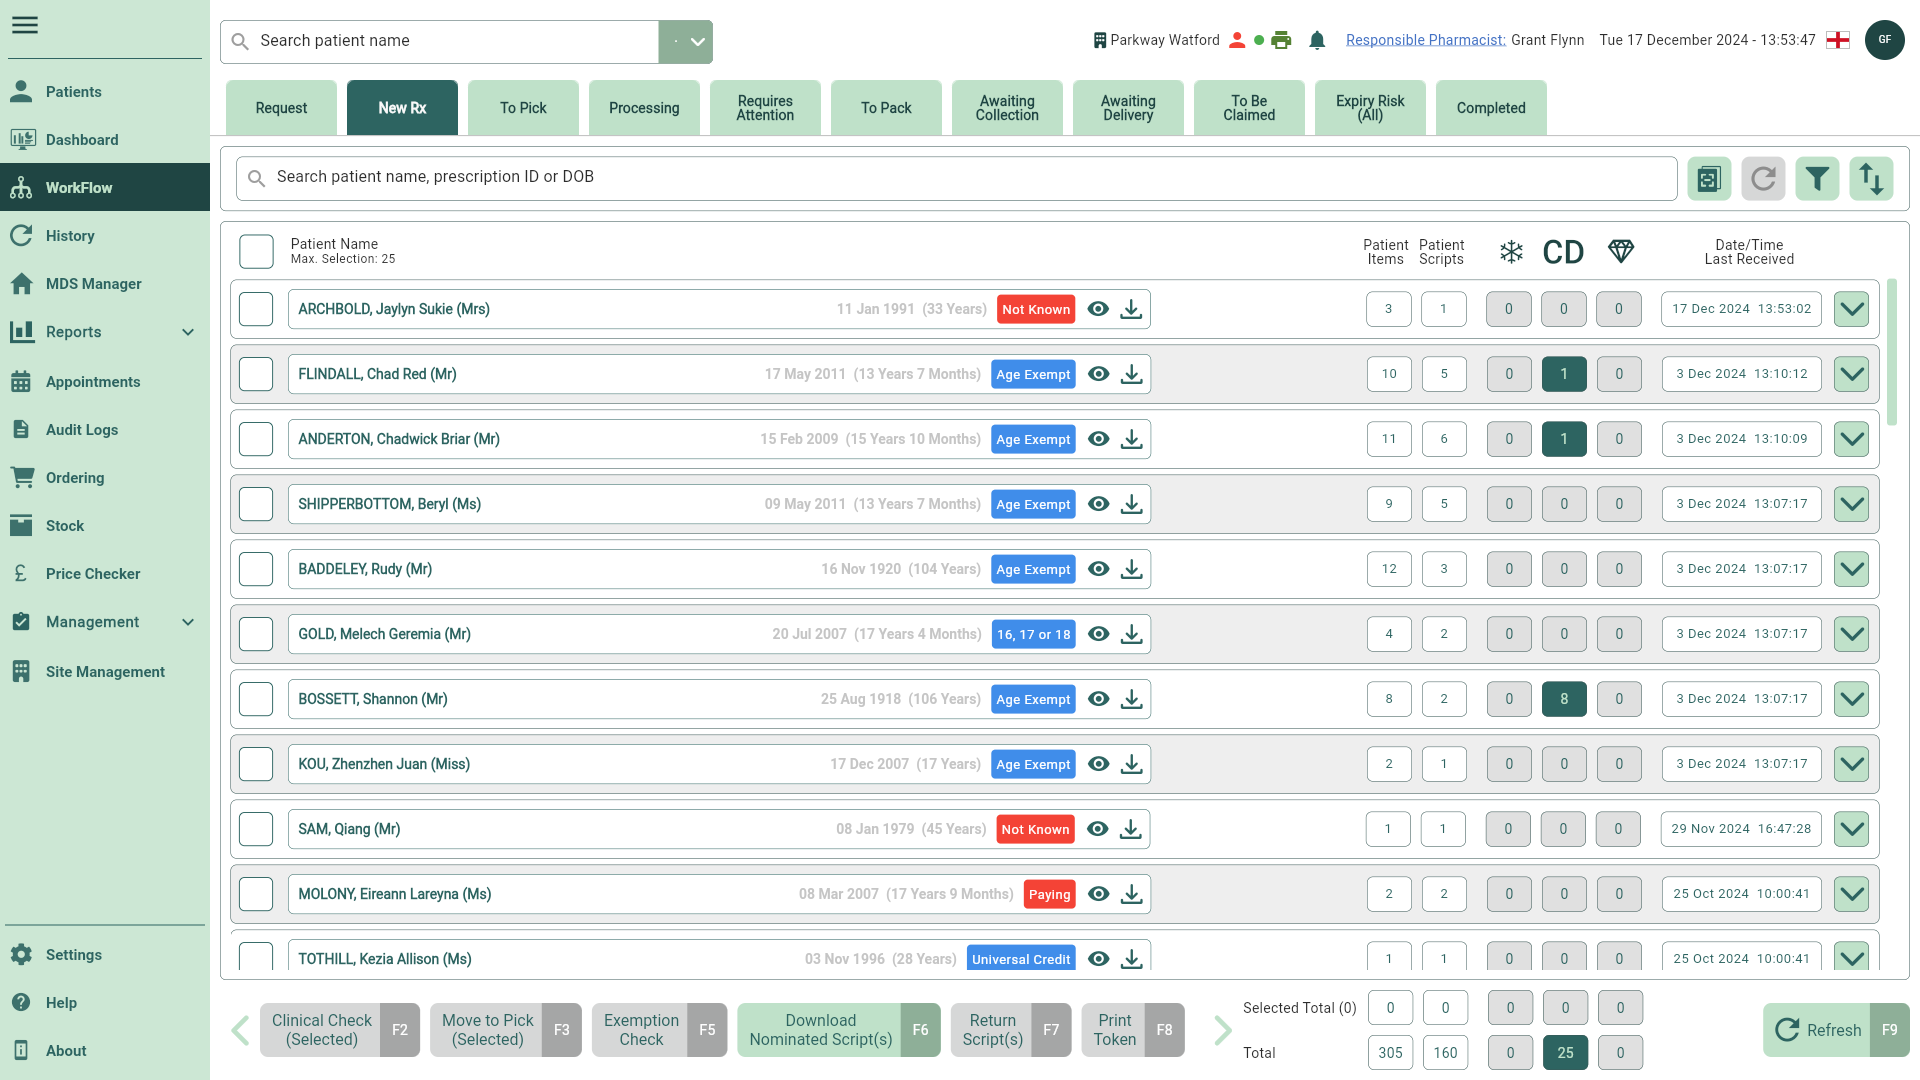
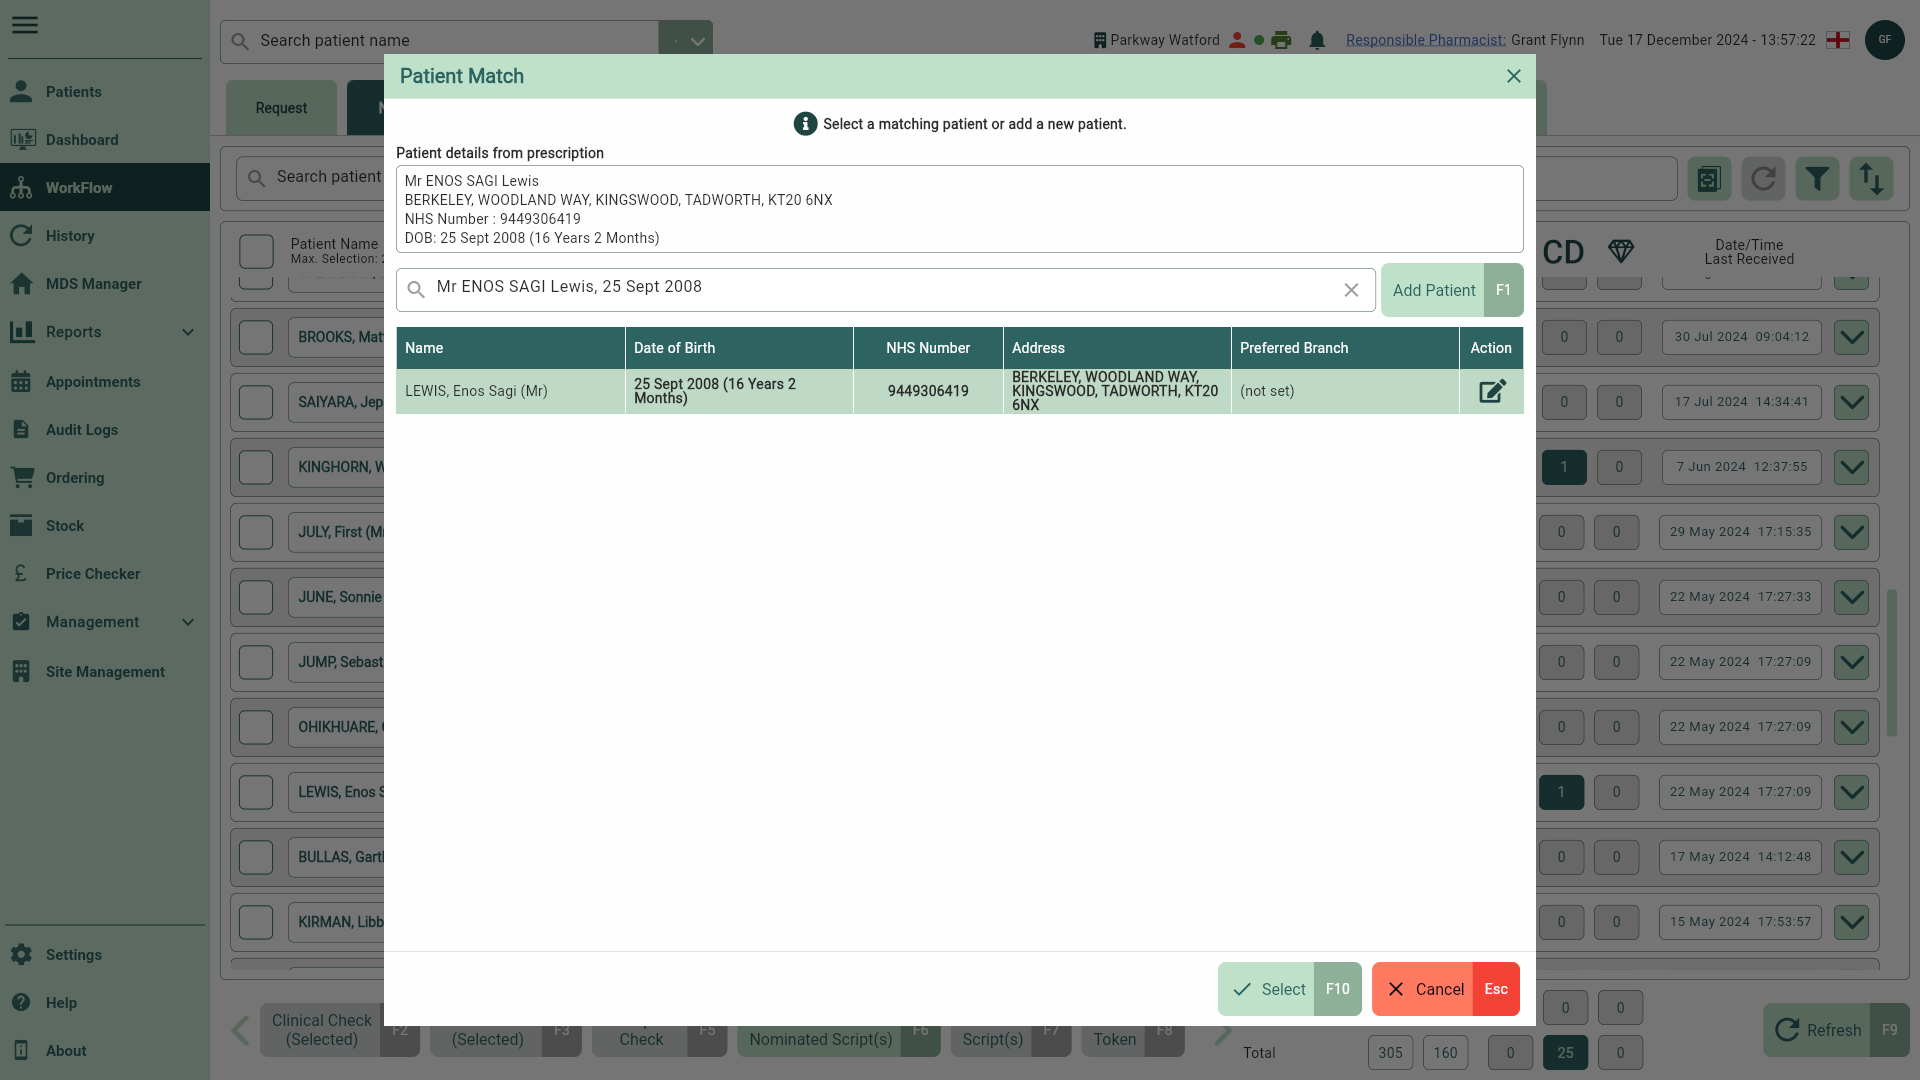
- Locate a patient with the Patient Not Matched badge and select the adjacent
 Add icon. The Patient Match window displays. A patient search is automatically performed using the patient's details and any potential matches will display in the grid.
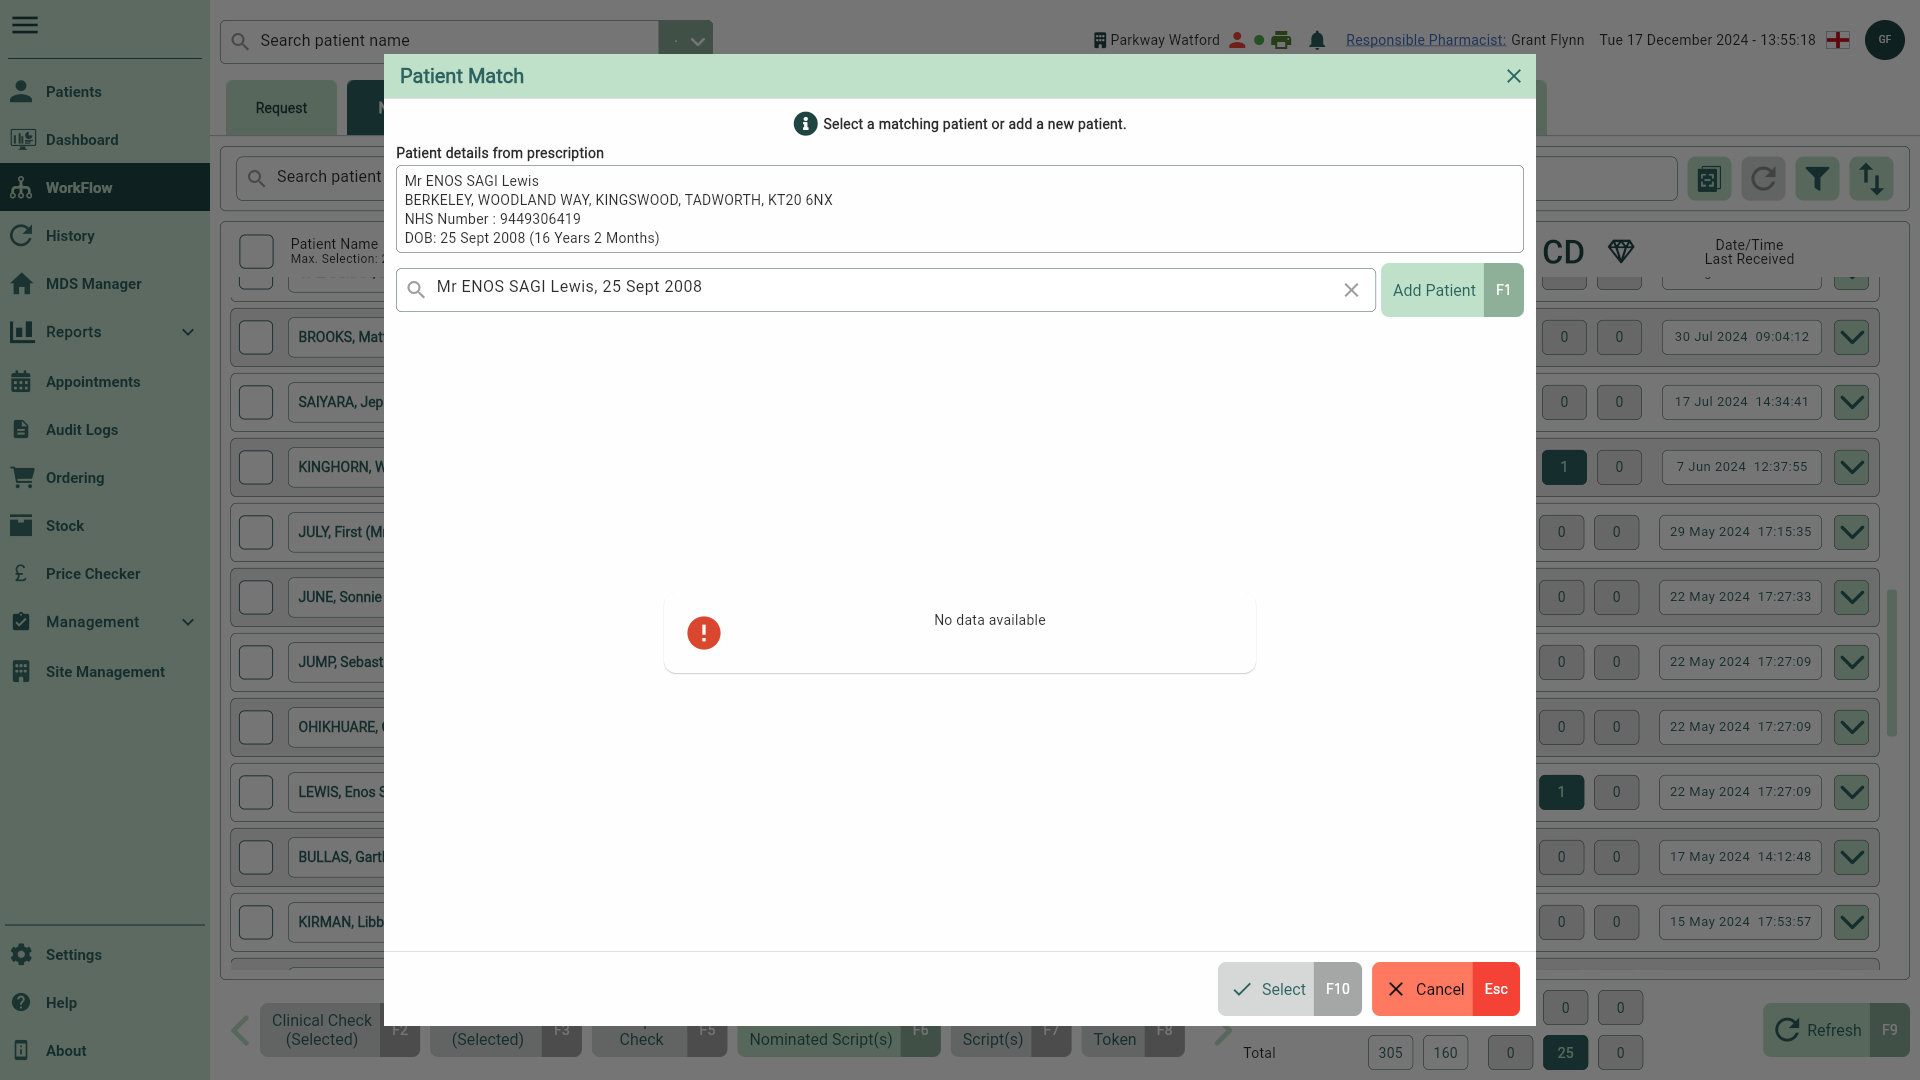
The patient search may return the correct patient if they do already exist in your CRM database. In which case, they'll just need to be linked to the record in Workflow. To do this, select the correct patient in the grid and skip to step 6.
- If the patient does not already exist in your CRM database, select the [Add Patient - F1] button. The Add Patient window displays, populated with all the available data from the incoming prescription.
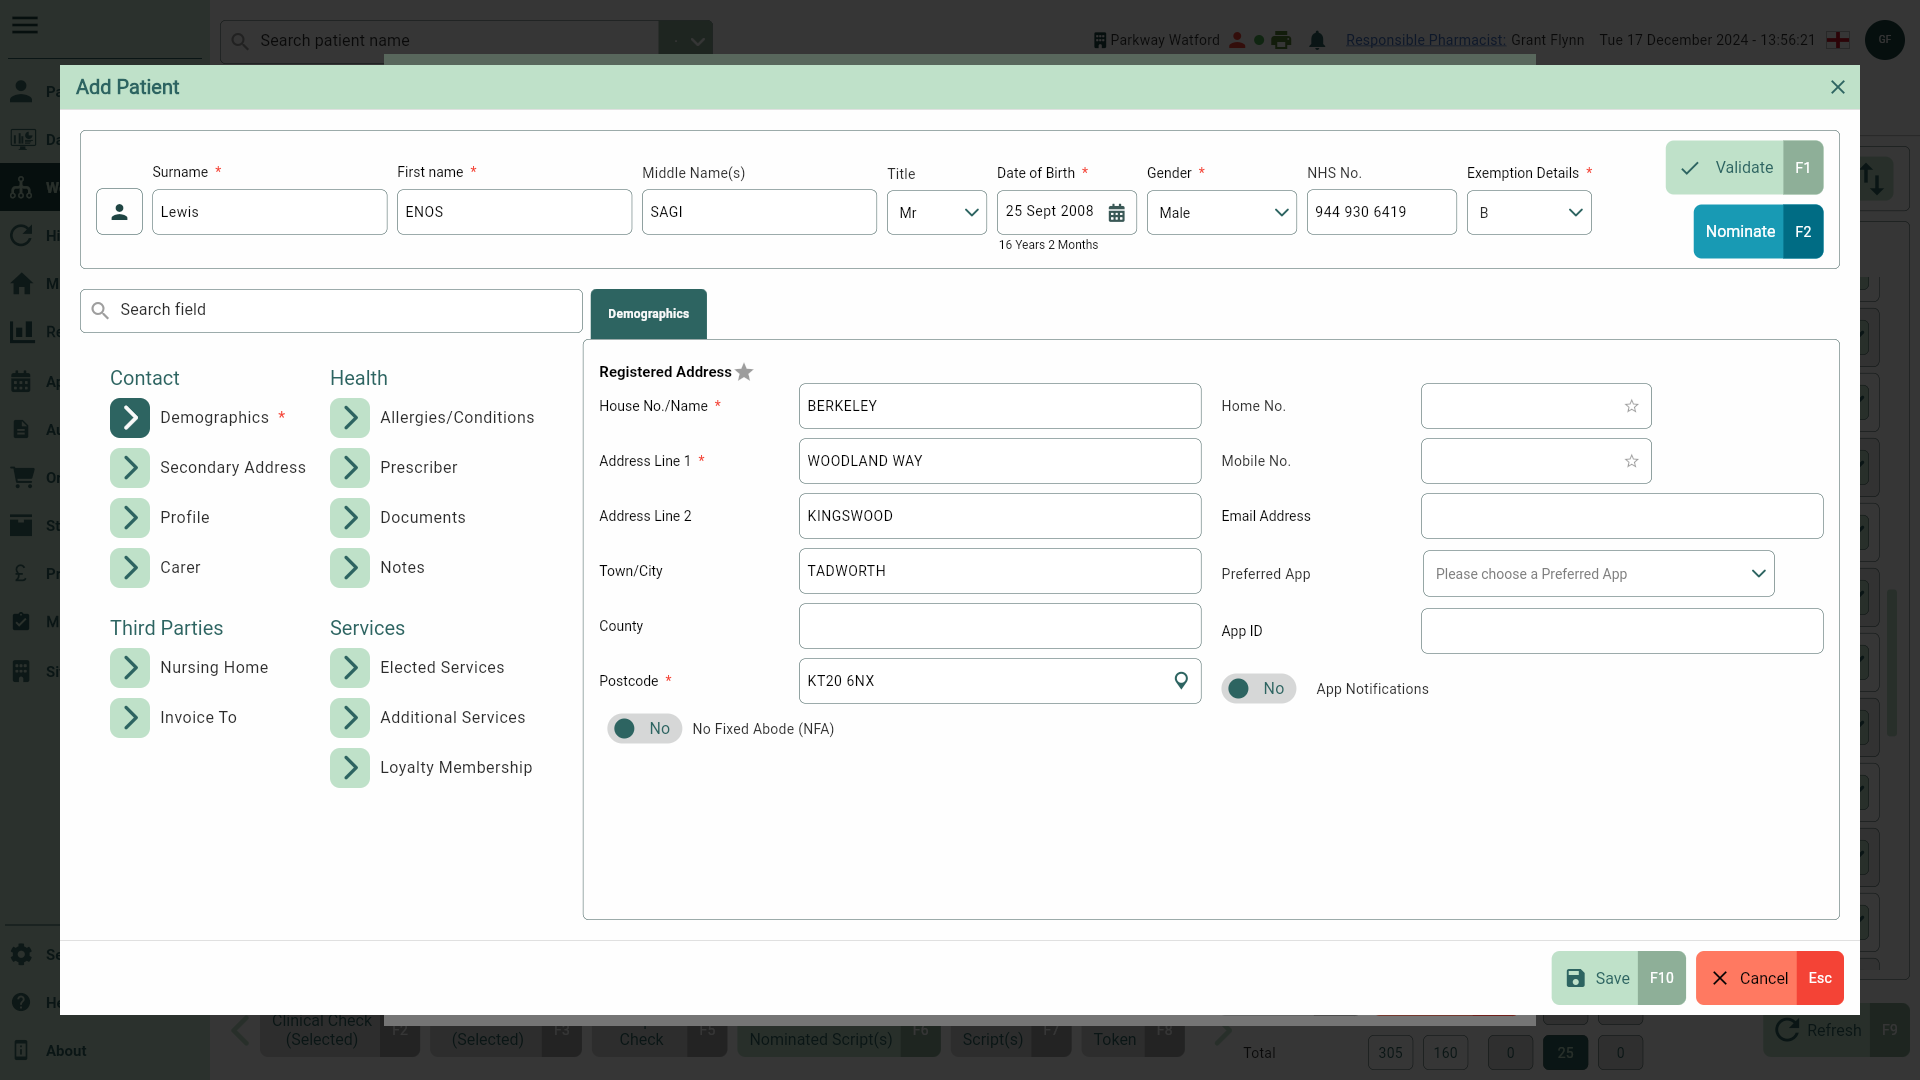
- Review the patient's details and make any adjustments or additions where required. Select the [Save - F10] button to add the patient. You're returned to the Patient Match window where your newly added patient displays in the grid.
If you are part of an organisation, the Preferred Branch field in the Profile tab is required when adding a patient. A branch must always be selected before you can save the patient’s record. If left blank, the CRM will automatically assign the current branch as the patient's preferred branch.

- Select the correct patient in the grid.
- Select the [Select - F10] button. The Update Patient Details window displays.
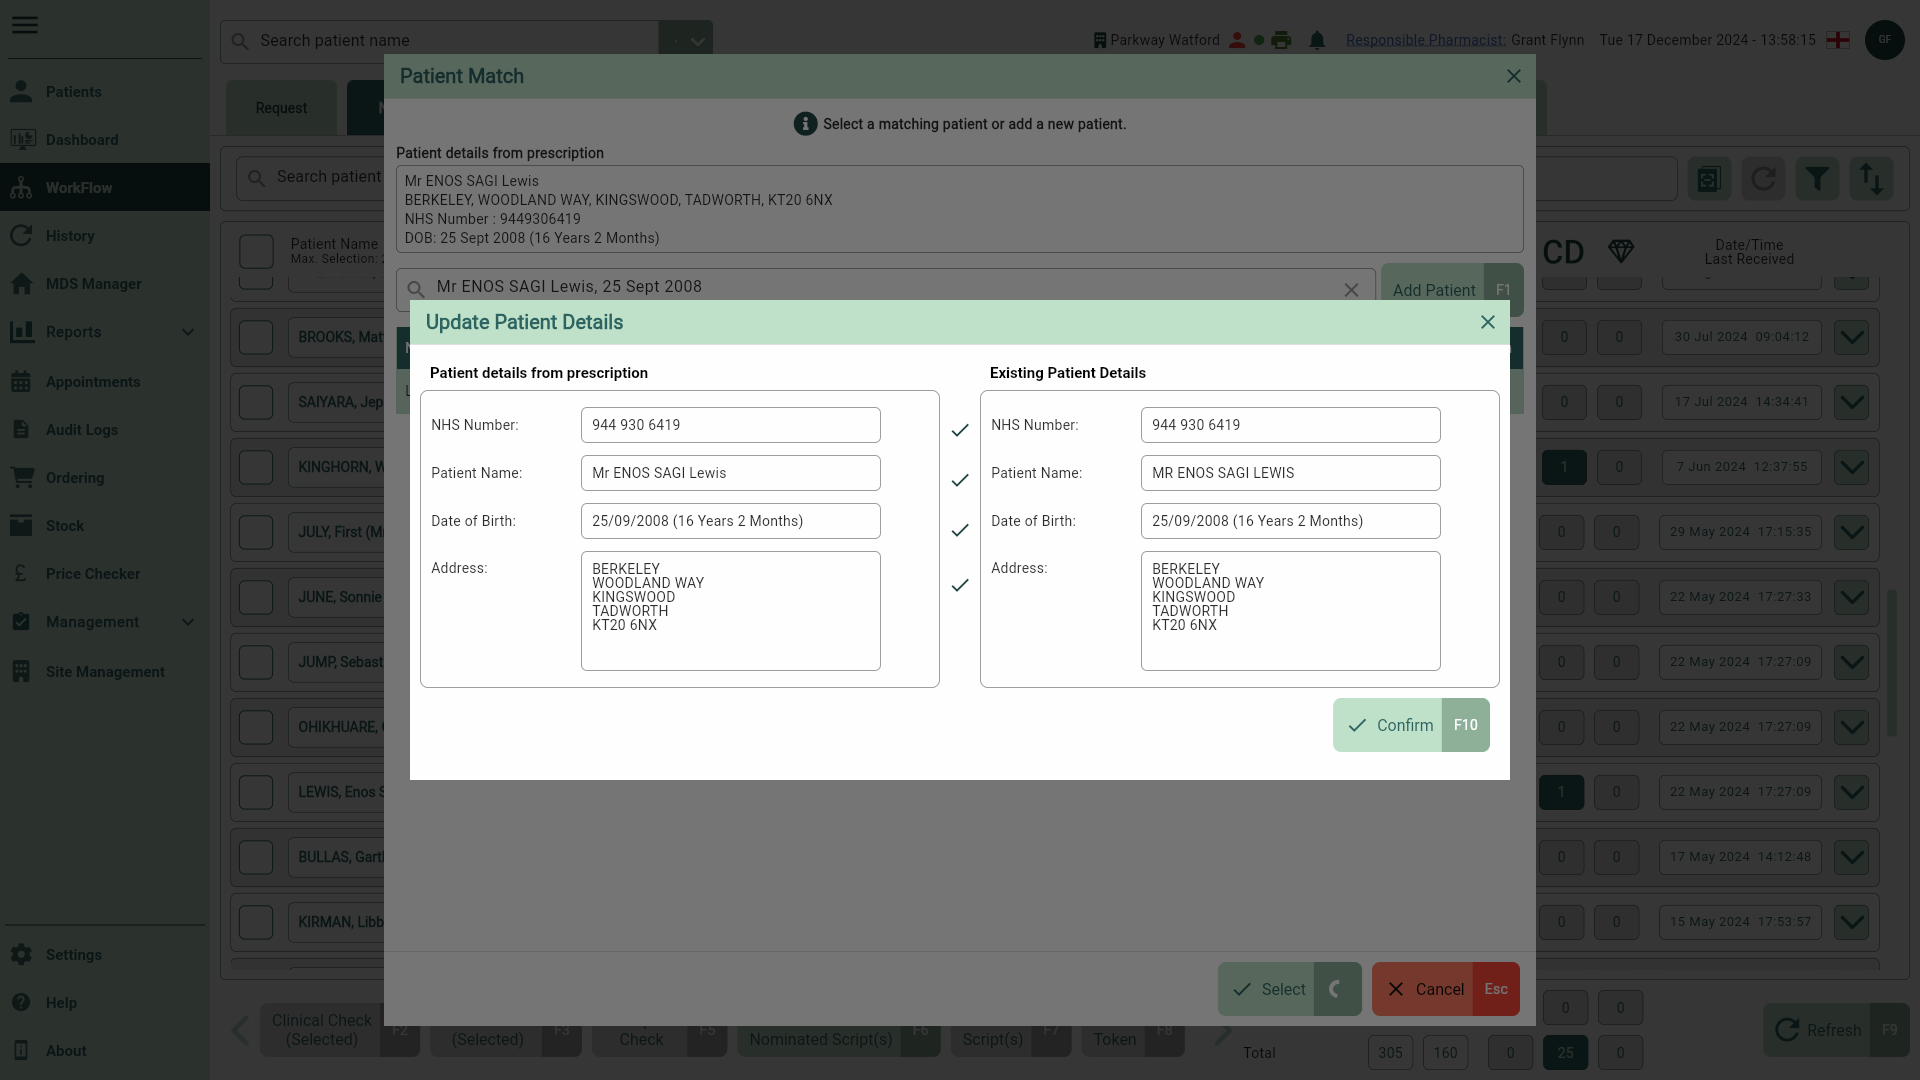
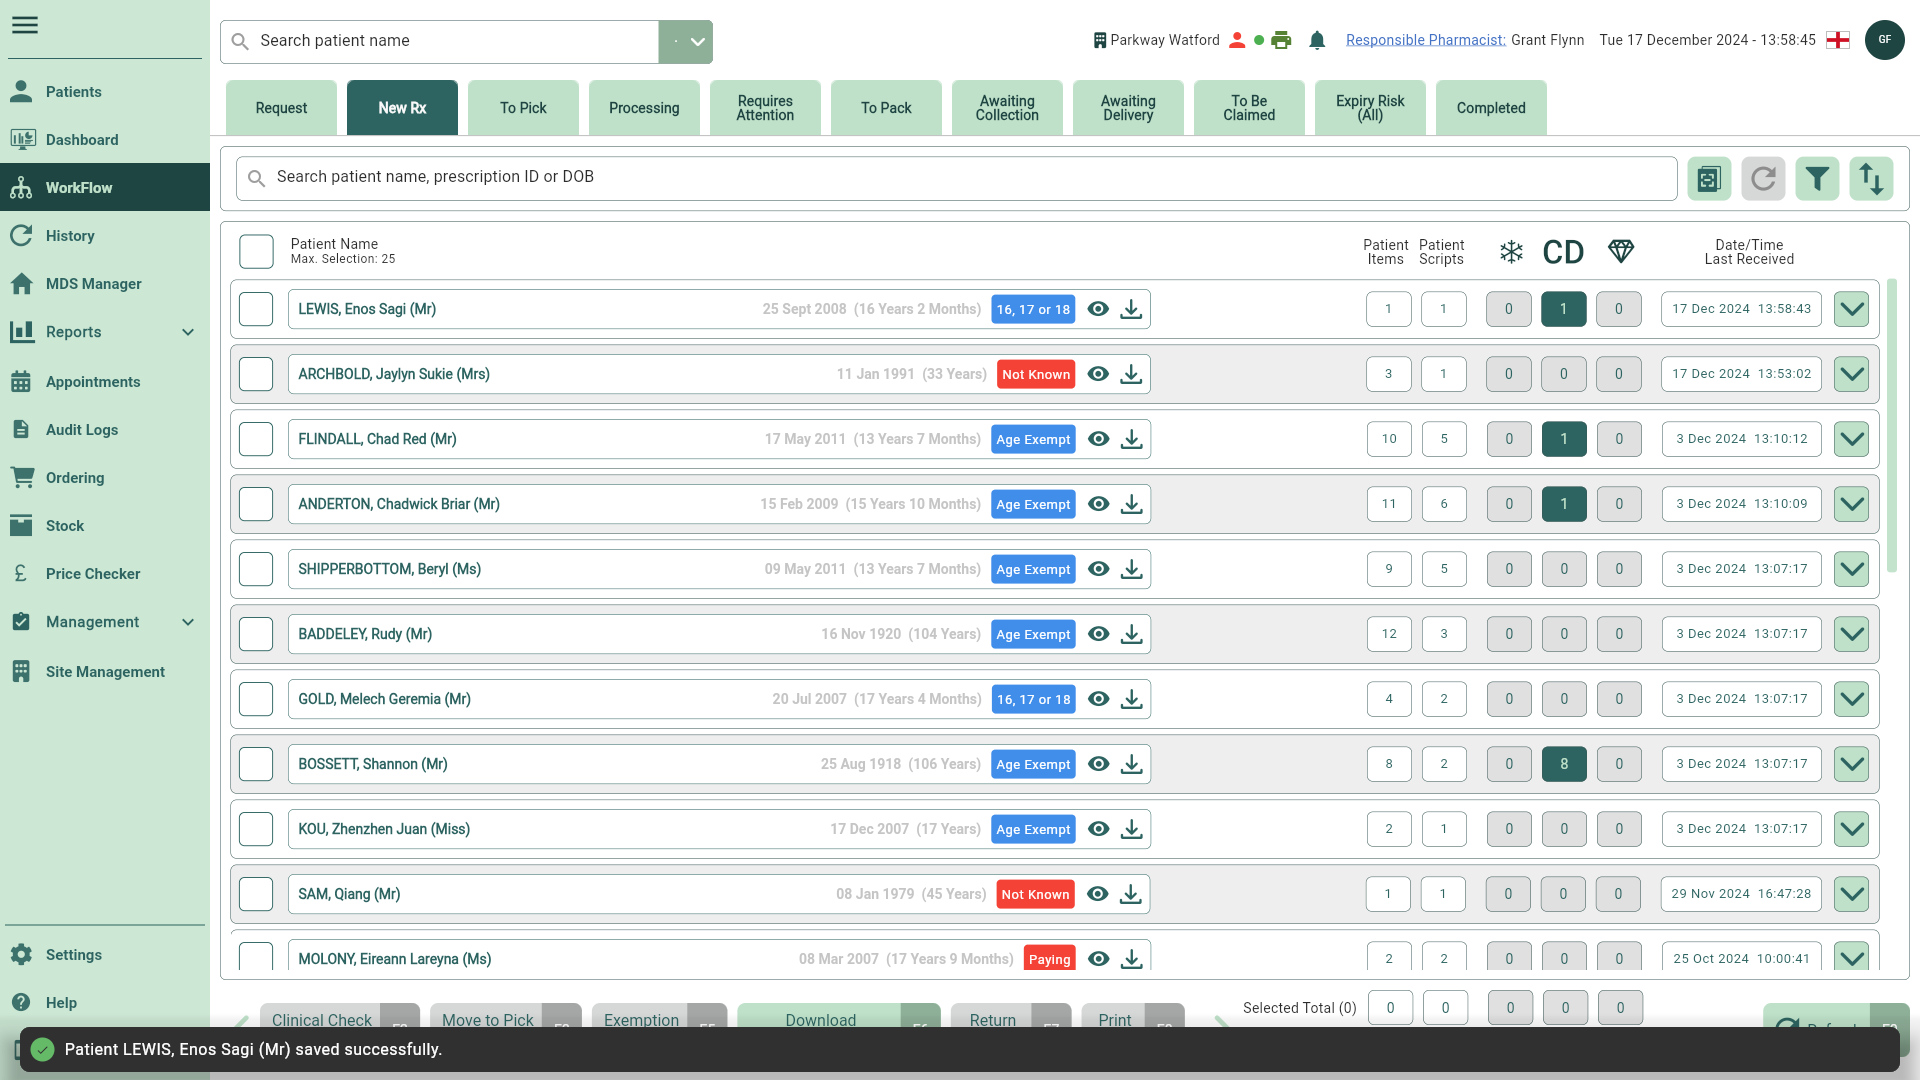
- Review the details and select the [Confirm - F10] button. You're returned to Workflow where your newly added patient has now been linked.
Adding a patient using PDS validation
If you have the patient's NHS number, or their surname, first name, gender and date of birth (as a minimum), you can perform a PDS validation to populate the patient's details when adding a patient.
It is important that information pulled from the Patient Demographics Service (PDS) is verified with your patient before saving to their patient CRM.
You will need to authenticate a valid NHS smartcard before you can perform a PDS validation. You can learn how to authenticate your smartcard in our Smartcard authentication article.
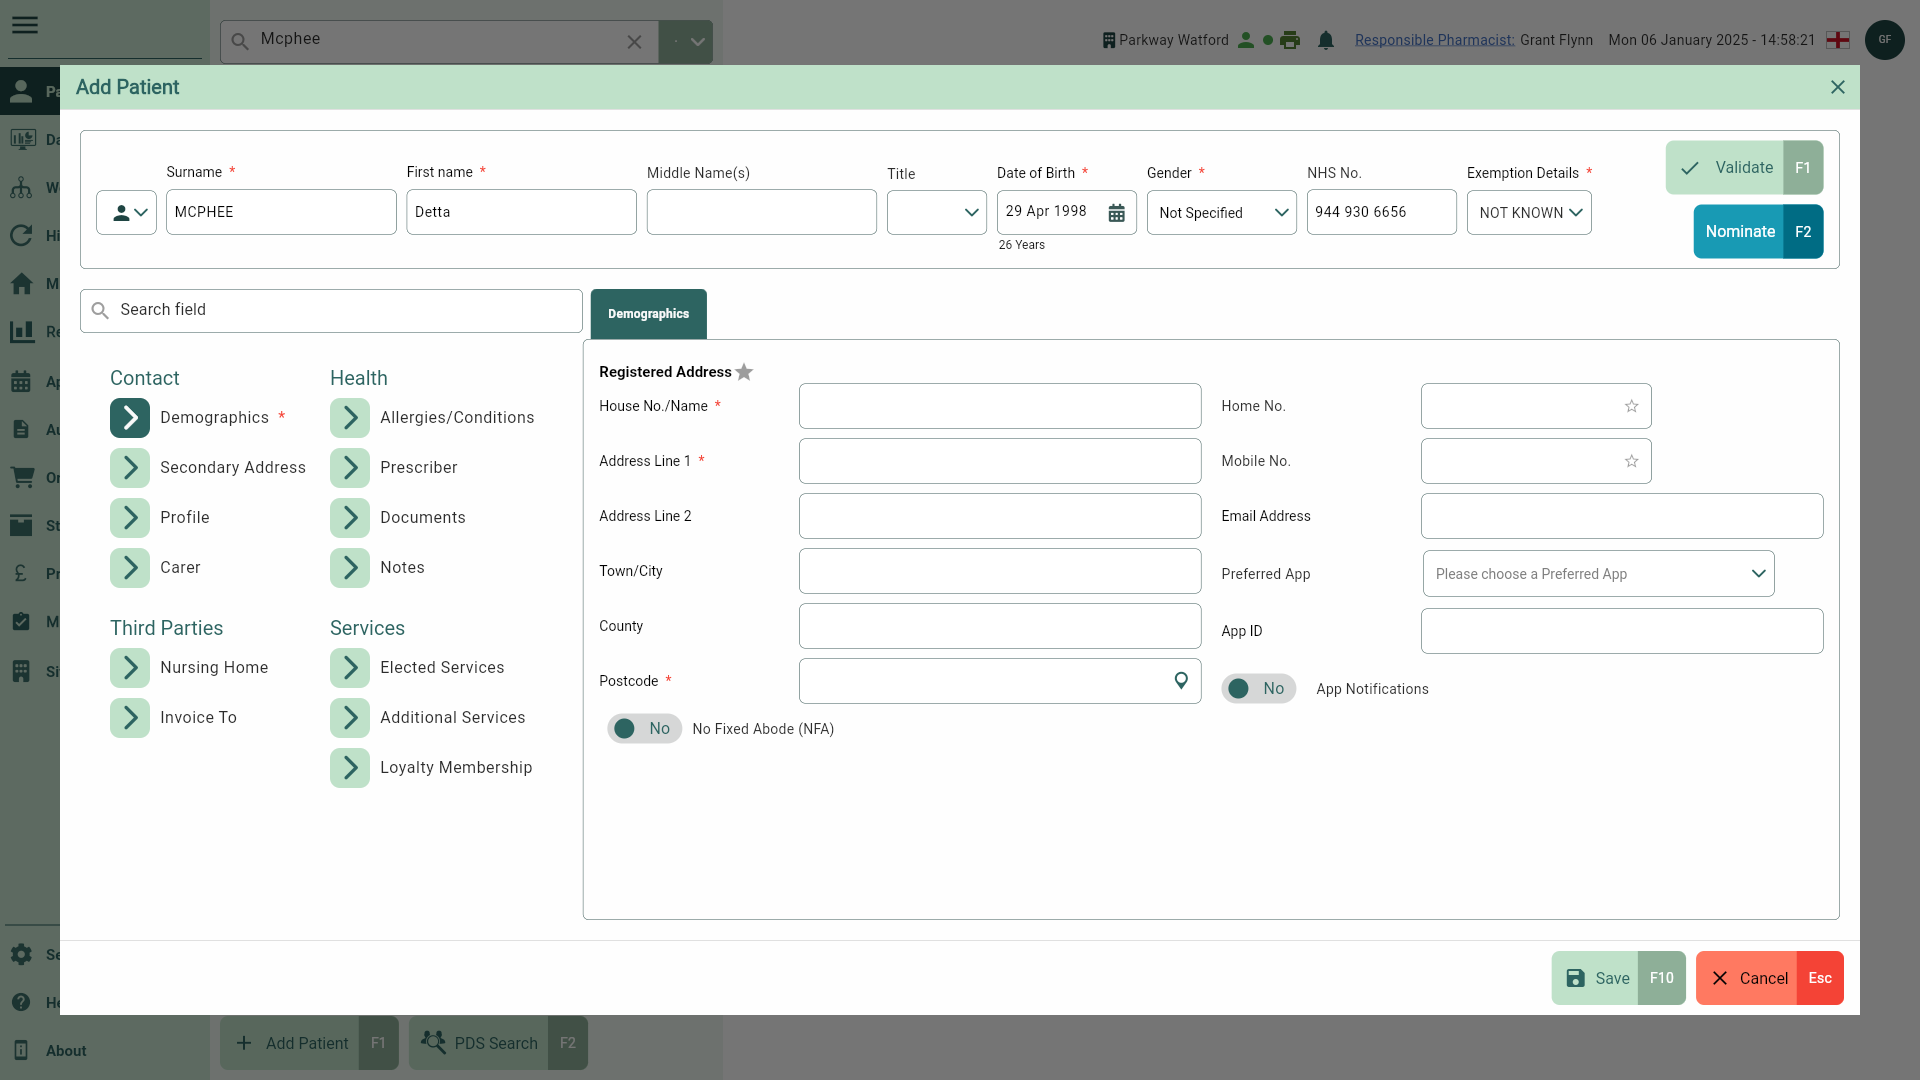
- To begin, from any module within Apotec CRM, type the patient's surname into the Search bar and press [Enter] on the keyboard.
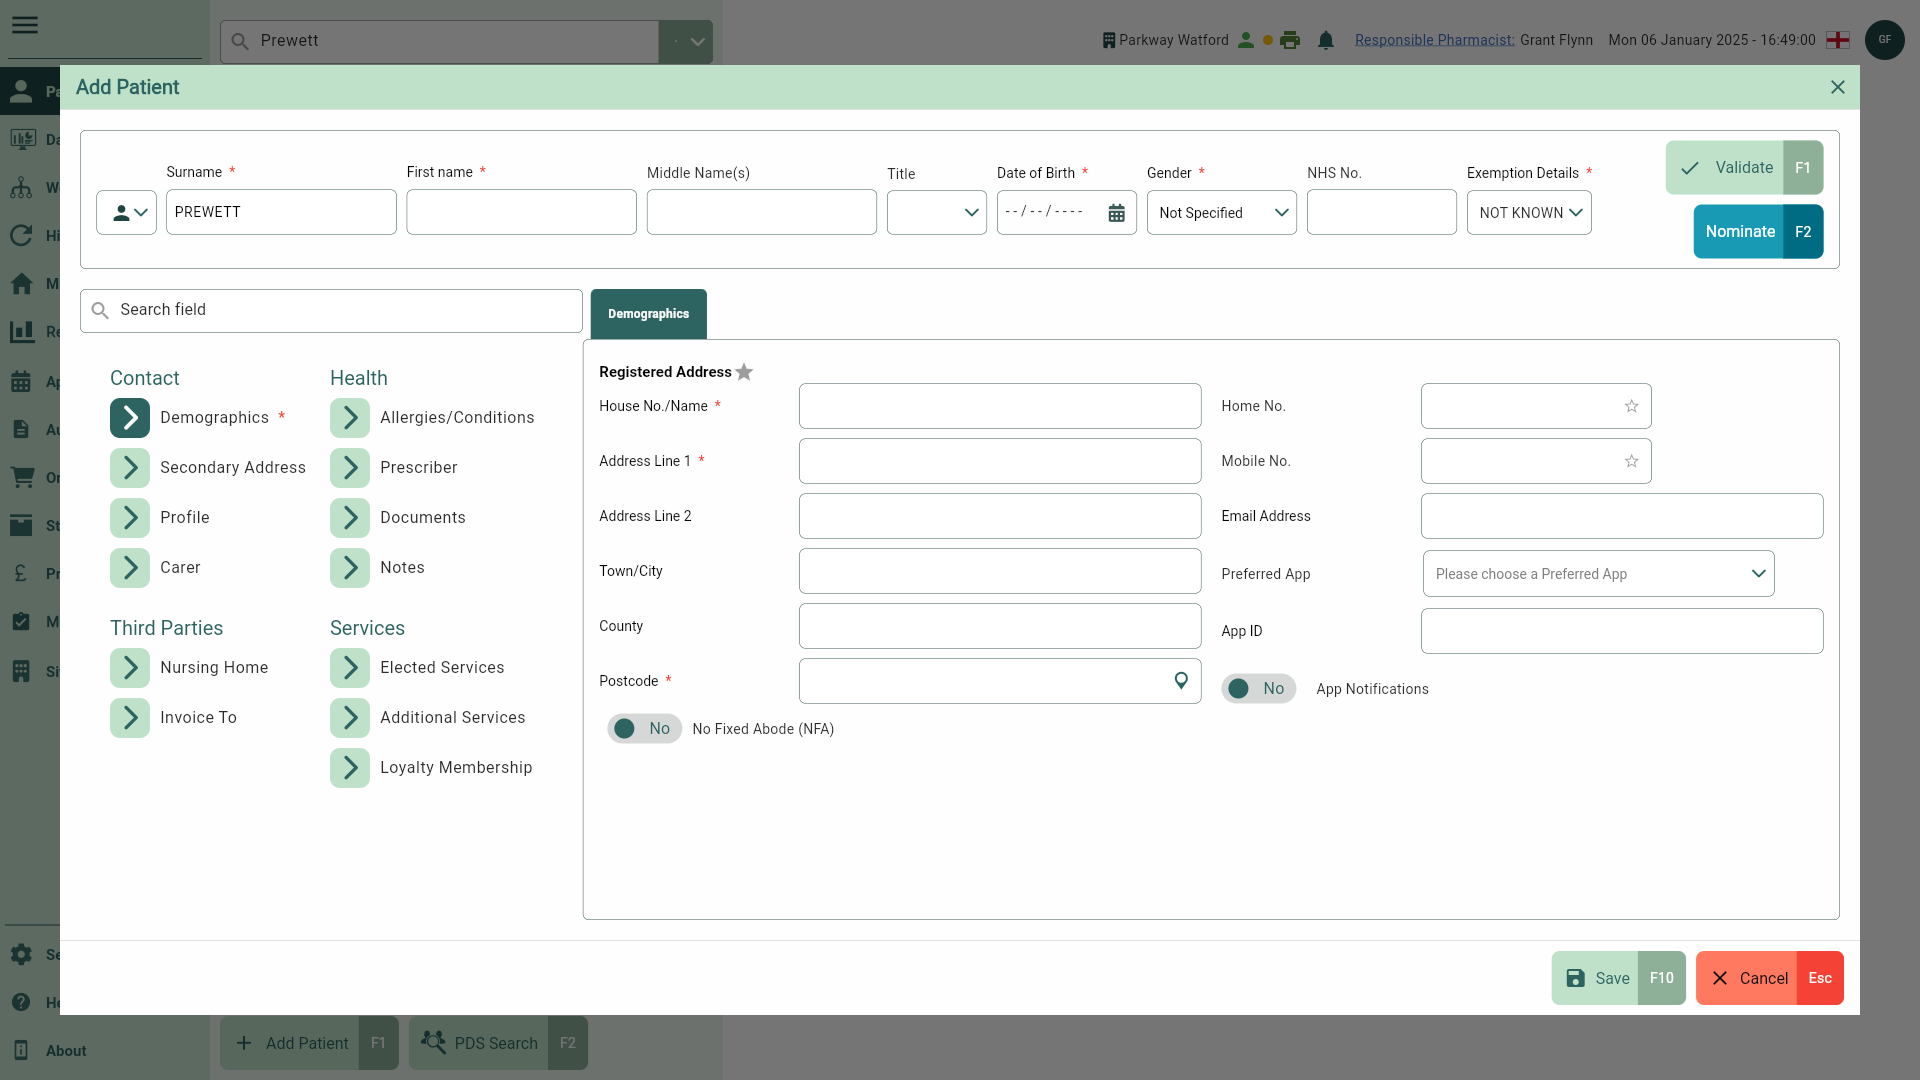
- Select the [Add Patient - F1] button. The Add Patient window displays.

- To perform a PDS validation, enter the patient's NHS number or demographics details (surname, first name, gender and date of birth as a minimum).
To minimise the number of potential patient matches, we recommend you enter as many demographics details as you have for the patient before performing the PDS validation.
- Select the [Validate - F1] button. The PDS Patient Validation window displays.
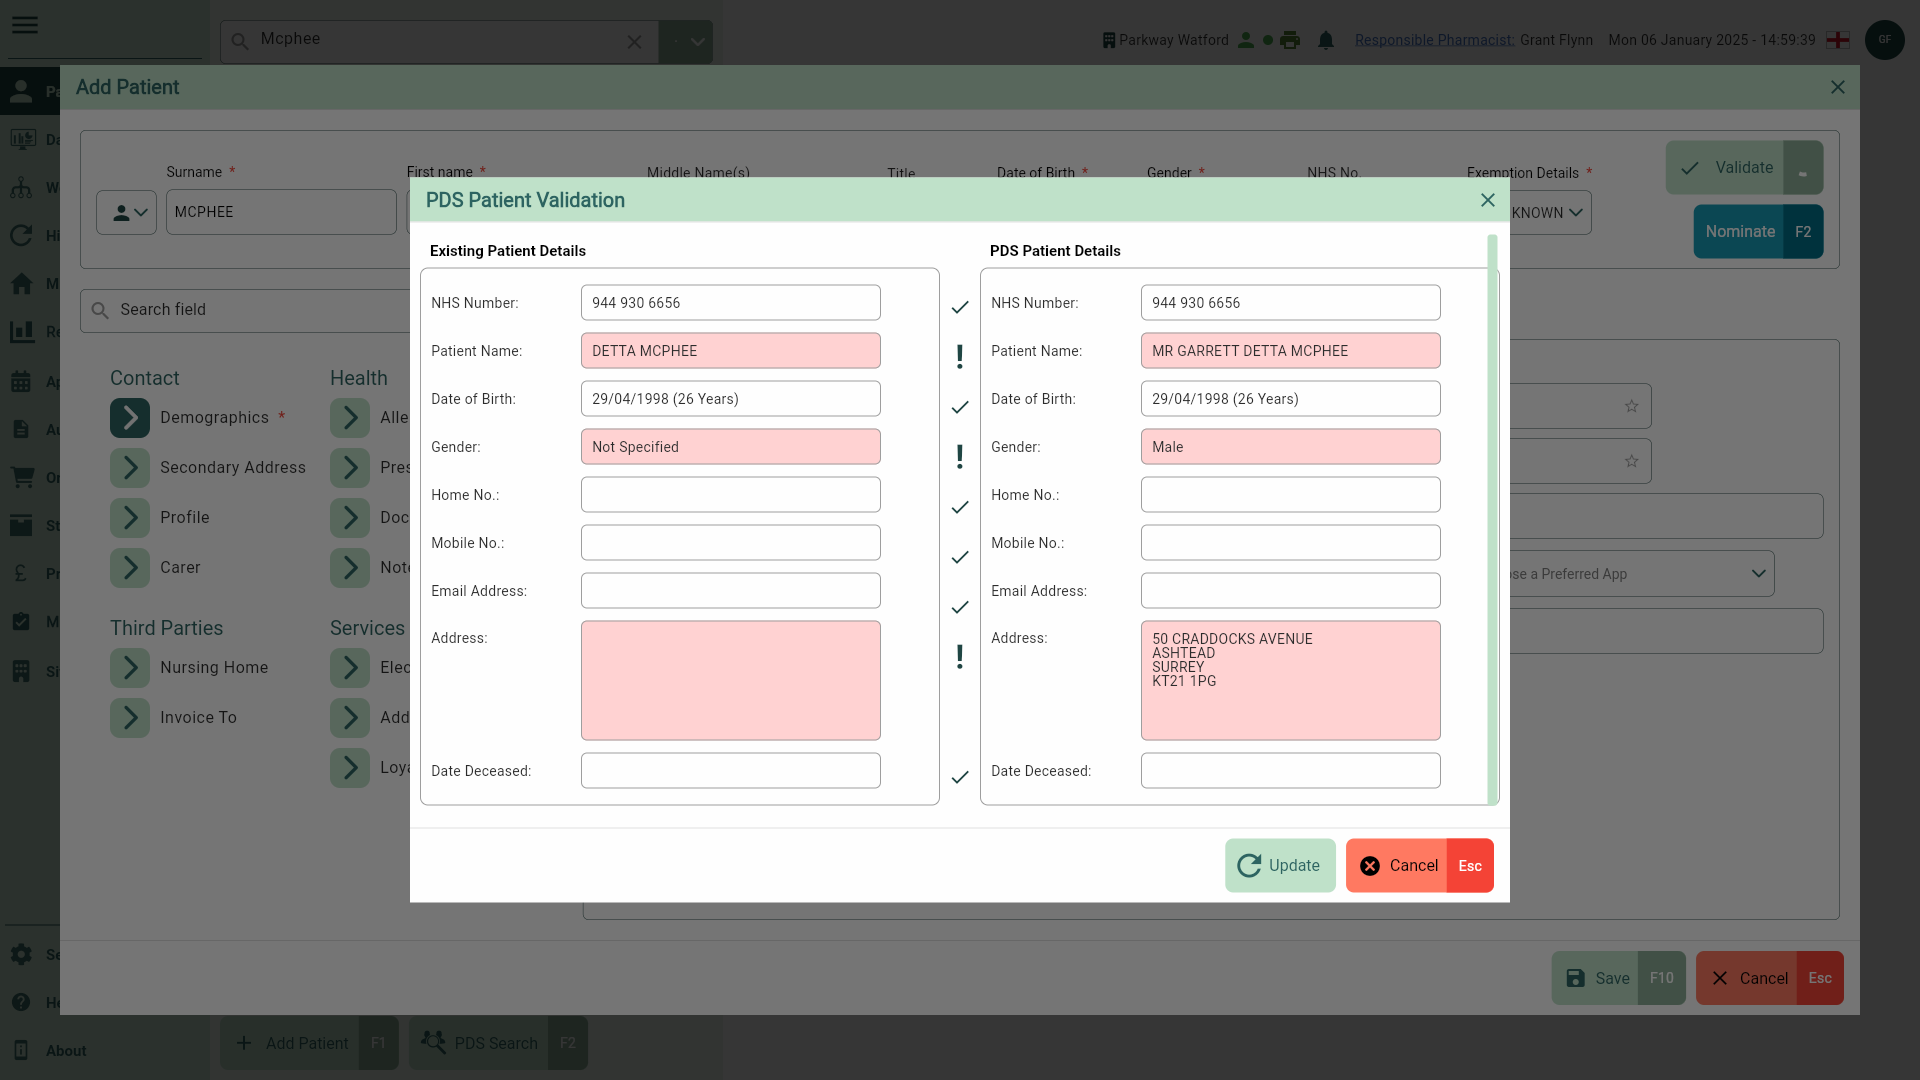
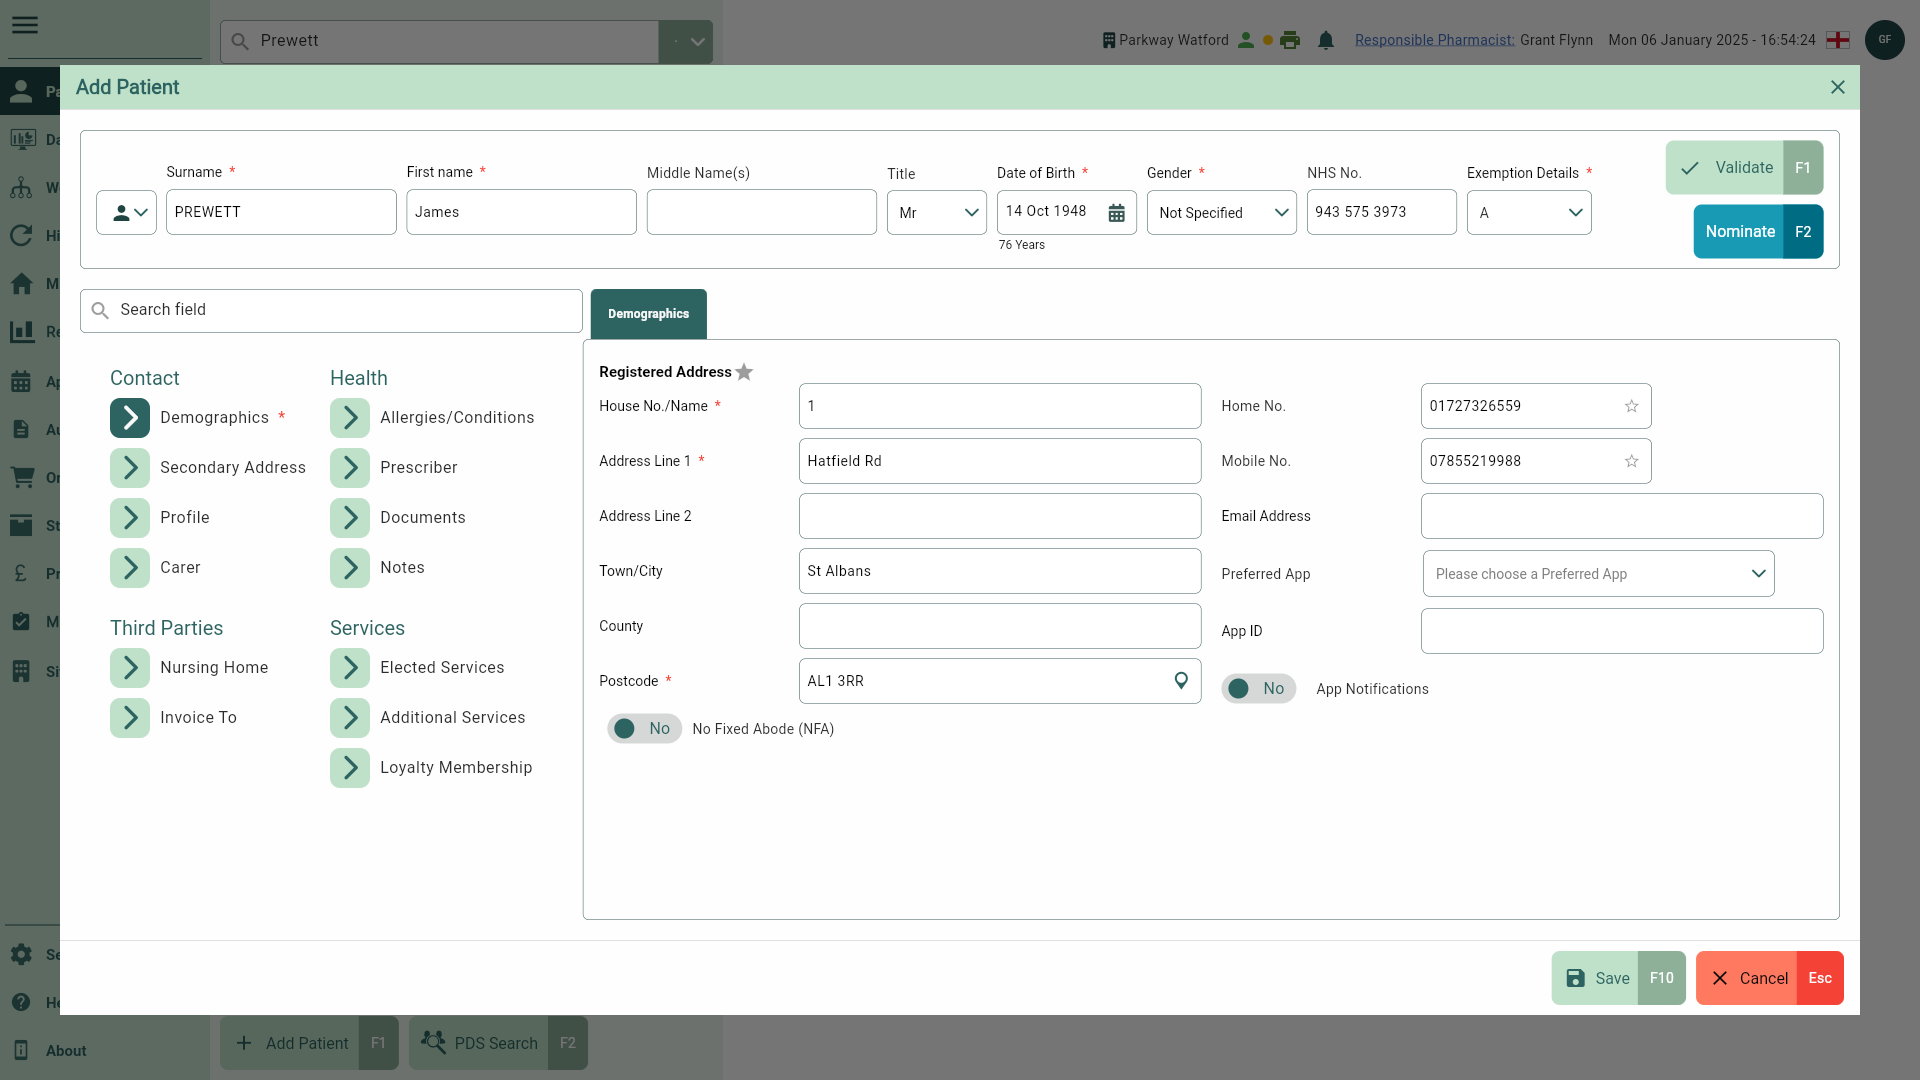
- Review and compare the Existing Patient Details you have entered in the Add Patient window with the PDS Patient Details.
- Once you/your patient have verified the details are accurate, select the [Update] button to use the PDS Patient Details to populate the Add Patient window. You're returned to the Add Patient window with a PDS badge displayed within the NHS No. field.
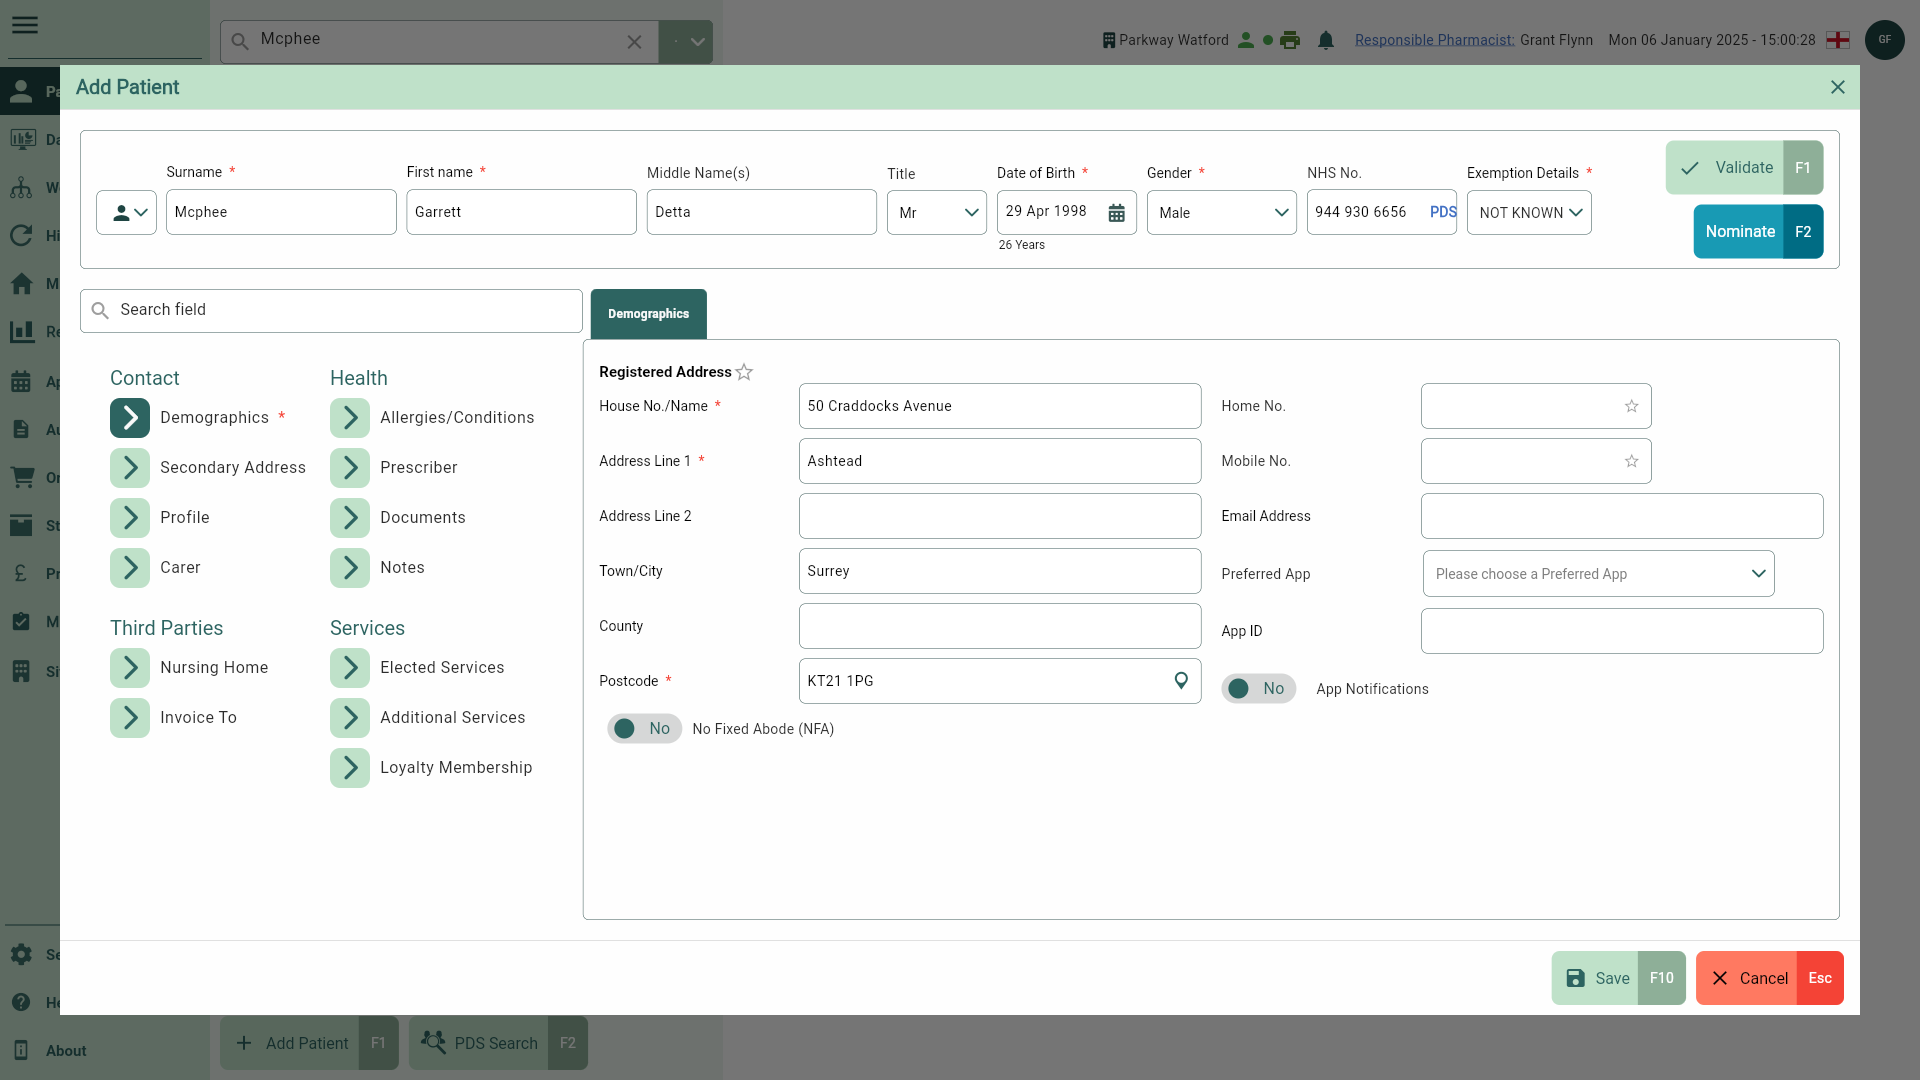
- Complete the remaining fields within the Add Patient window as required, ensuring all mandatory fields are completed at a minimum. See our Get to Know Patient Details article to learn more about all the patient details fields and tabs, including how to add allergies and conditions, prescribers and carers.
If you are part of an organisation, the Preferred Branch field in the Profile tab is required when adding a patient. A branch must always be selected before you can save the patient’s record. If left blank, the CRM will automatically assign the current branch as the patient's preferred branch.
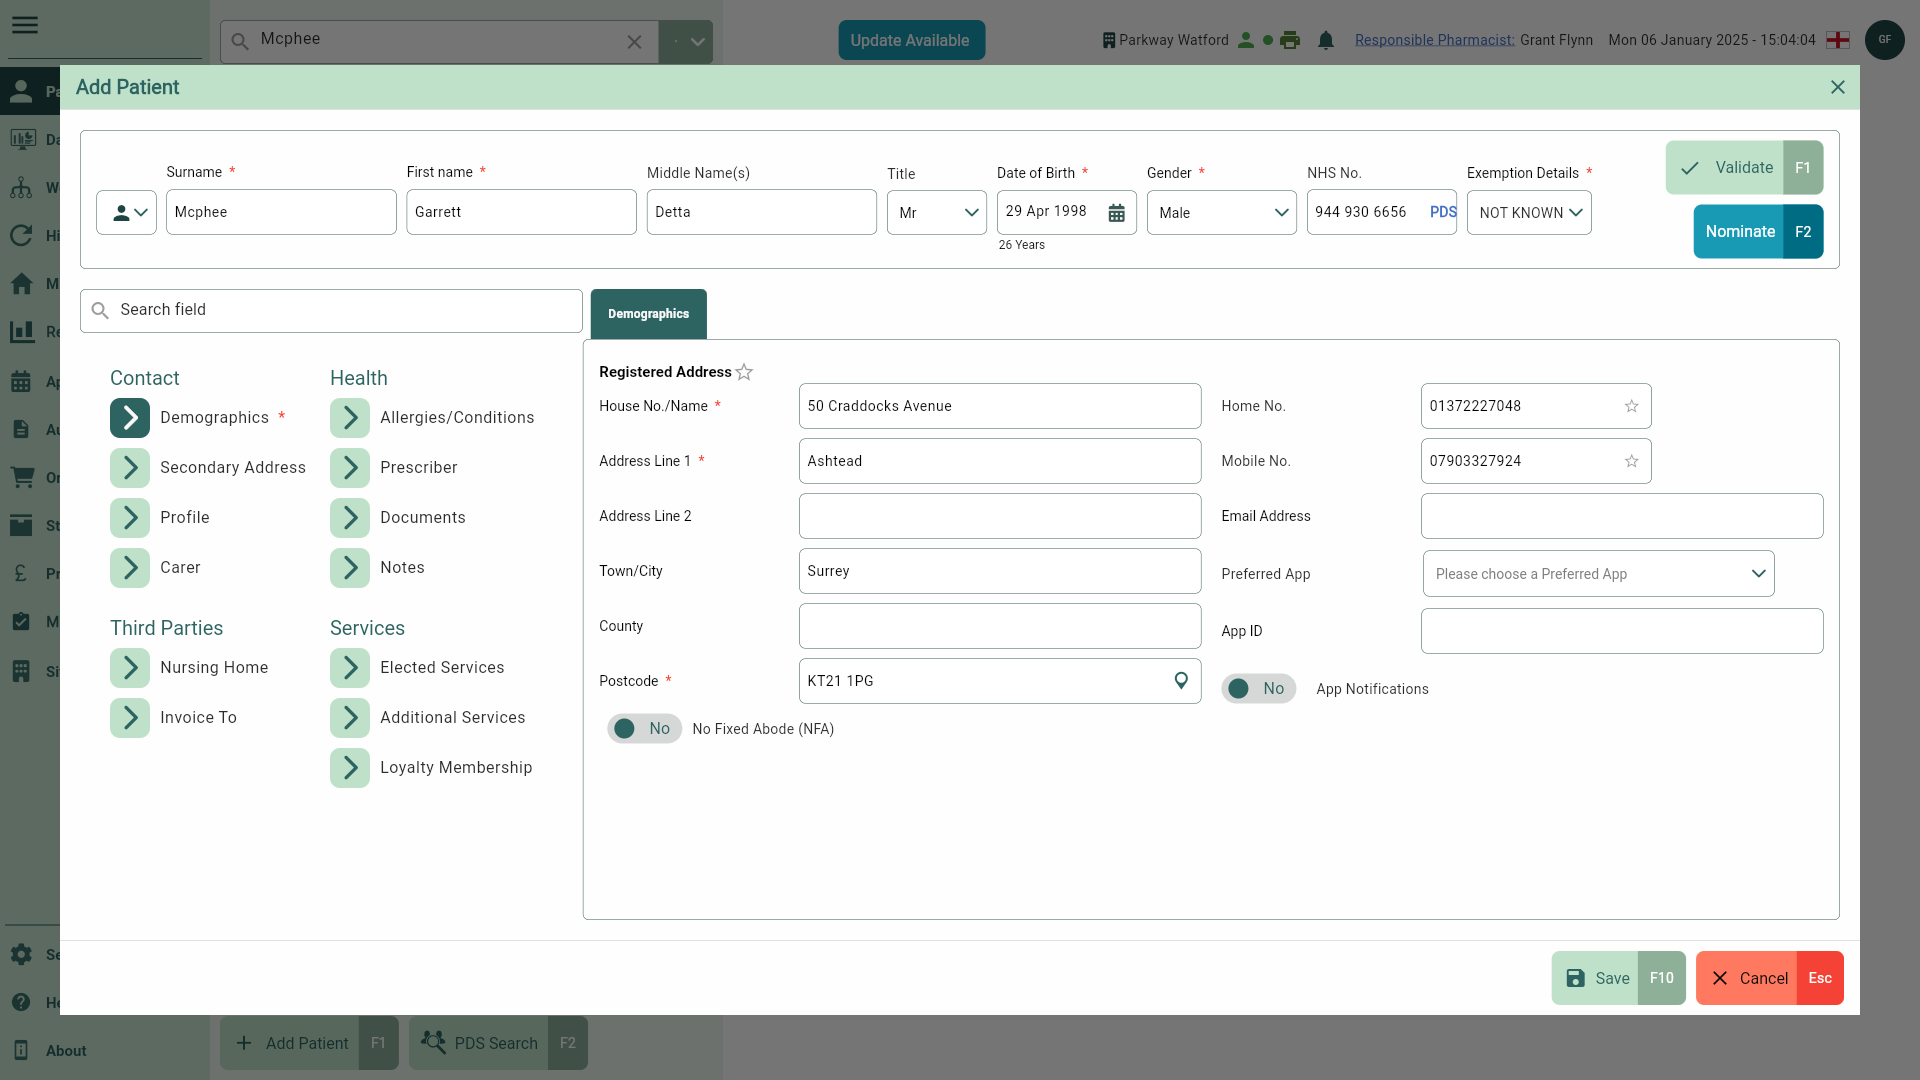
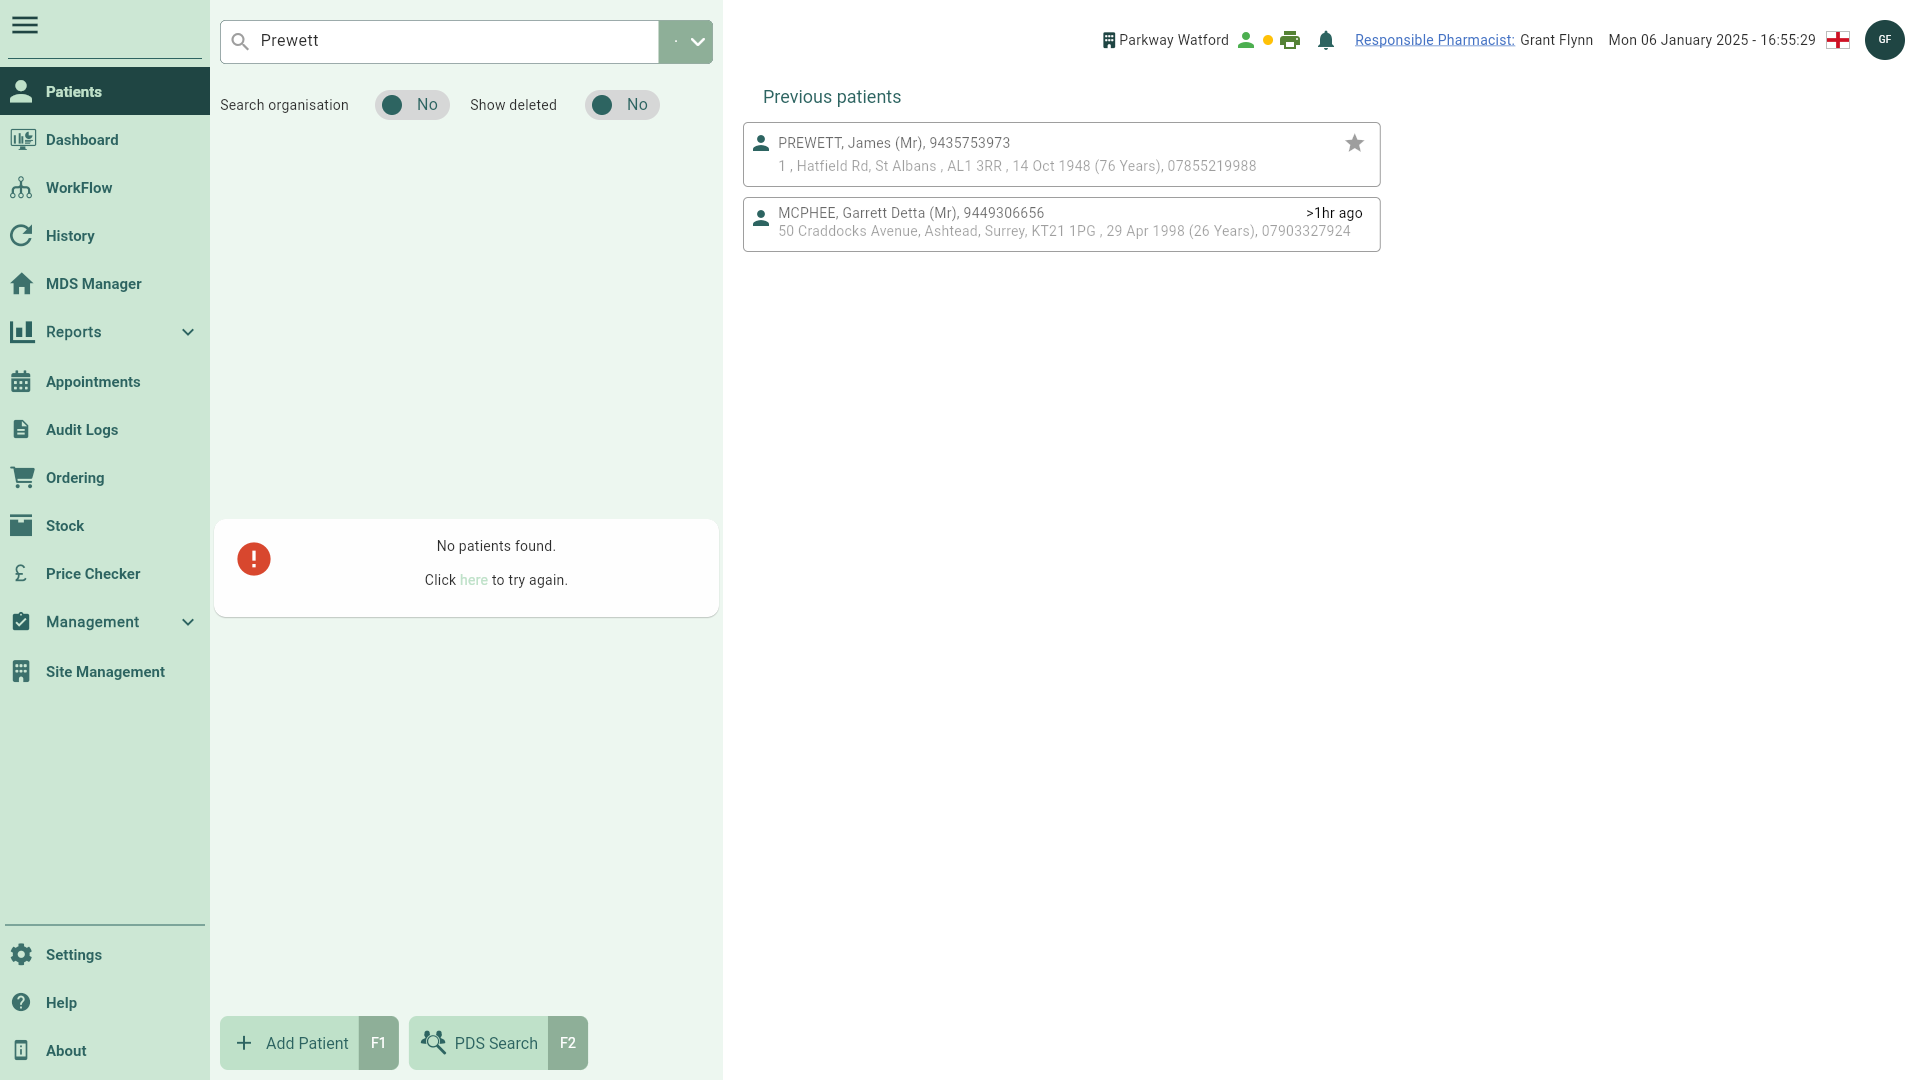
- Select the [Save - F10] button to save the patient to your database. You're returned to the patient search and a snackbar confirms your patient has been added successfully. Your newly added patient is added to the Previous Patients list for easy selection and access to their patient CRM.

Adding a patient manually
- To begin, from any module within Apotec CRM, type the patient's surname into the Search bar and press [Enter] on the keyboard.

- Select the [Add Patient - F1] button. The Add Patient window displays.
- Complete the fields with the patient's details, ensuring all mandatory fields are completed at a minimum. See our Get to Know Patient Details article to learn more about all the patient details fields and tabs, including how to add allergies and conditions, prescribers and carers.
If you are part of an organisation, the Preferred Branch field in the Profile tab is required when adding a patient. A branch must always be selected before you can save the patient’s record. If left blank, the CRM will automatically assign the current branch as the patient's preferred branch.
- Select the [Save - F10] button to save the patient to your database. You're returned to the patient search and a snackbar confirms your patient has been added successfully. Your newly added patient is added to the Previous Patients list for easy selection and access to their patient CRM.
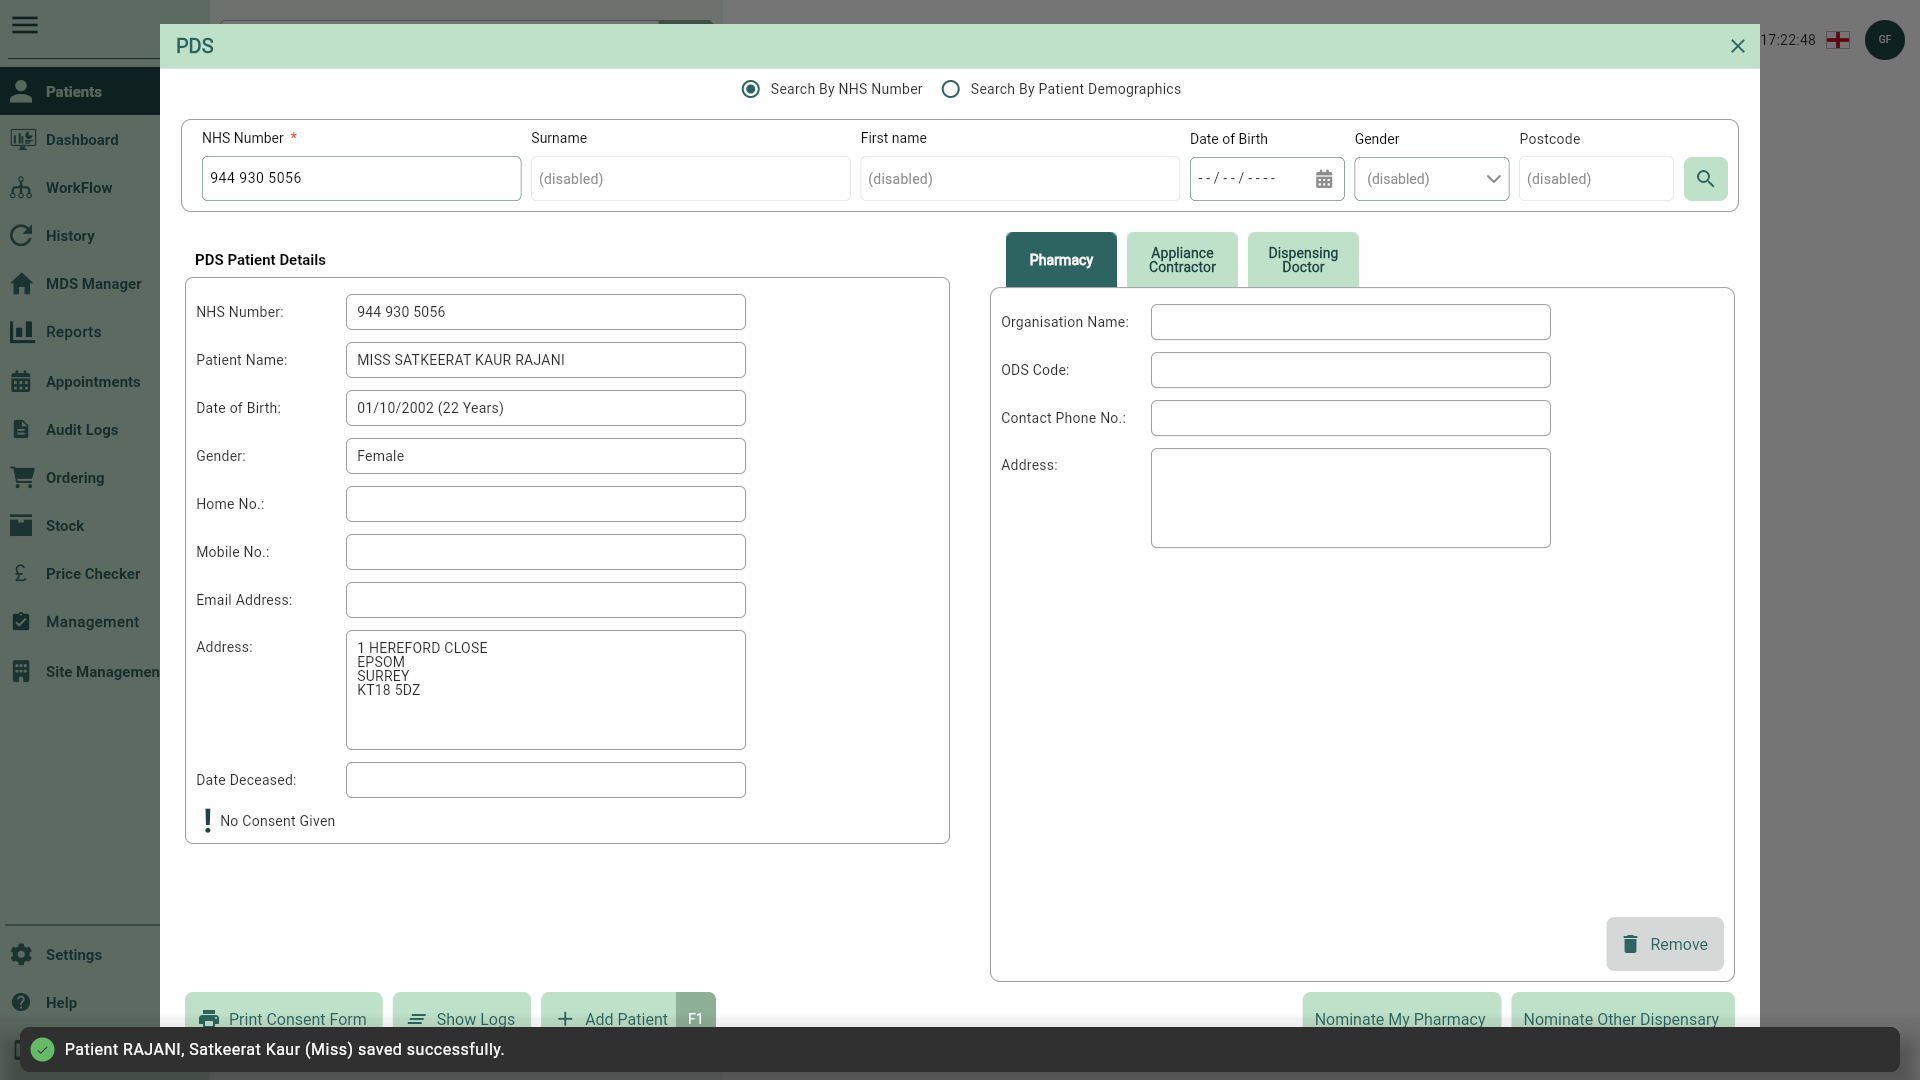
Adding a patient using PDS search
If you have the patient's NHS number or, alternatively their surname, first name, date of birth and gender (as a minimum) you can perform a PDS search to populate the patient's details when adding a patient.
It is important that information pulled from the Patient Demographics Service (PDS) is verified with your patient before saving to their patient CRM.
You will need to authenticate a valid NHS smartcard before you can perform a PDS search. You can learn how to authenticate your smartcard in our Smartcard authentication article.
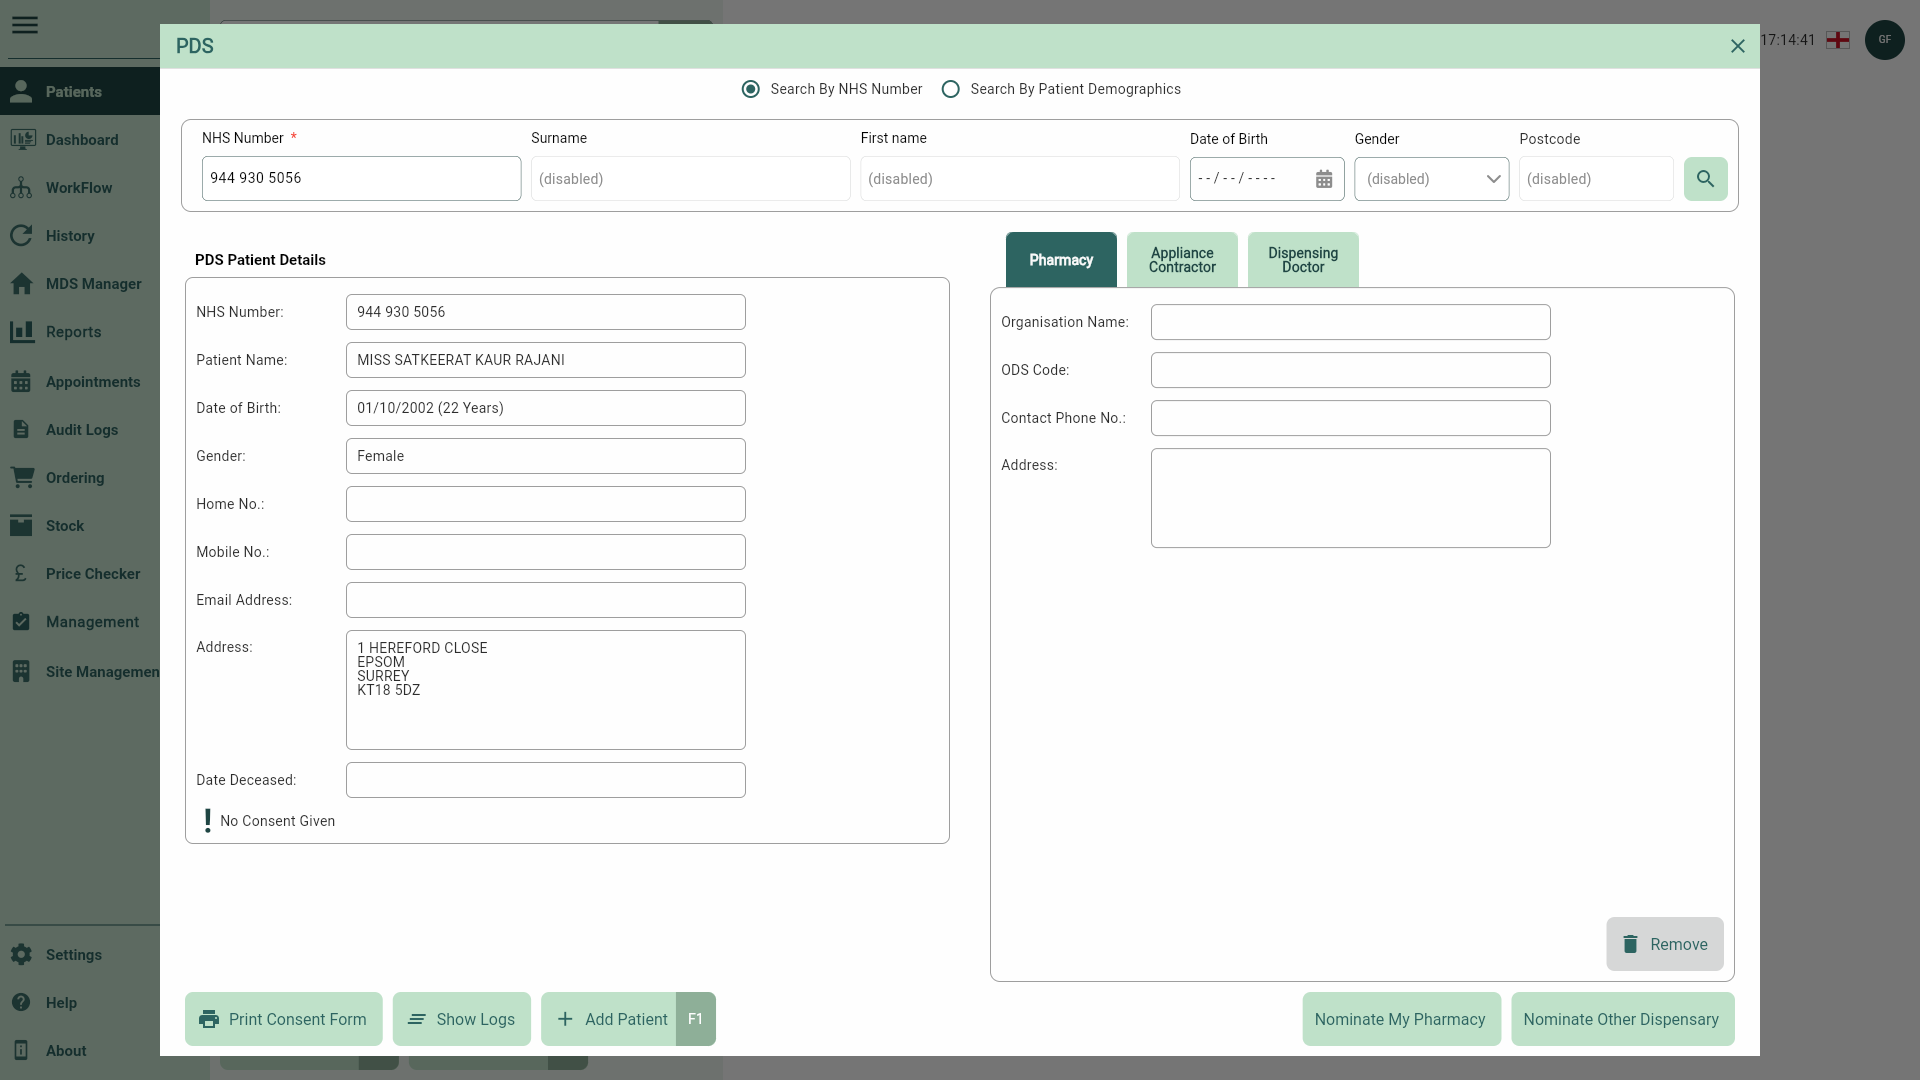
- To begin, select Patients from the left-nav.
- Select the [PDS Search - F2] button. The PDS window displays.
- Enter the patient's NHS number or demographics details (surname, first name, date of birth and gender as a minimum).
To minimise the number of potential patient matches, we recommend you enter as many demographics details as you have for the patient before performing the PDS search.
- Select the [Add Patient - F1] button. The patient details form displays.
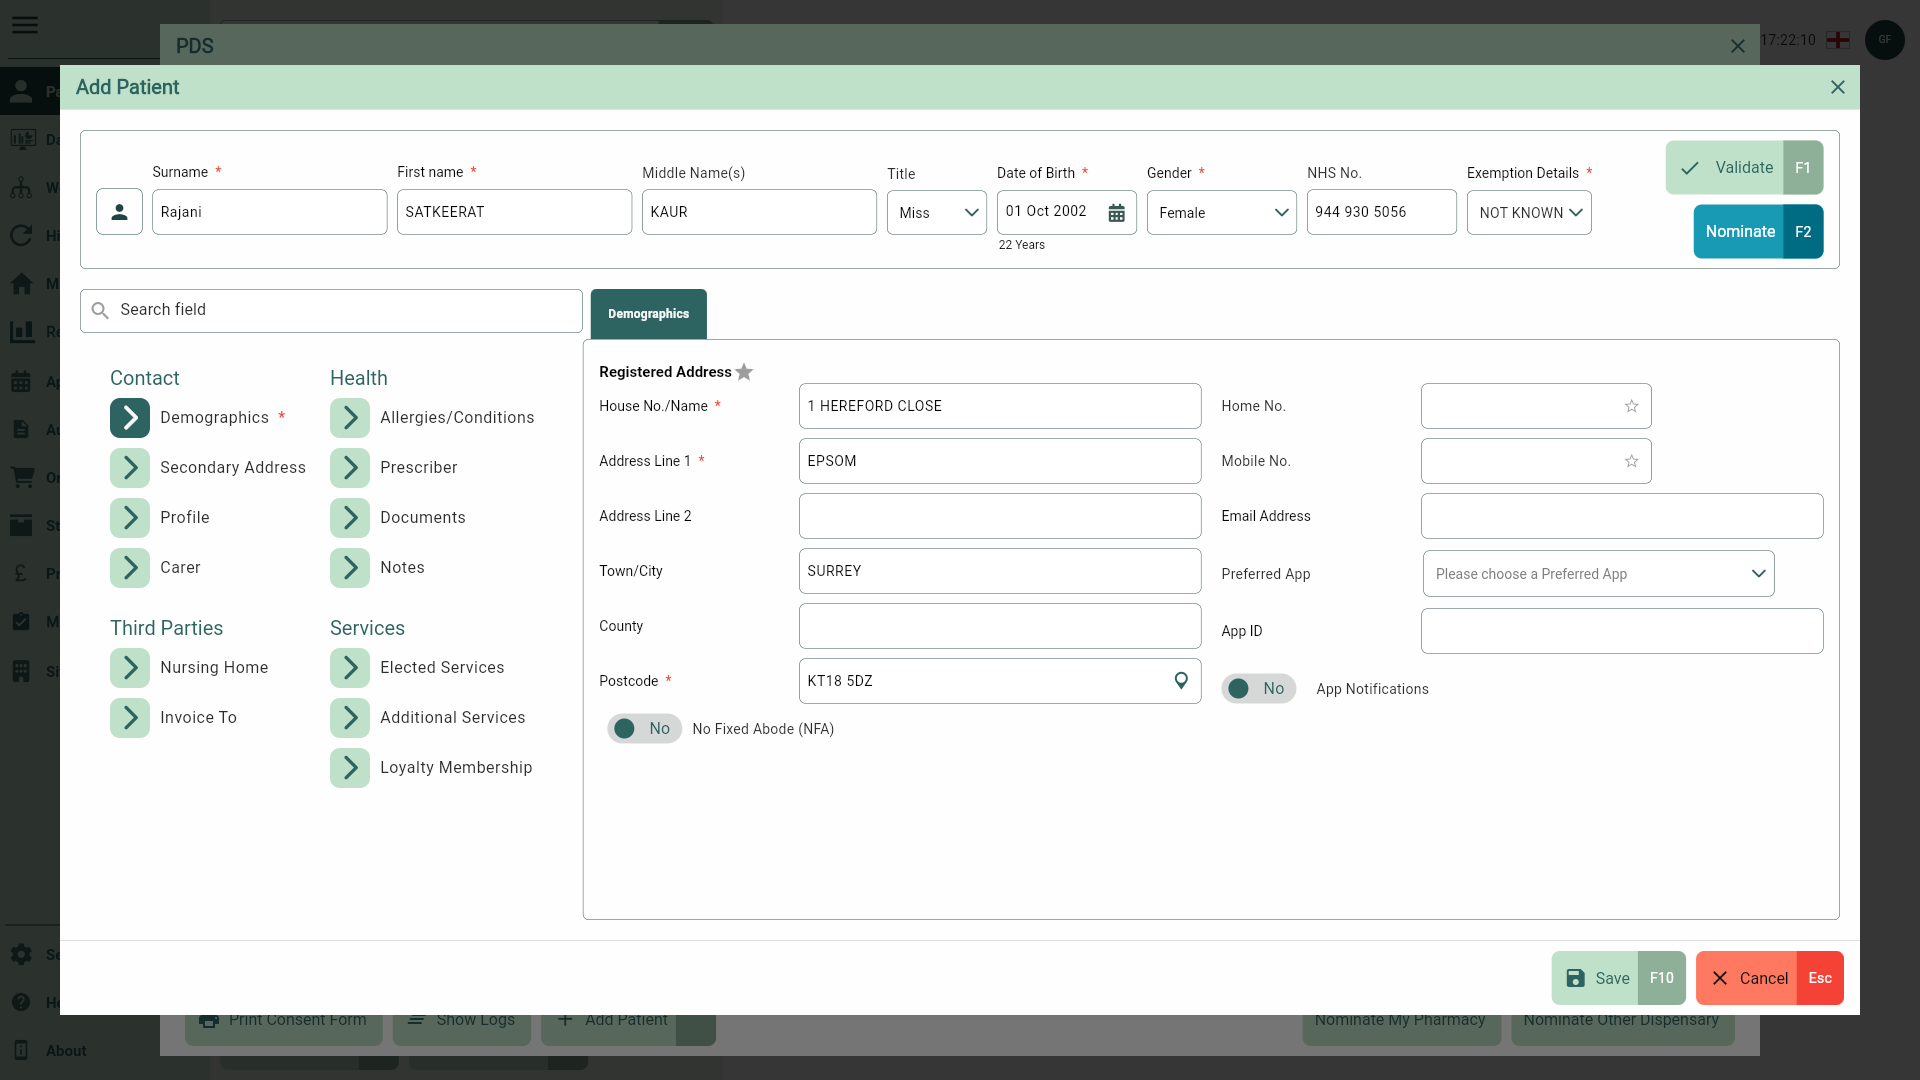
- Check the patient details are correct. Update the Exemption Details if known, then select the [Save - F10] button. A snackbar displays confirming your patient has been added successfully.
If you are part of an organisation, the Preferred Branch field in the Profile tab is required when adding a patient. A branch must always be selected before you can save the patient’s record. If left blank, the CRM will automatically assign the current branch as the patient's preferred branch.