Publishing ad-hoc branch settings
You can publish ad-hoc settings to your branches without the need for a template. After selecting the settings, you can choose the values you want to publish to your branches:
- Default value: Select a setting without making any edits to publish the setting with its default value
- Custom values: Override the setting's default values with your own configuration
- Force default: Force reset any configuration that exists at branch level to the setting's Default value
- To begin, open Head Office Branch Settings by selecting the Head Office dropdown menu from the left-nav and the Branch Settings menu item.
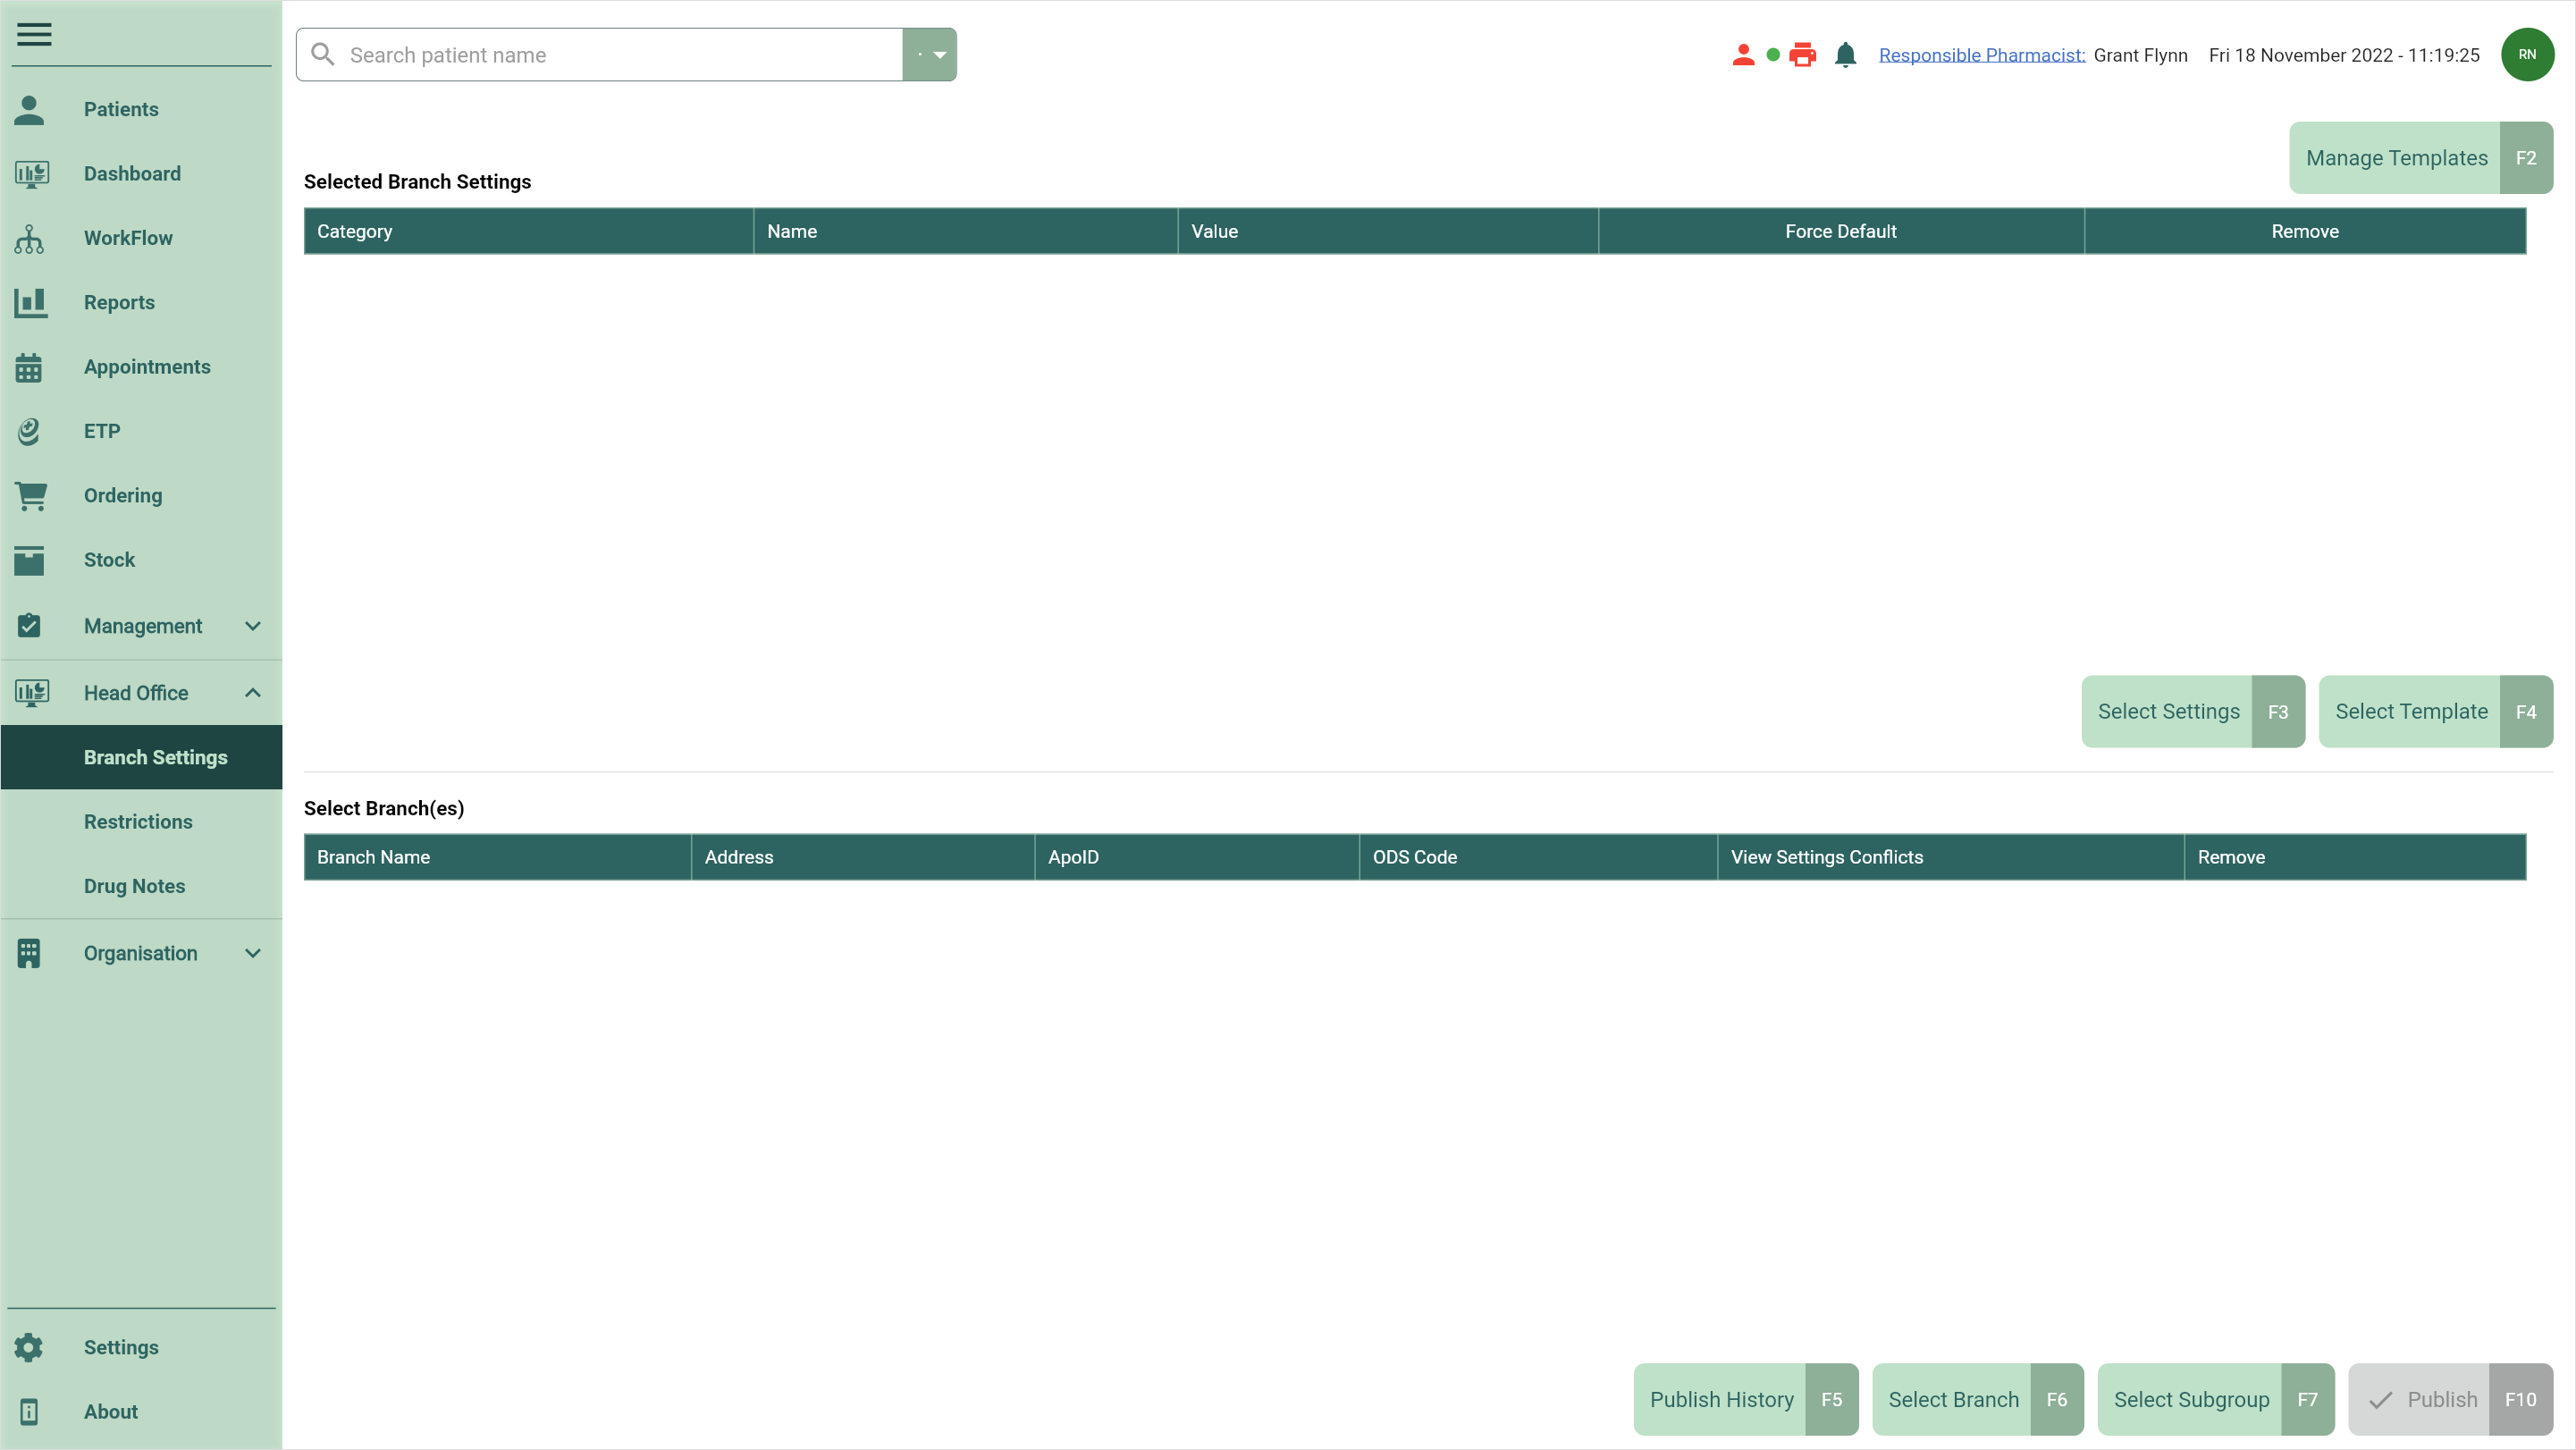
- Select the [Select Settings - F3] button. The Select Settings window displays.
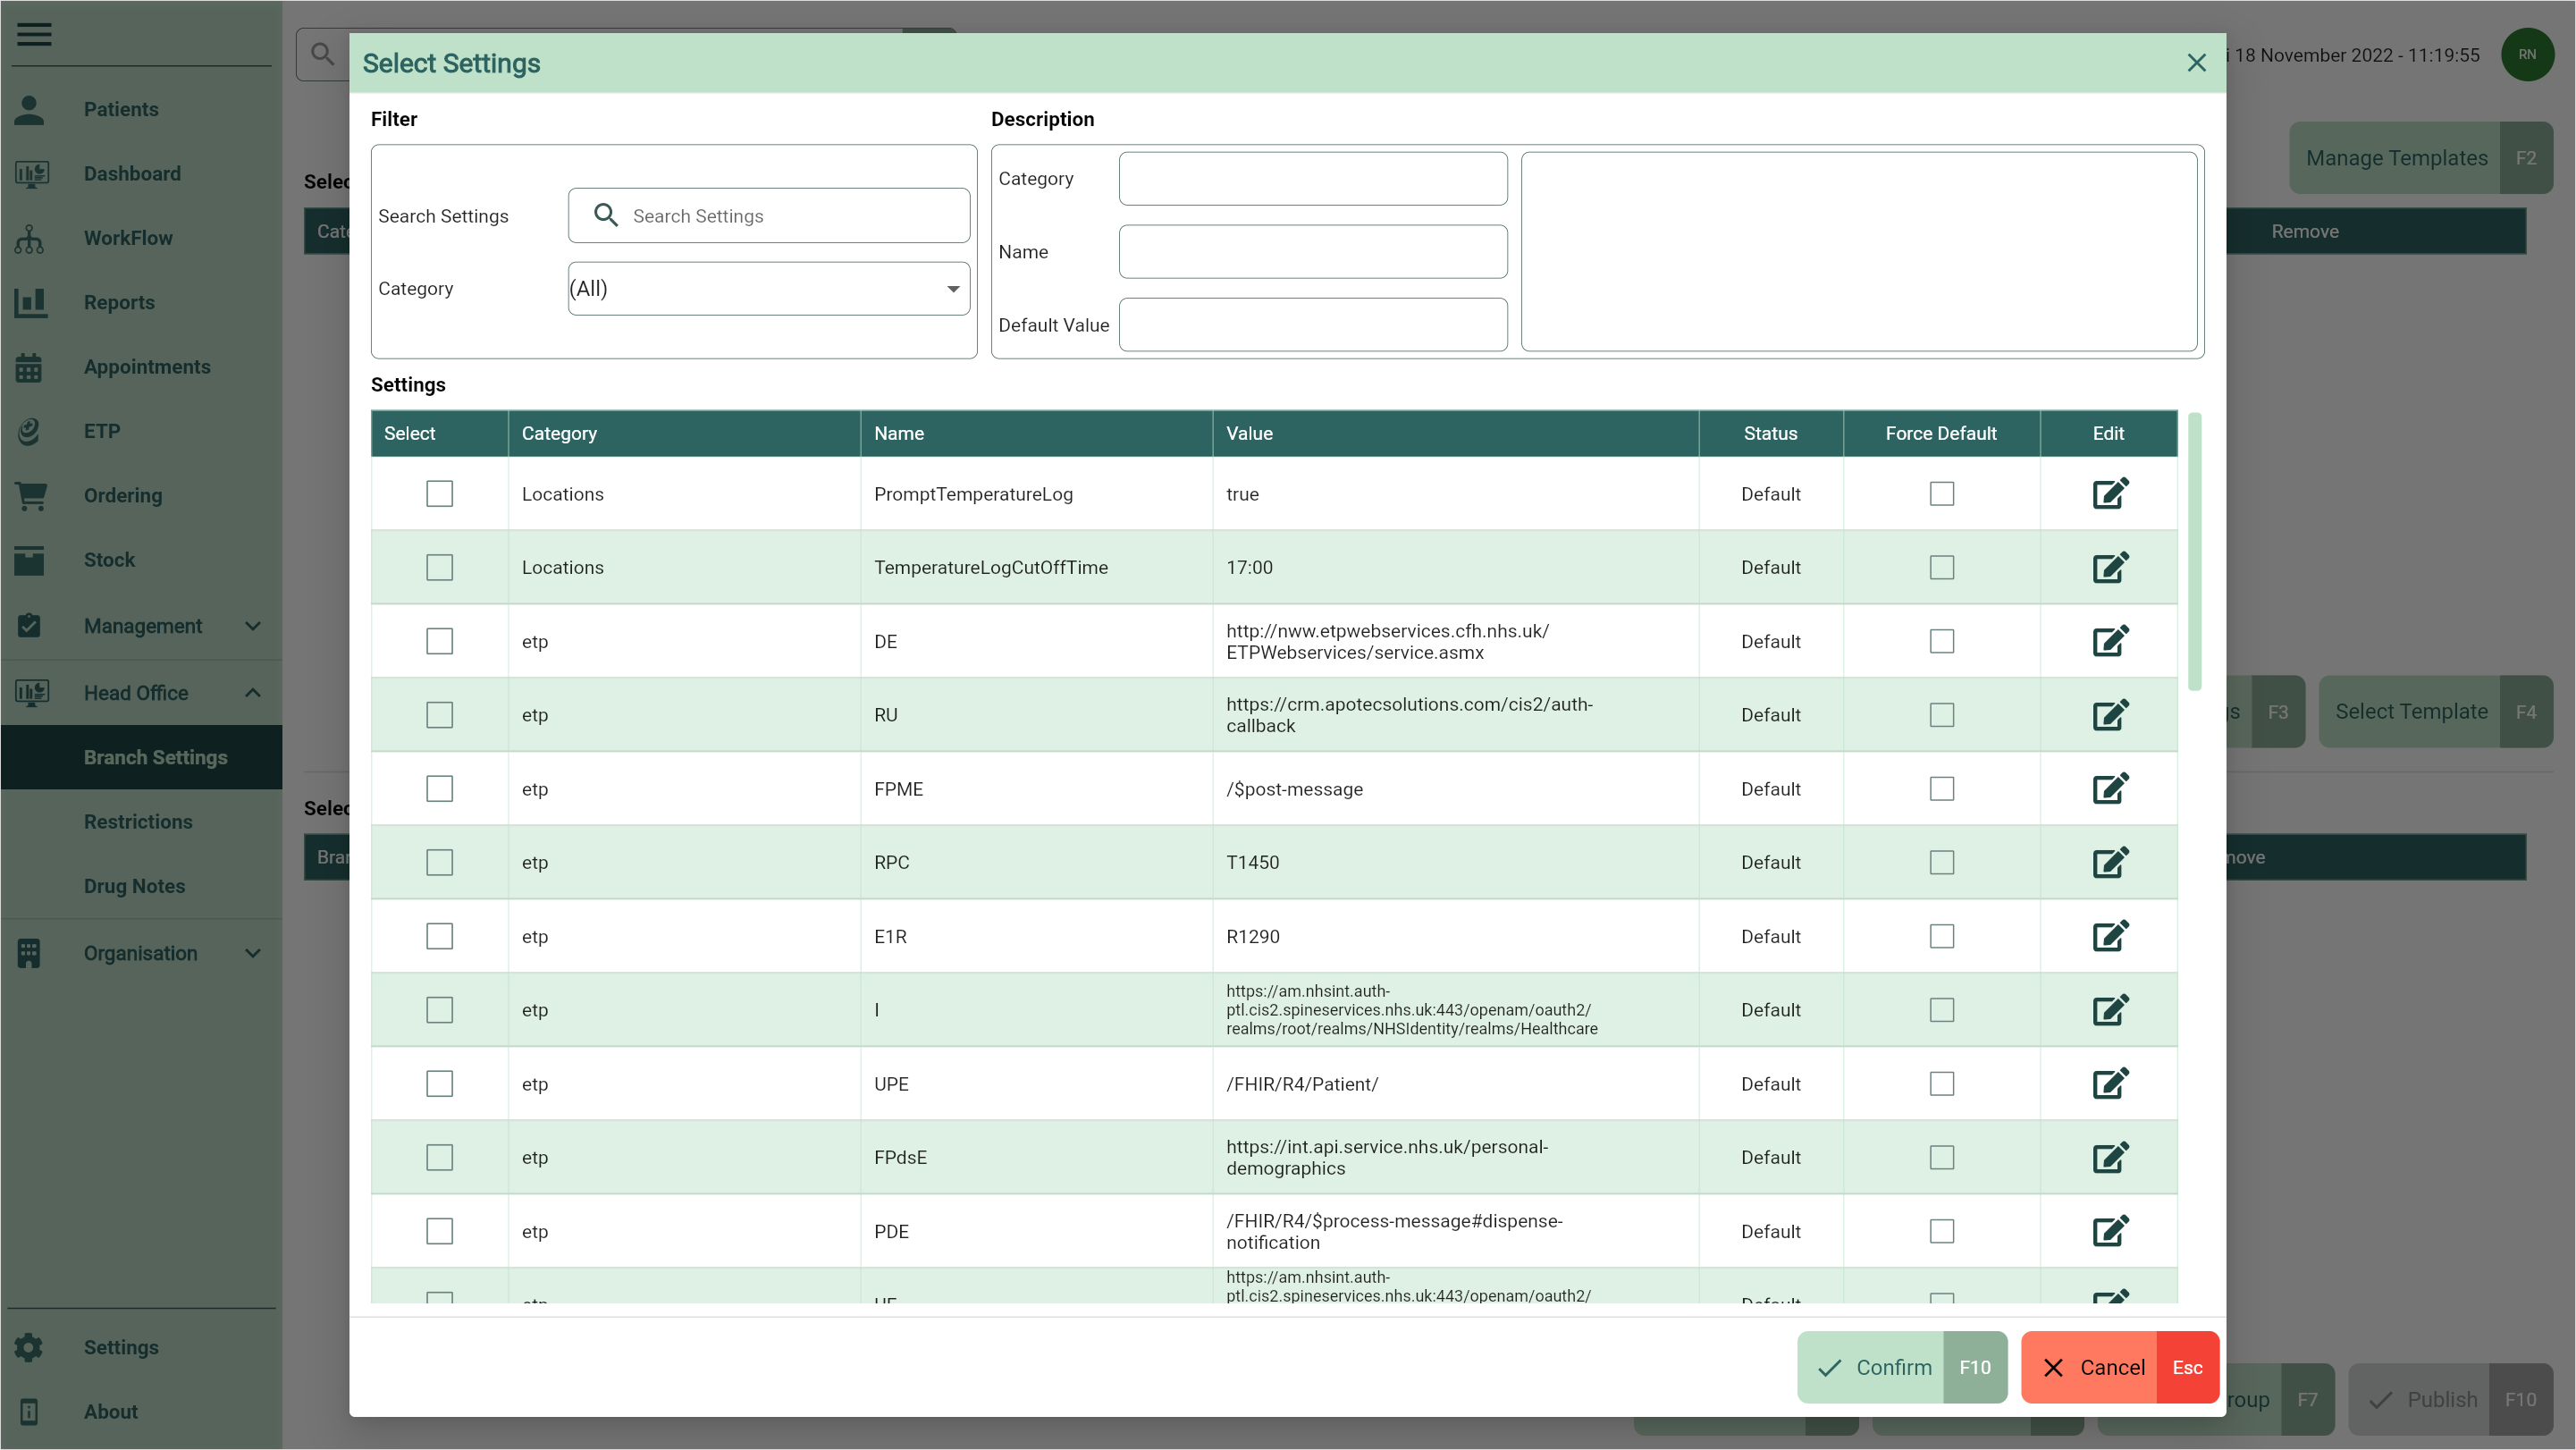
- Use the available Filters to refine the Settings grid to quickly locate the settings you want to add.
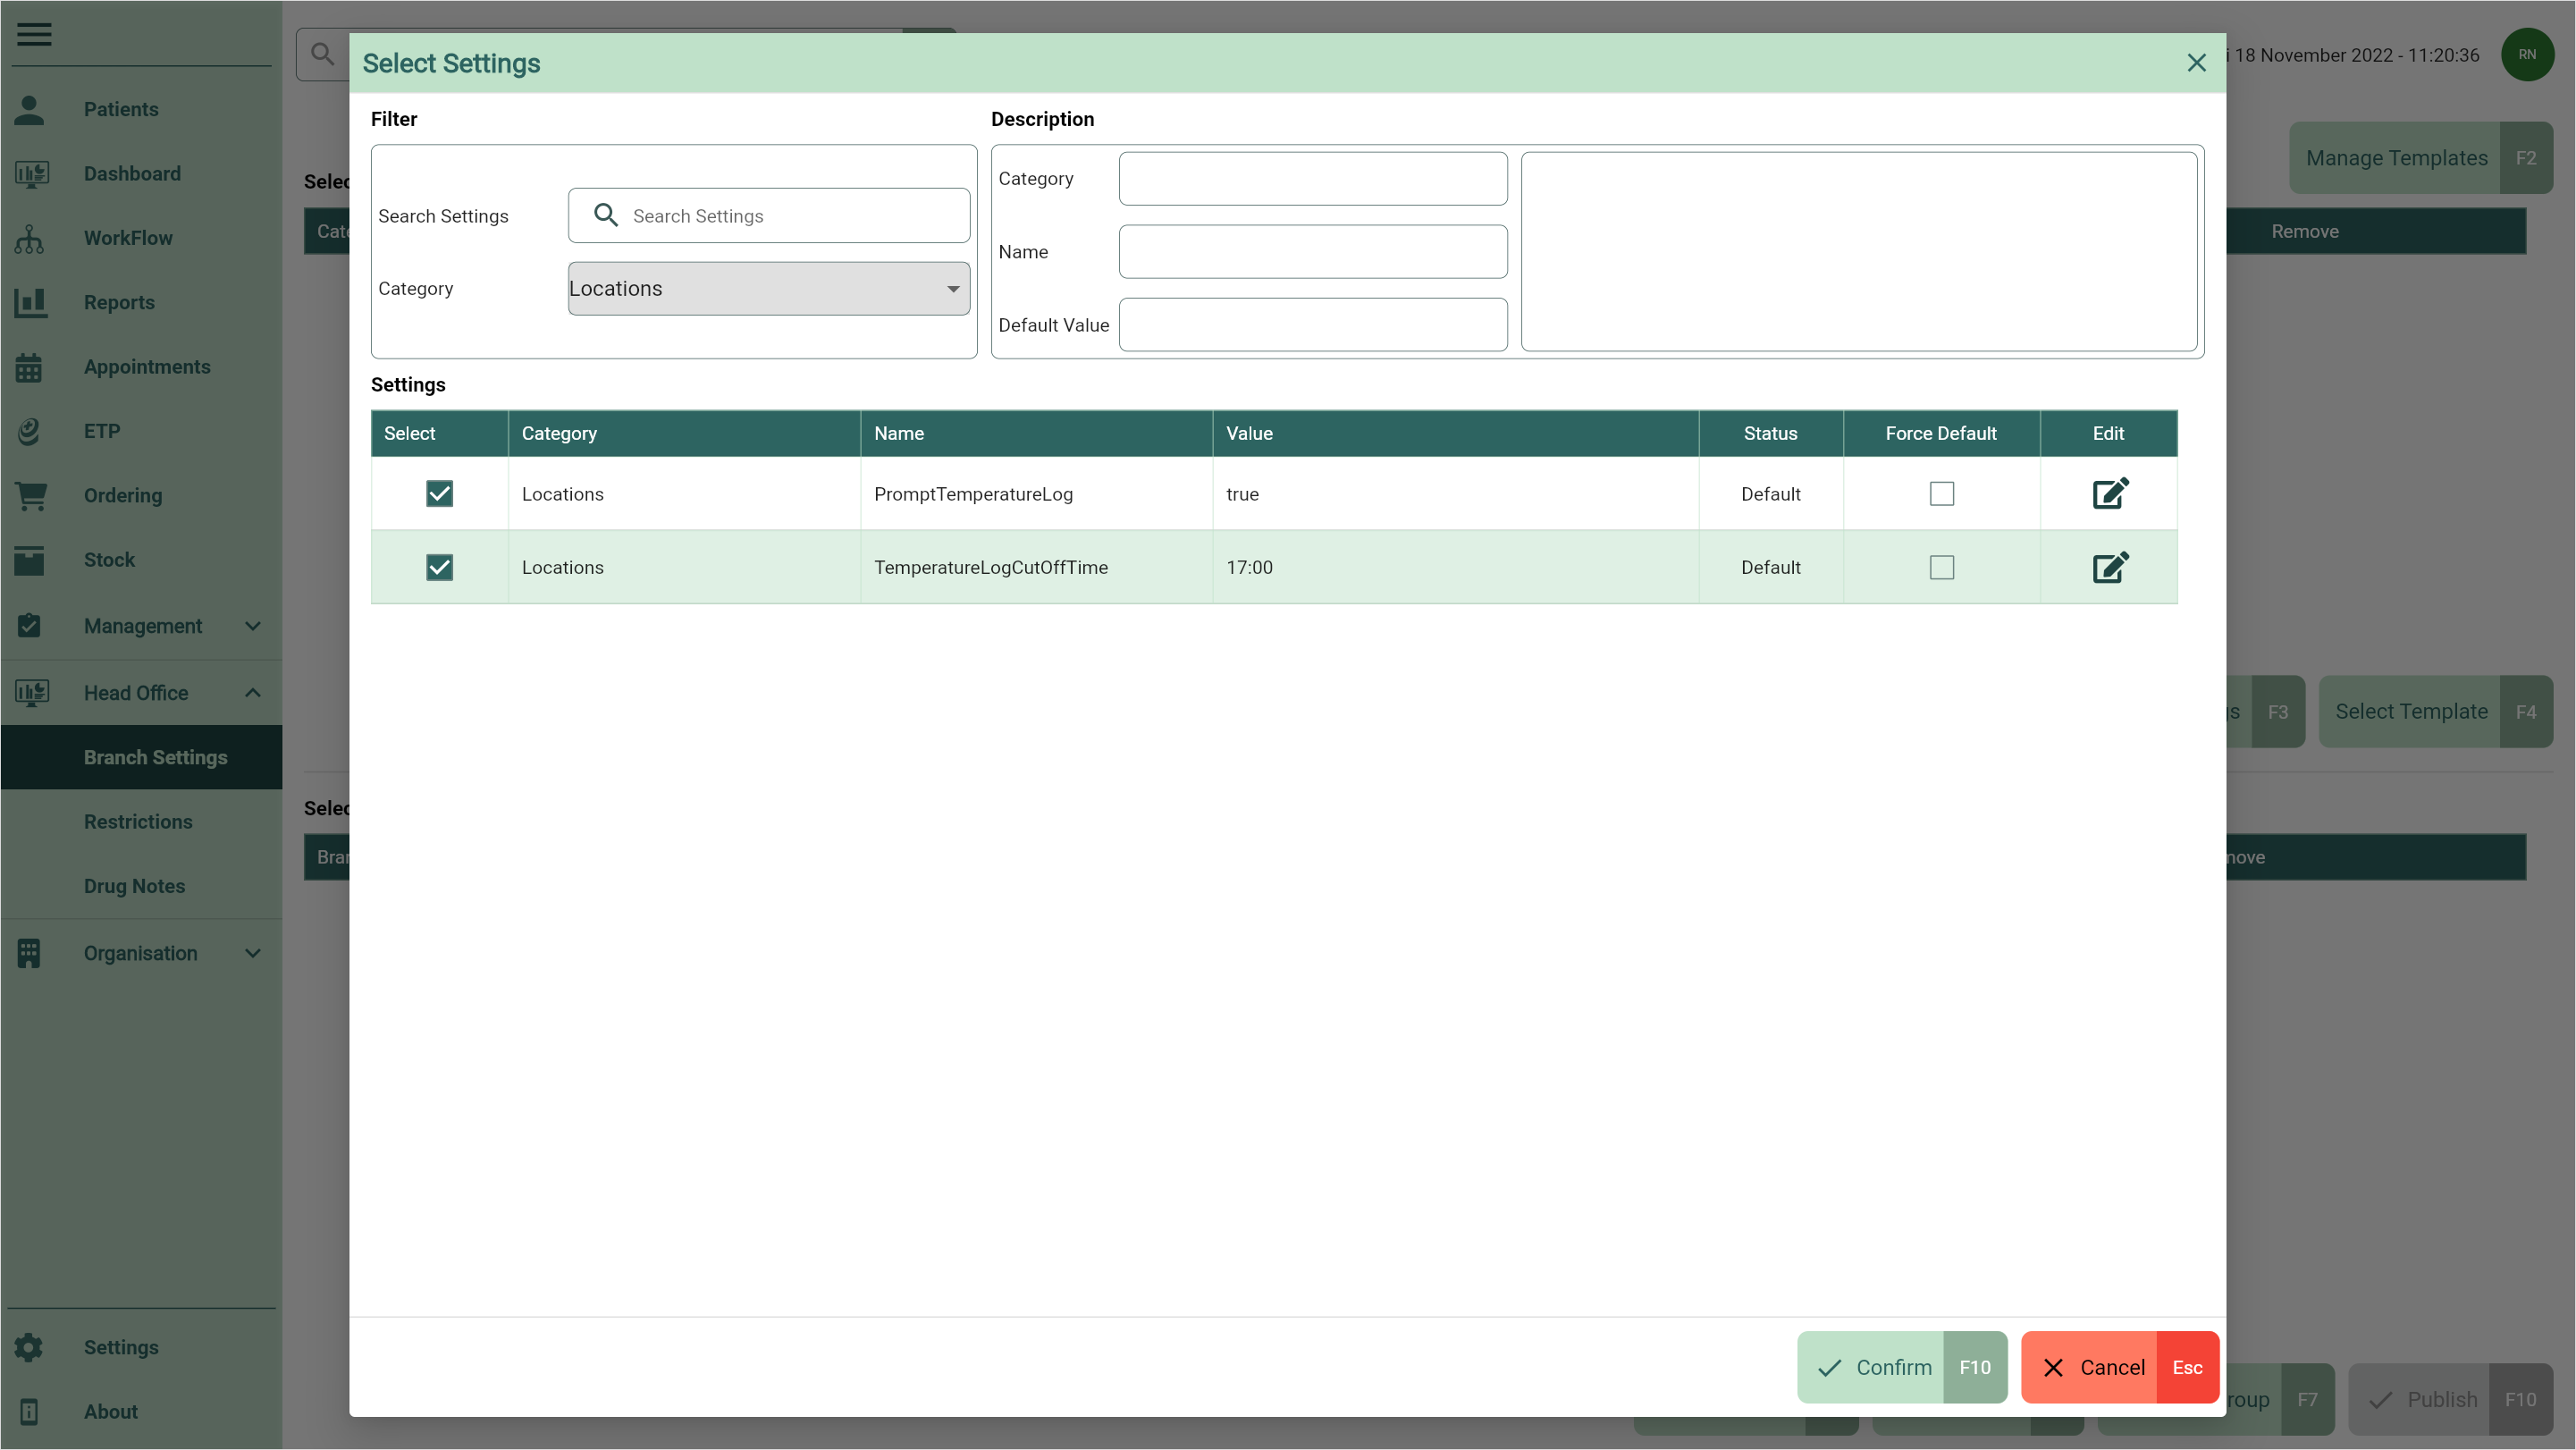
- Once you have found a required setting, add it to the Selected Branch Settings grid by selecting the tick box in the Select column.
You must select the tick box in the Select column to add settings to the Selected Branch Settings grid.
- To edit a setting's value or force the default value, select the adjacent
 Edit icon found in the Action column to enable the Value and Force Default columns. From here, you can perform the following actions using the fields below:
| Field | Action |
|---|---|
| Value column | Enter a custom value for the setting. |
| Force Default column | Select the tick box in the Force Default column to force the setting's default value. |
 Save icon Save icon | Use the adjacent Save icon found in the Action column to save your changes. |
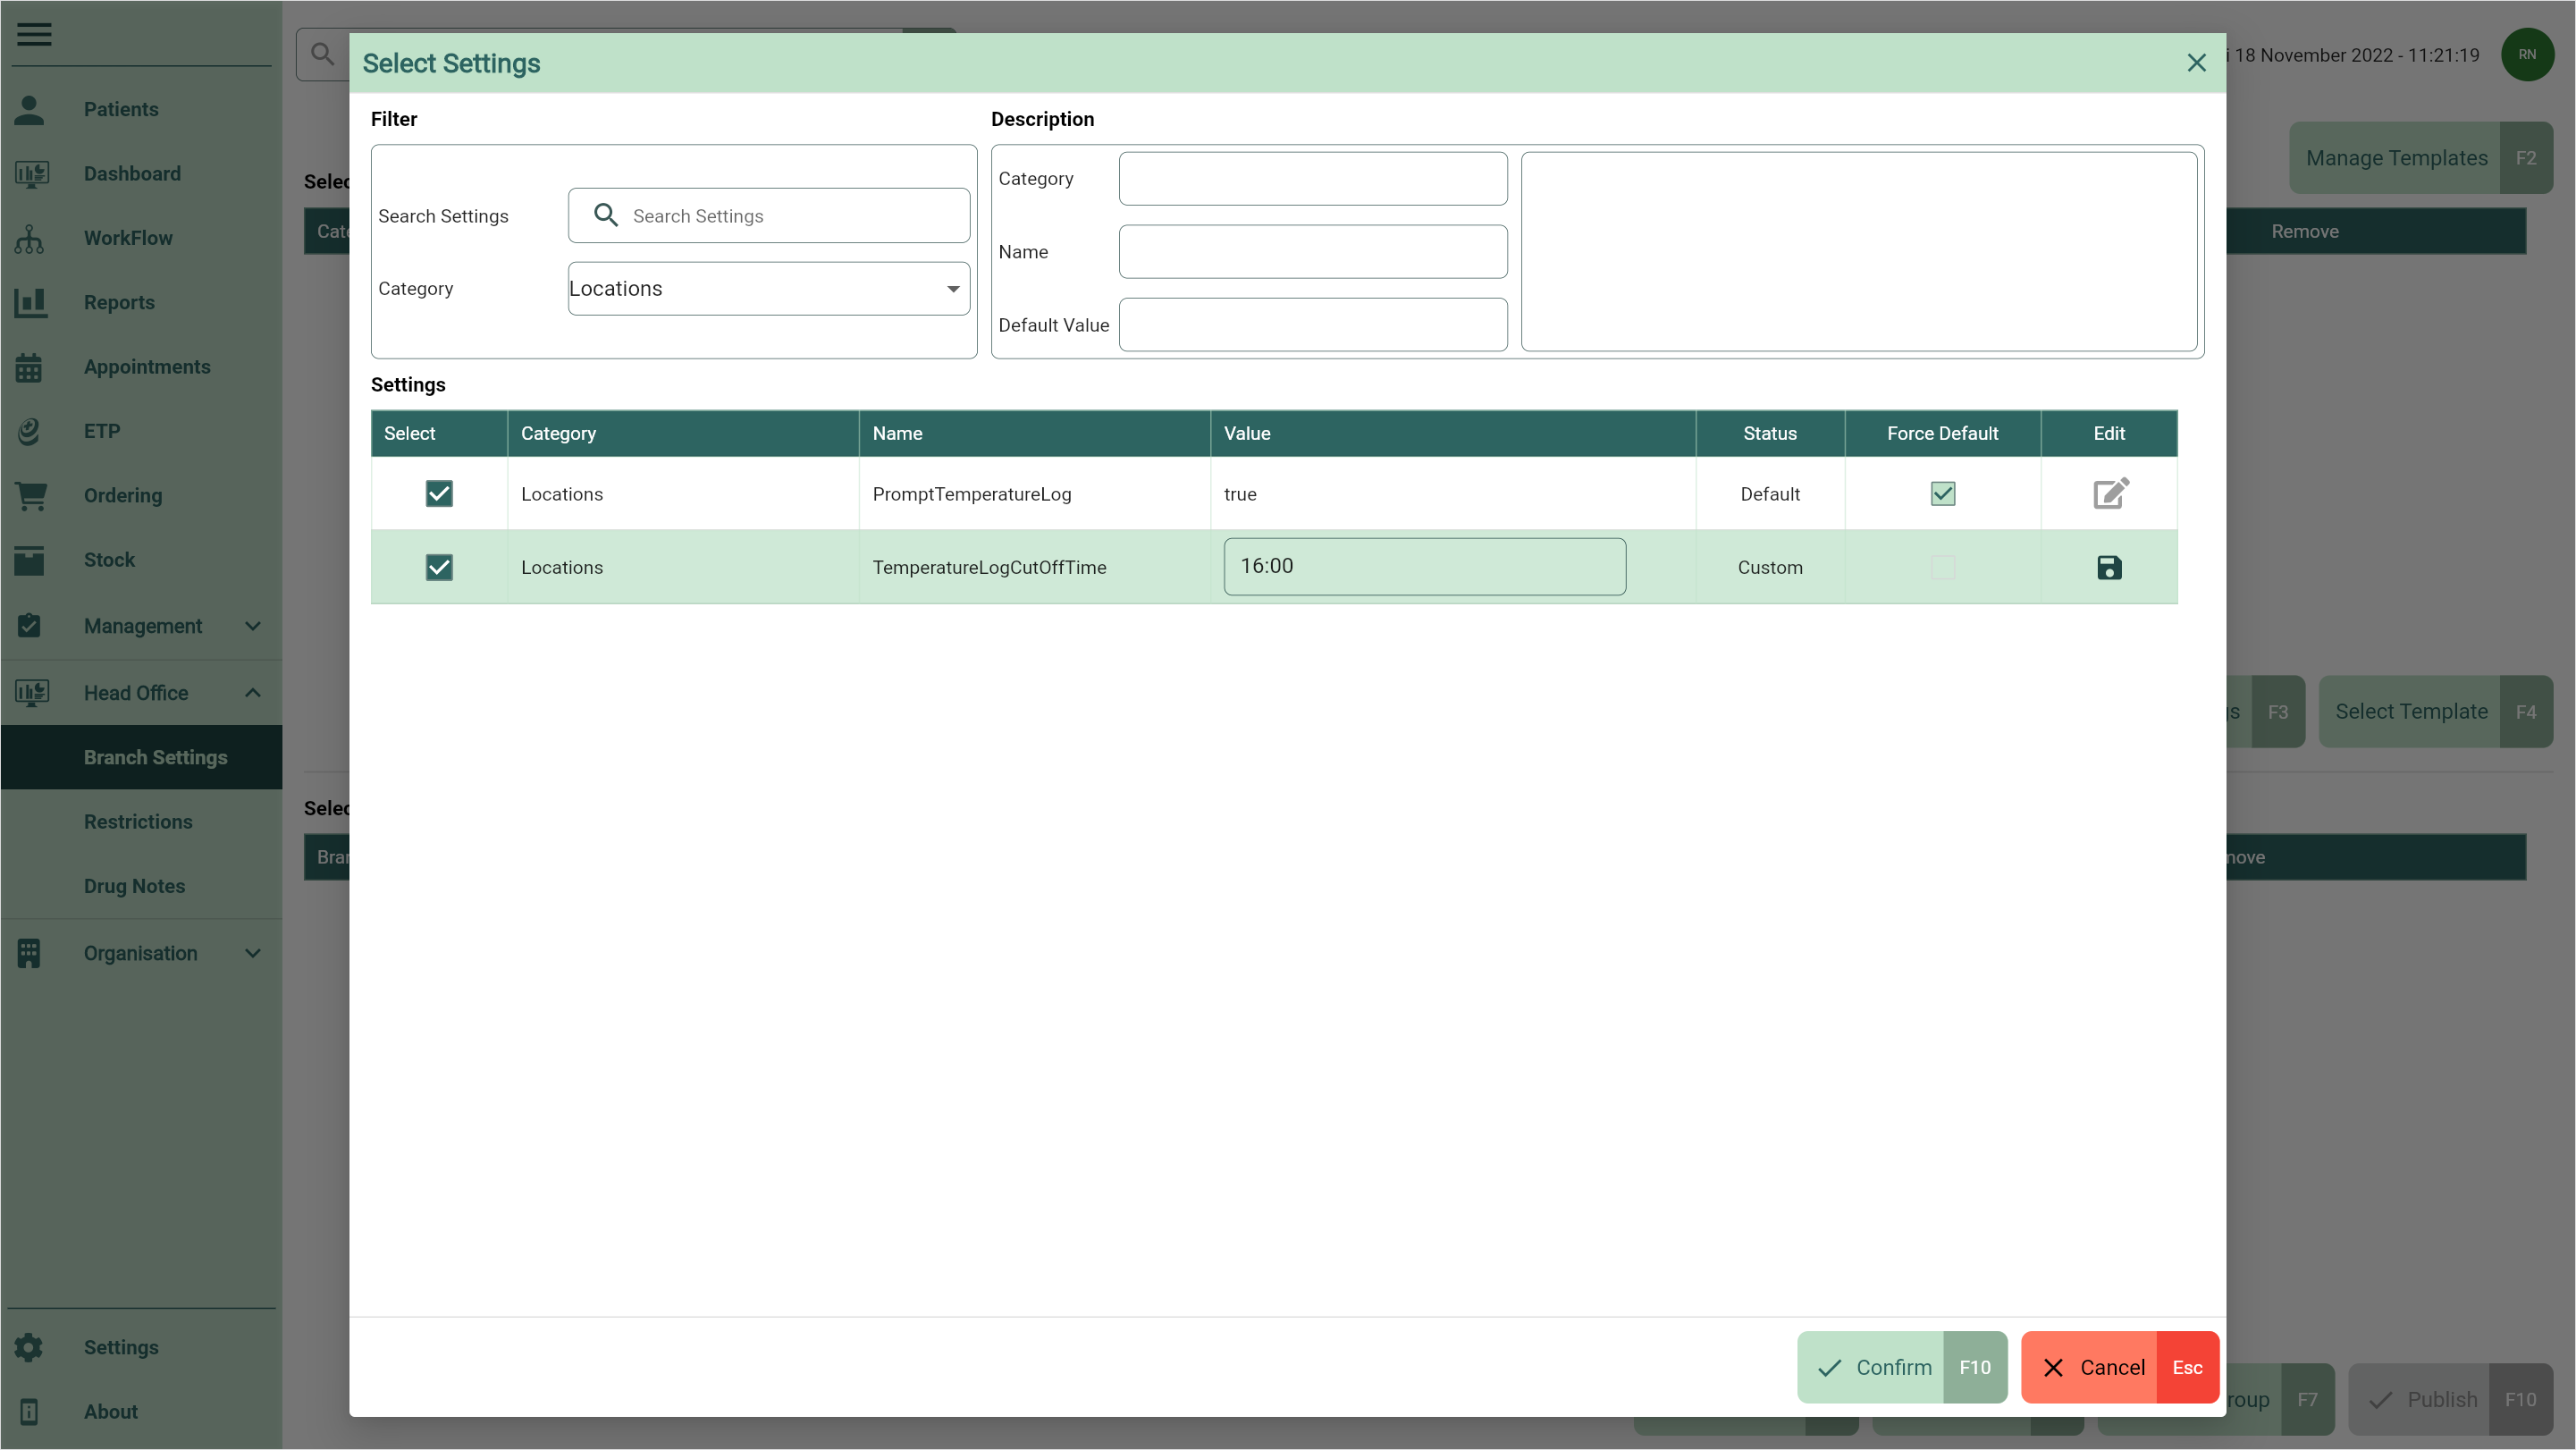
You will only be able to edit one setting at a time. Please ensure you save changes to each setting before selecting to edit another.
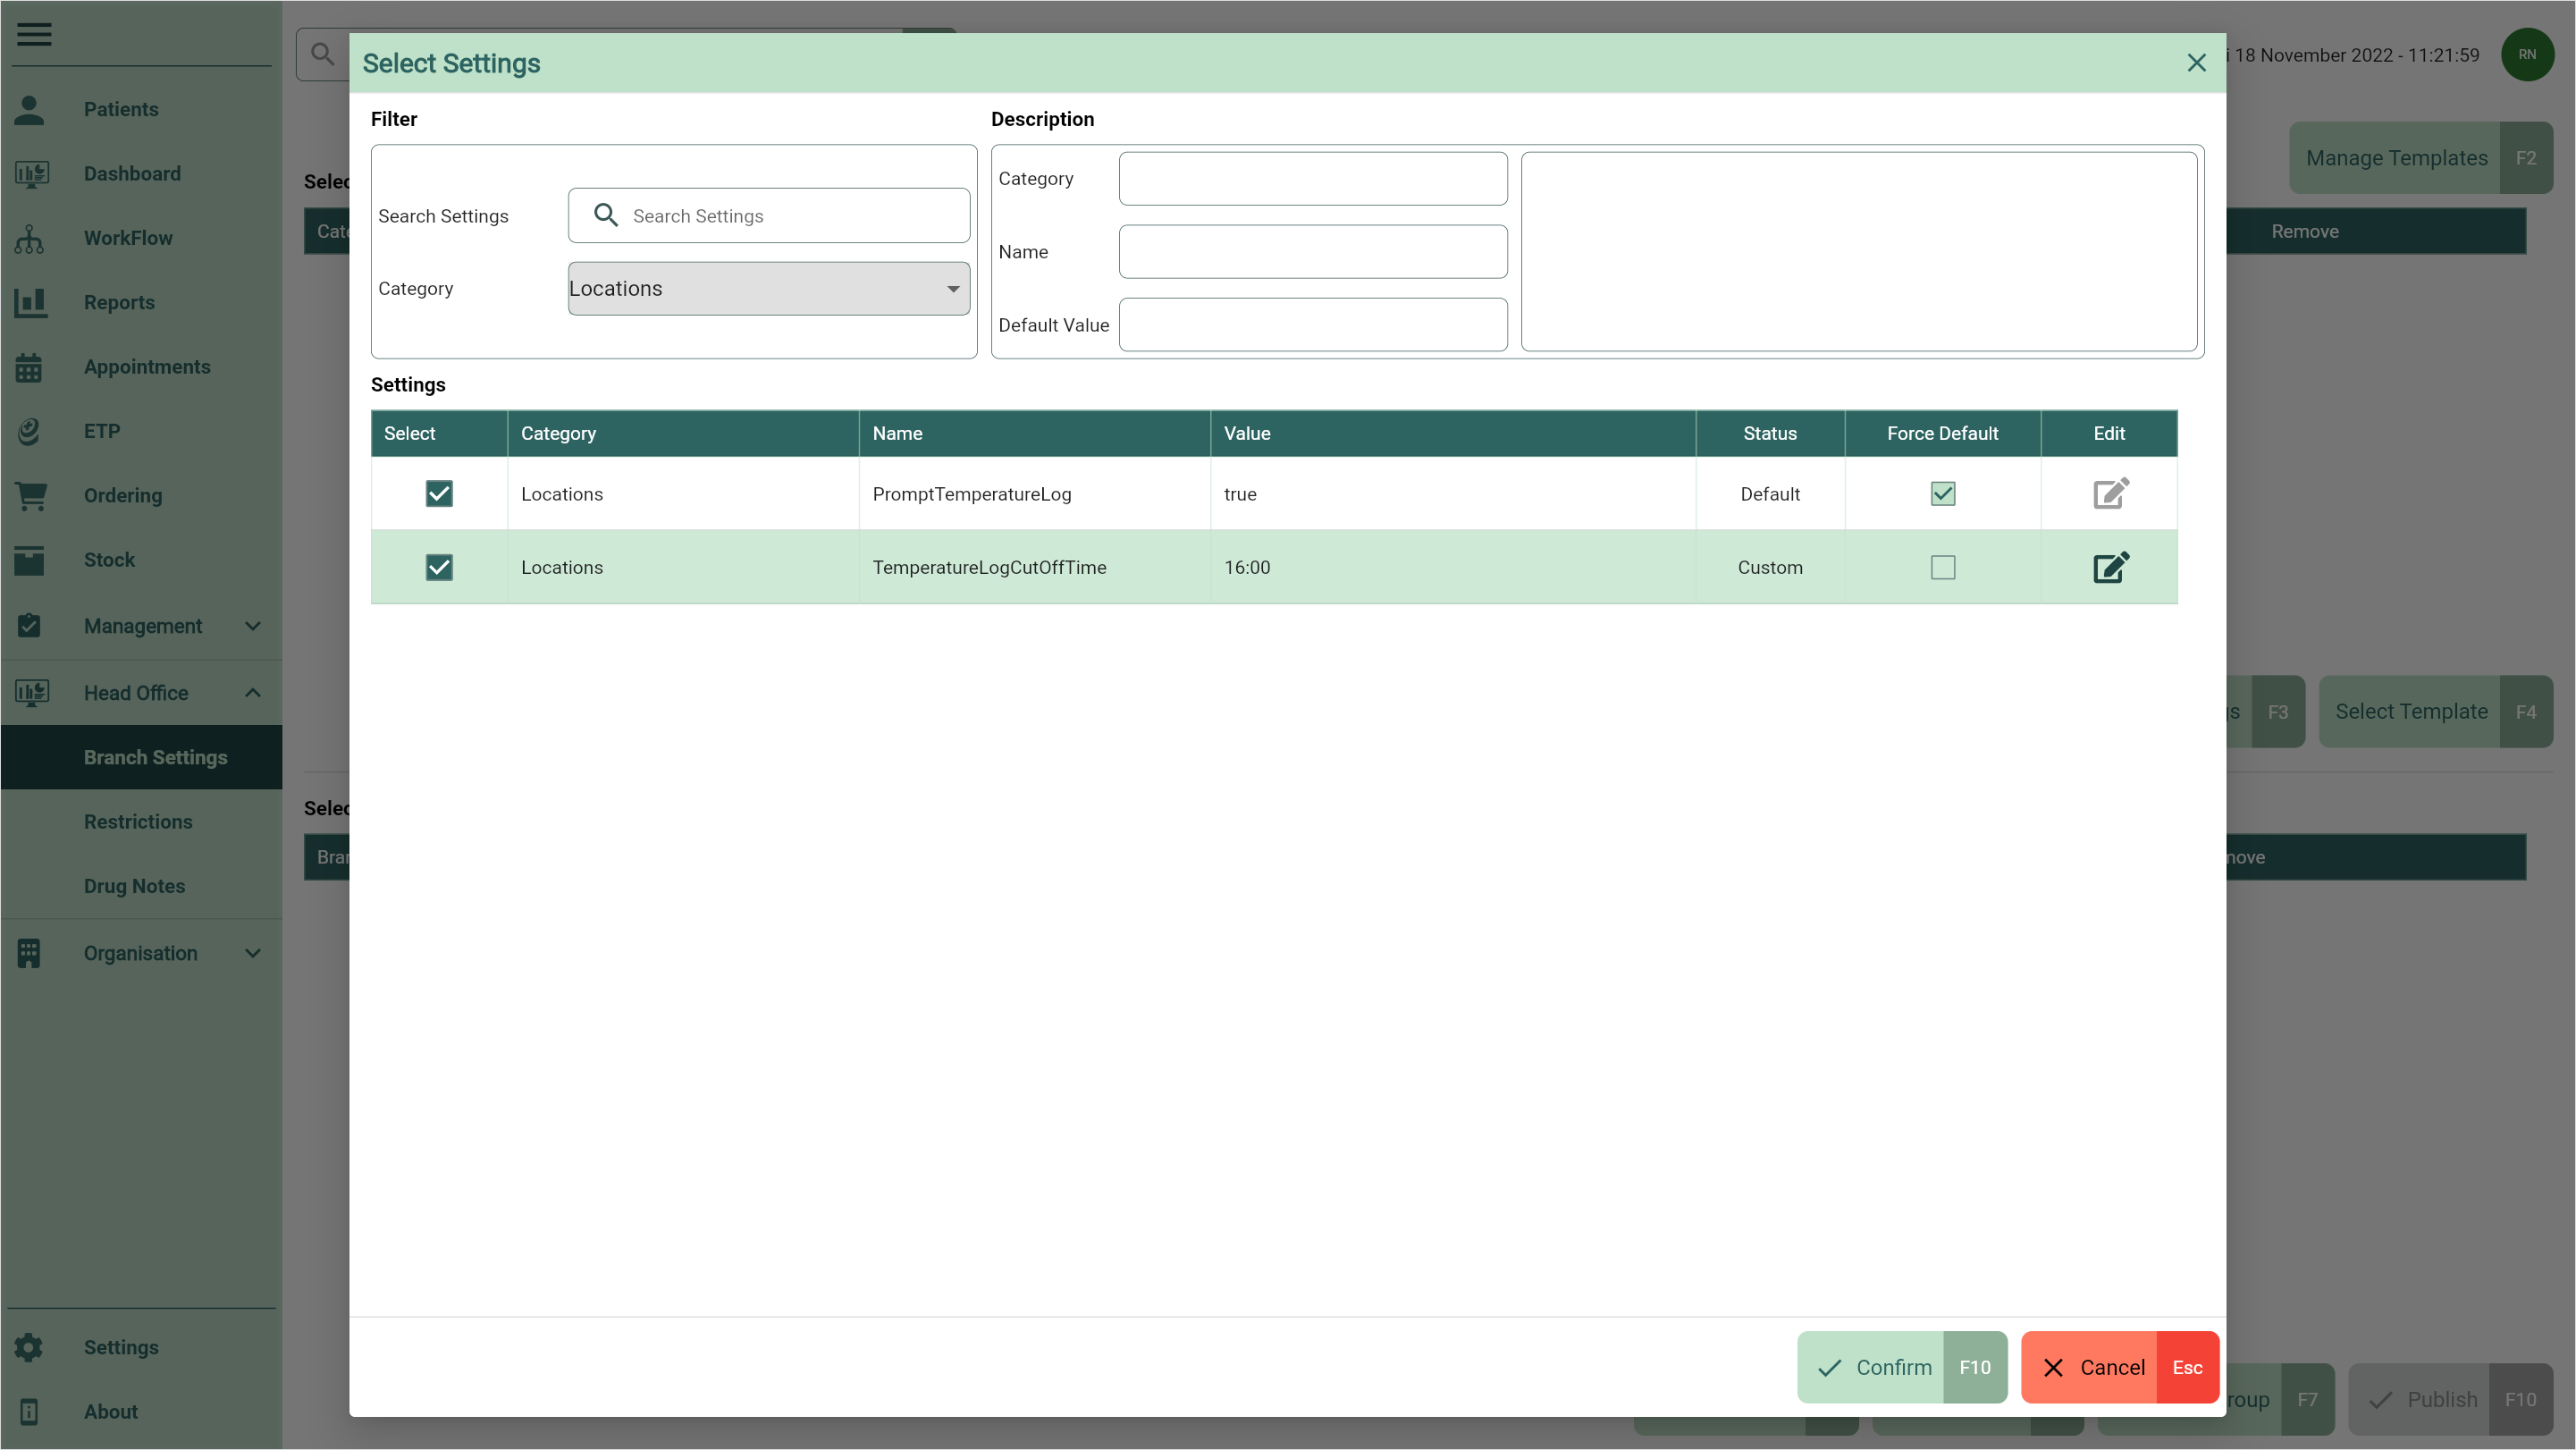
- Once you have selected all your required settings and made all the necessary edits, select the [Confirm - F10] button. All the selected settings have now been added to the Selected Branch Settings grid.
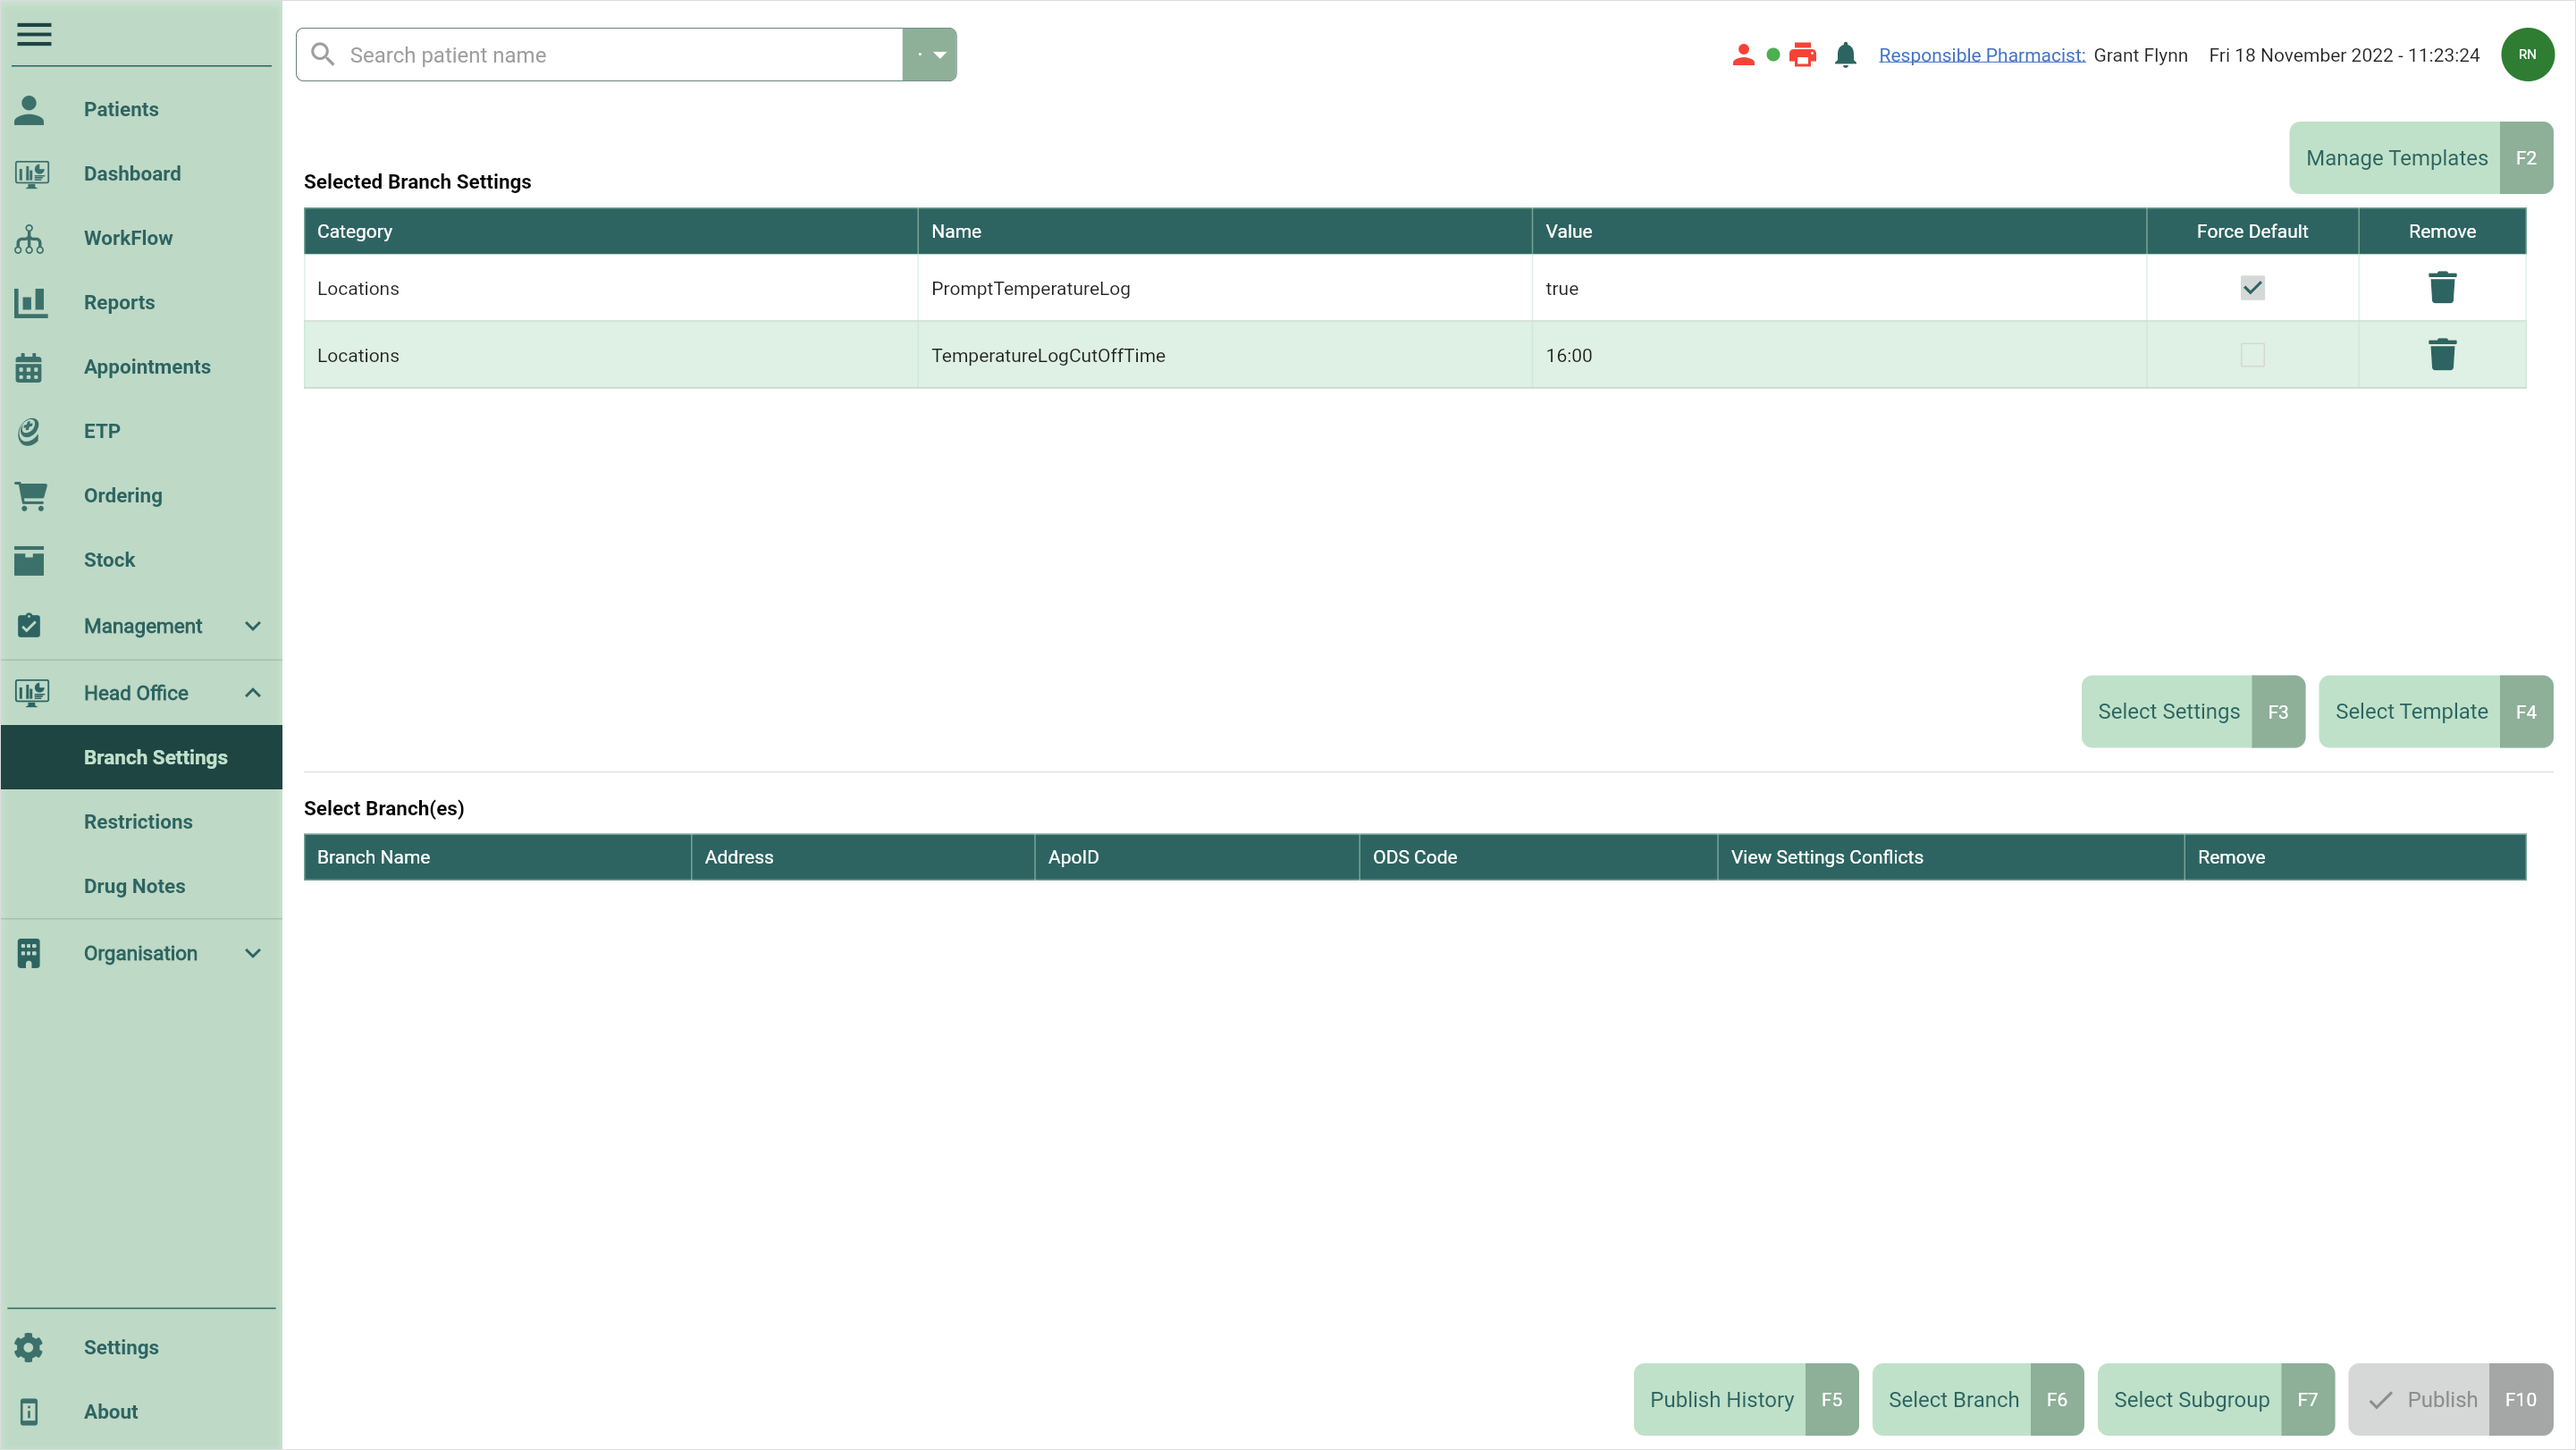
You can edit or remove settings using the adjacent Edit icon and/or  Delete icons found in the Actions column in the Selected Branch Settings grid, or add additional settings using the [Select Settings - F3] button.
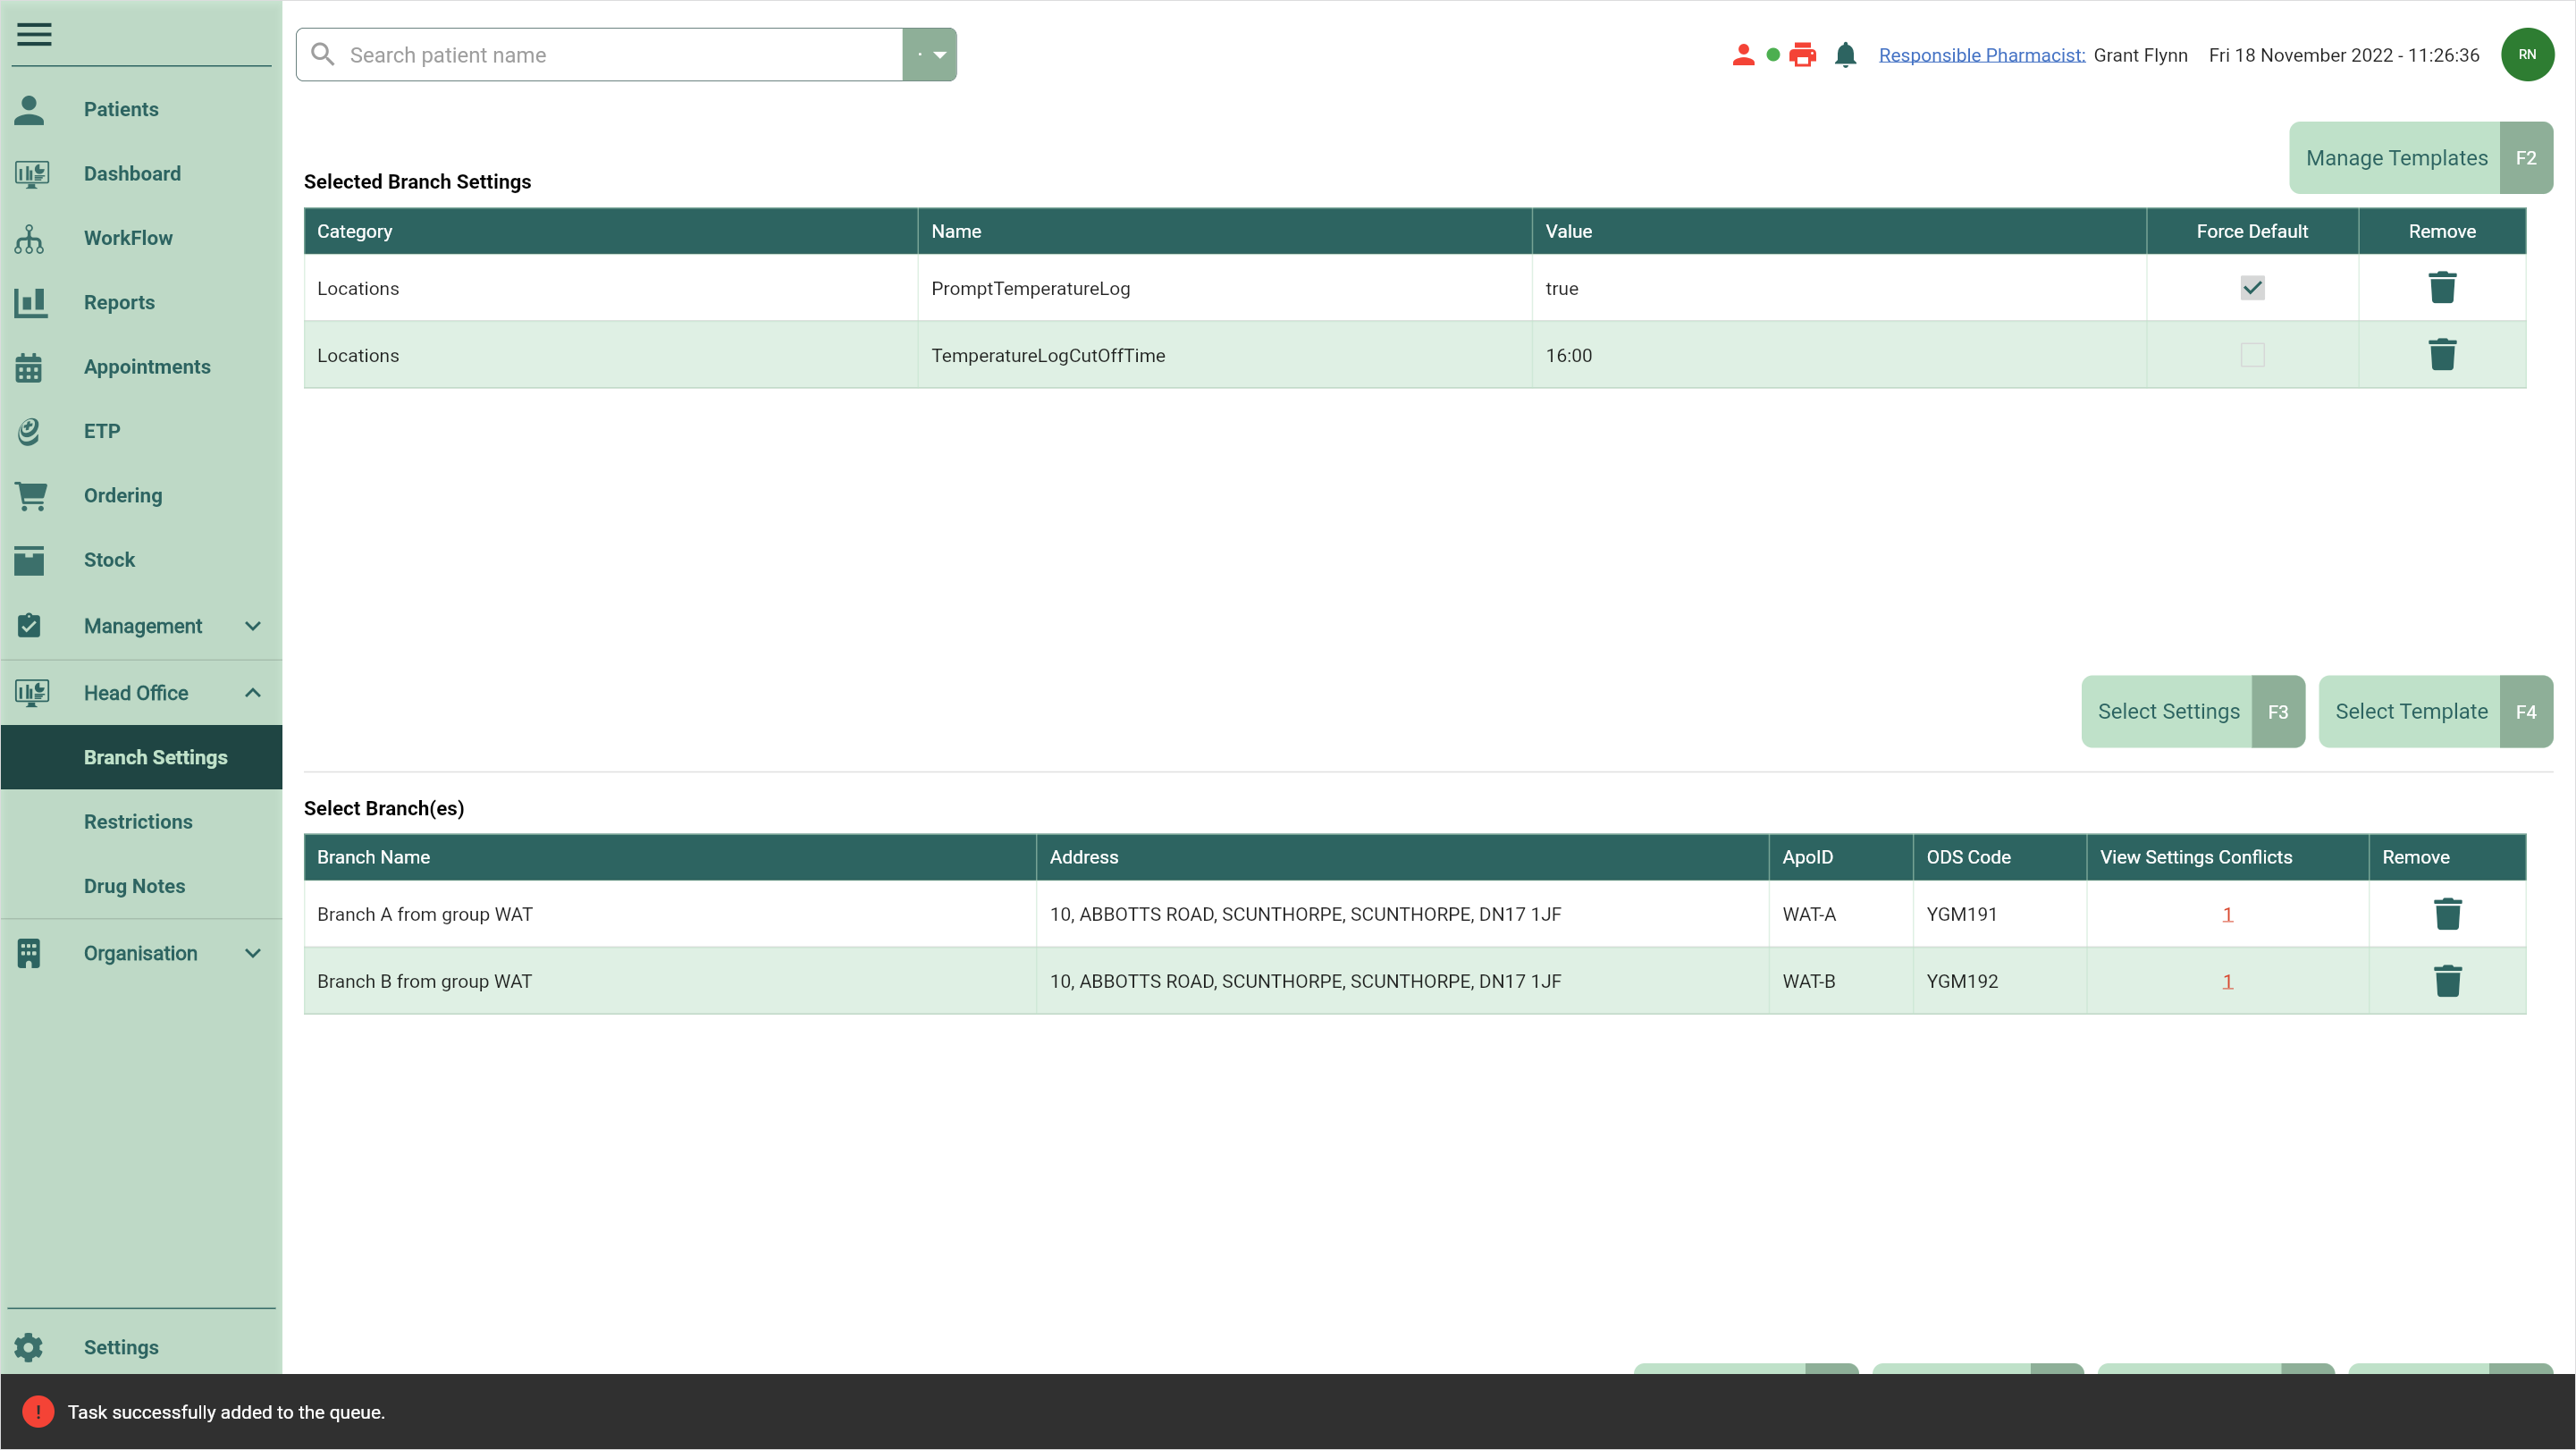
- Once you're happy with the settings, add the branch(es) and/or subgroups you want to receive your settings to the Select Branch(es) grid by:
- Selecting the [Select Branch - F6] button to open the Select Branch window where you can search for and select all required branches. Select the [Confirm - F10] button to save your changes.
- Selecting the [Select Subgroup - F7] button to open the Select Subgroup window where you can select all required subgroups of branches. Select the [Confirm - F10] button to save your changes.

Apotec CRM will complete a comparison of your proposed settings values against the existing settings values held at each selected branch. By selecting the numeric badges in the View Settings Conflicts column within the Select Branch(es) grid, you can view a list of any conflicting New Values that you have configured in the Selected Branch Settings grid with the branches Current Values for each setting.
- Select the [Publish - F10] button to publish the settings to your selected branches. A Publish Settings prompt appears asking if you're sure you want to publish the selected settings.
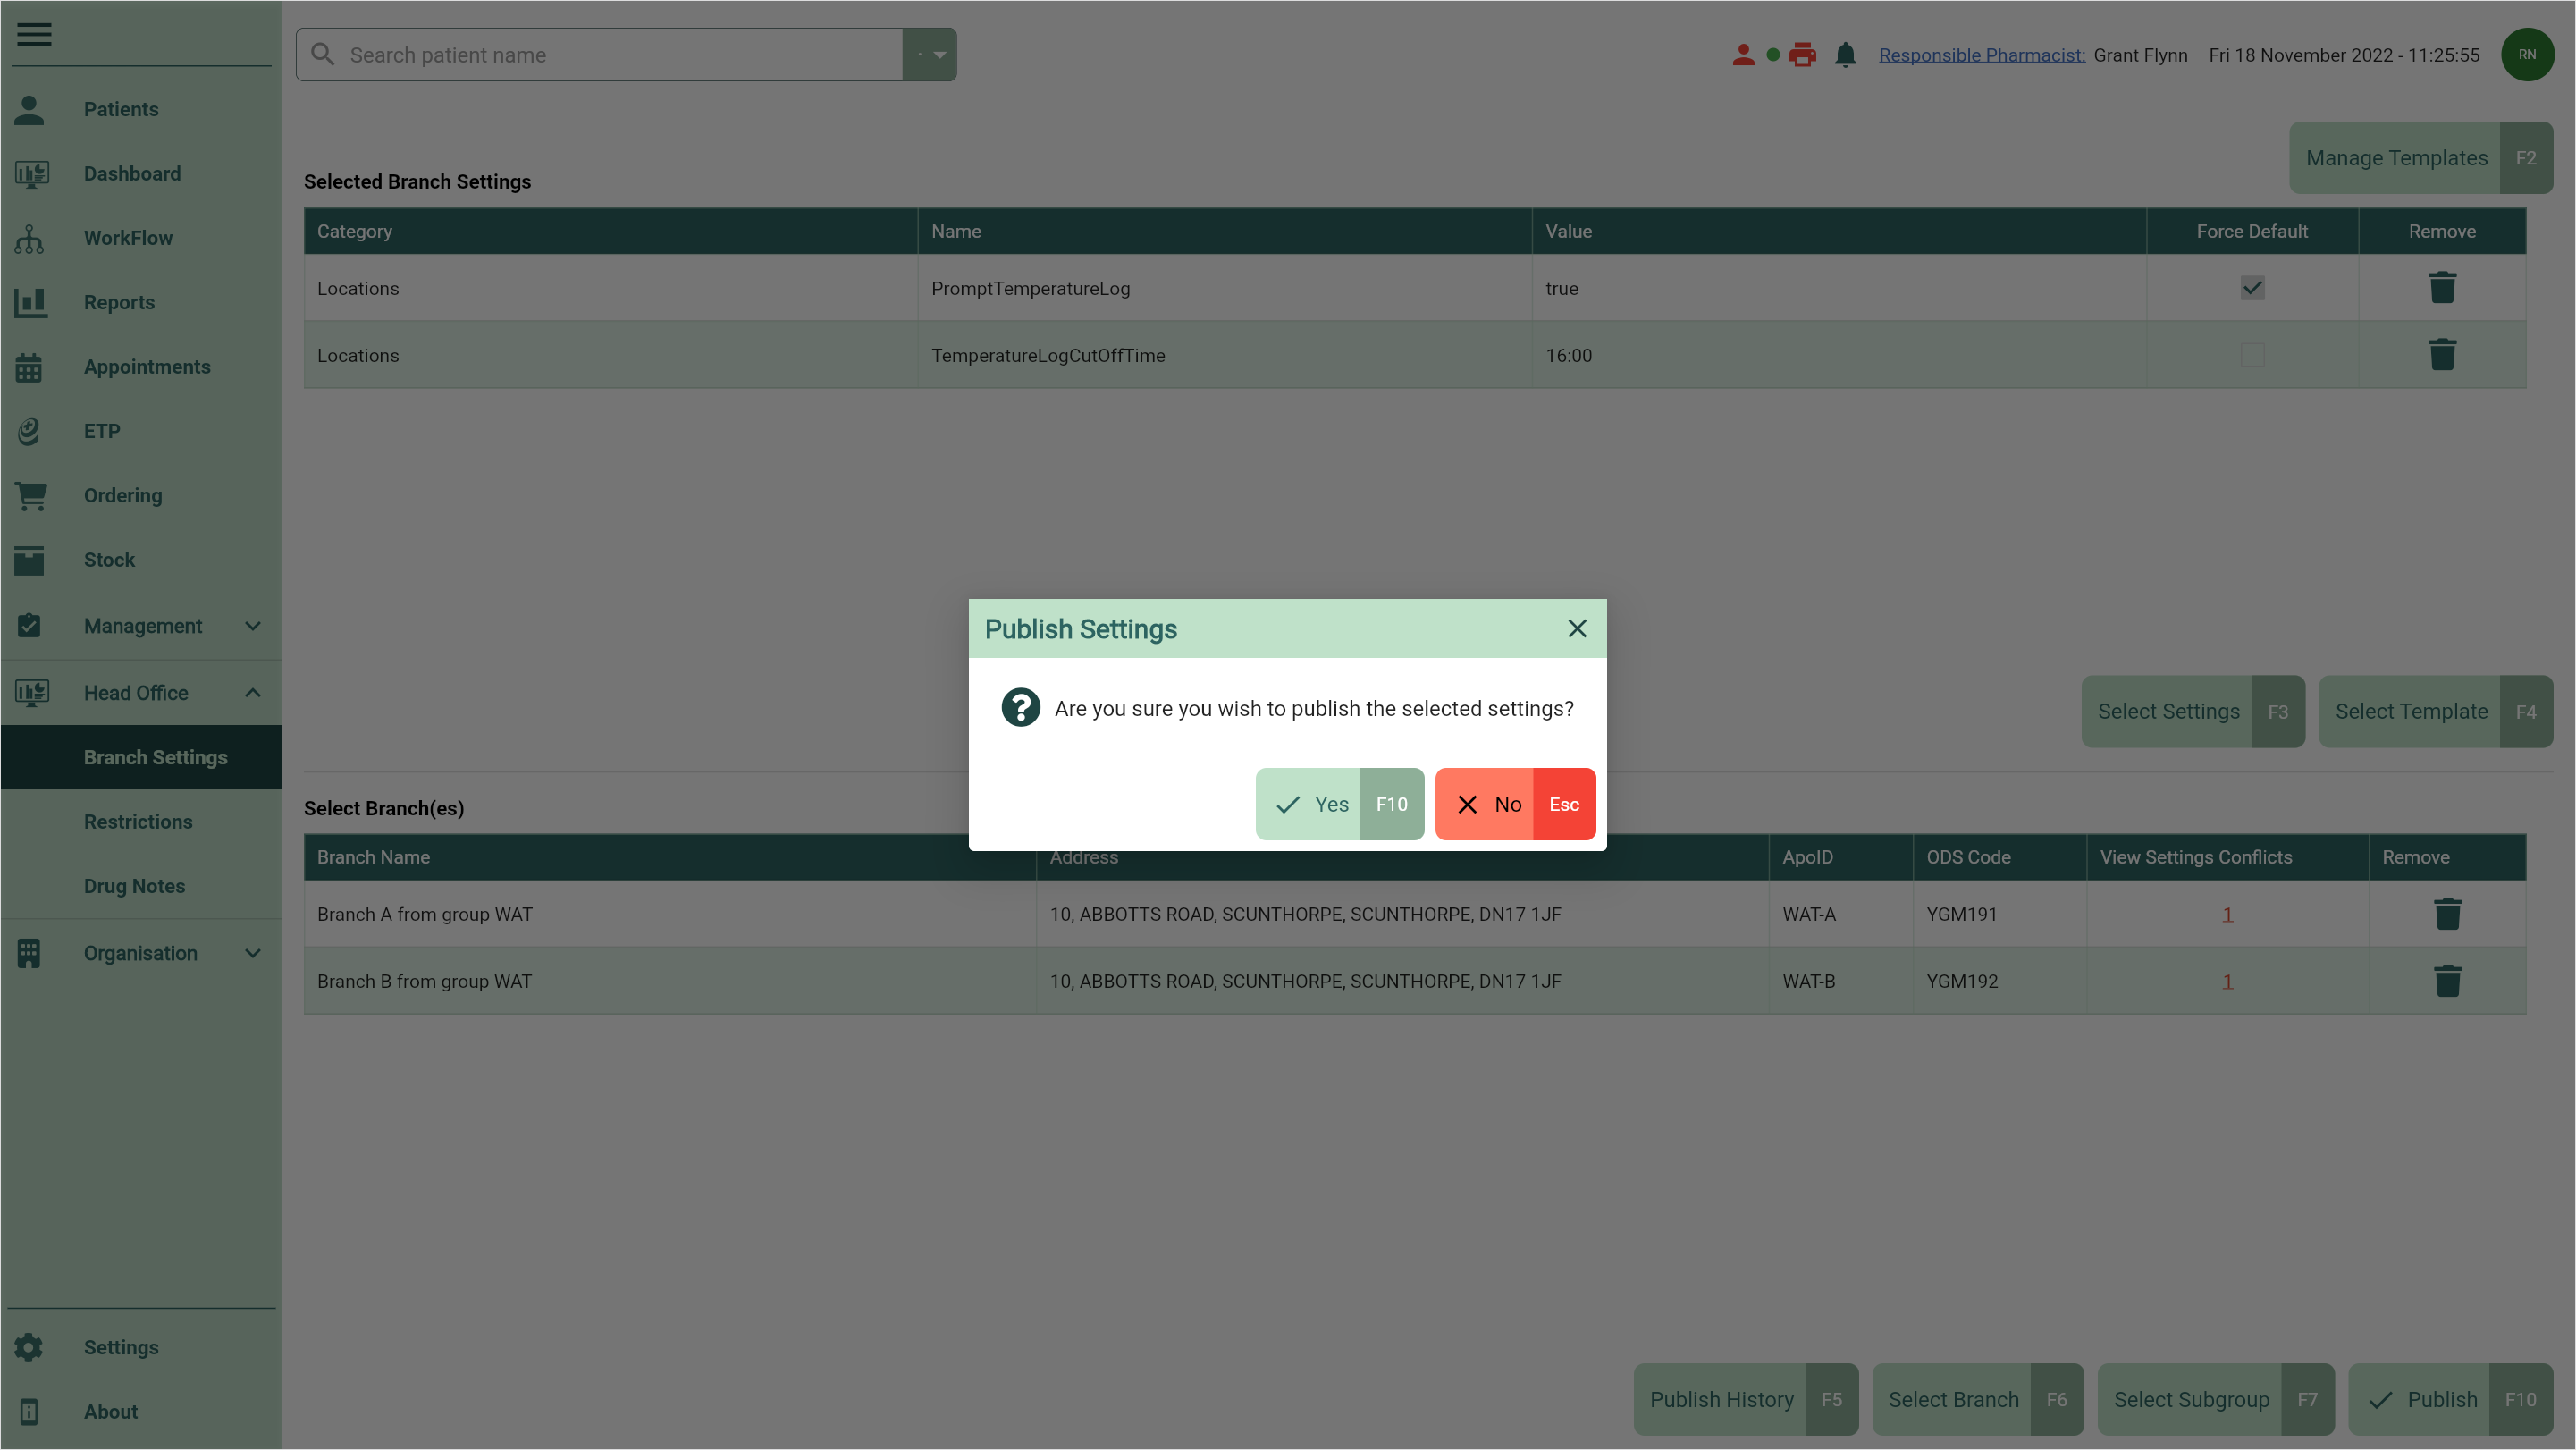
- Select the [Yes - F10] button. You're returned to Head Office Branch Settings and a snackbar displays confirming your task has been added to the queue.