Sending dispense notifications (DNs)
After a prescription has been fulfilled and collected by the patient it is necessary to send a dispense notification. On the To Be Claimed tab of the Workflow module you will find all dispensed prescriptions ready for processing.
You will need to authenticate a valid NHS smartcard before you can send a dispense notification. You can learn how to authenticate your smartcard in our Smartcard authentication article.
Sending dispense notifications (DNs) using Send DN
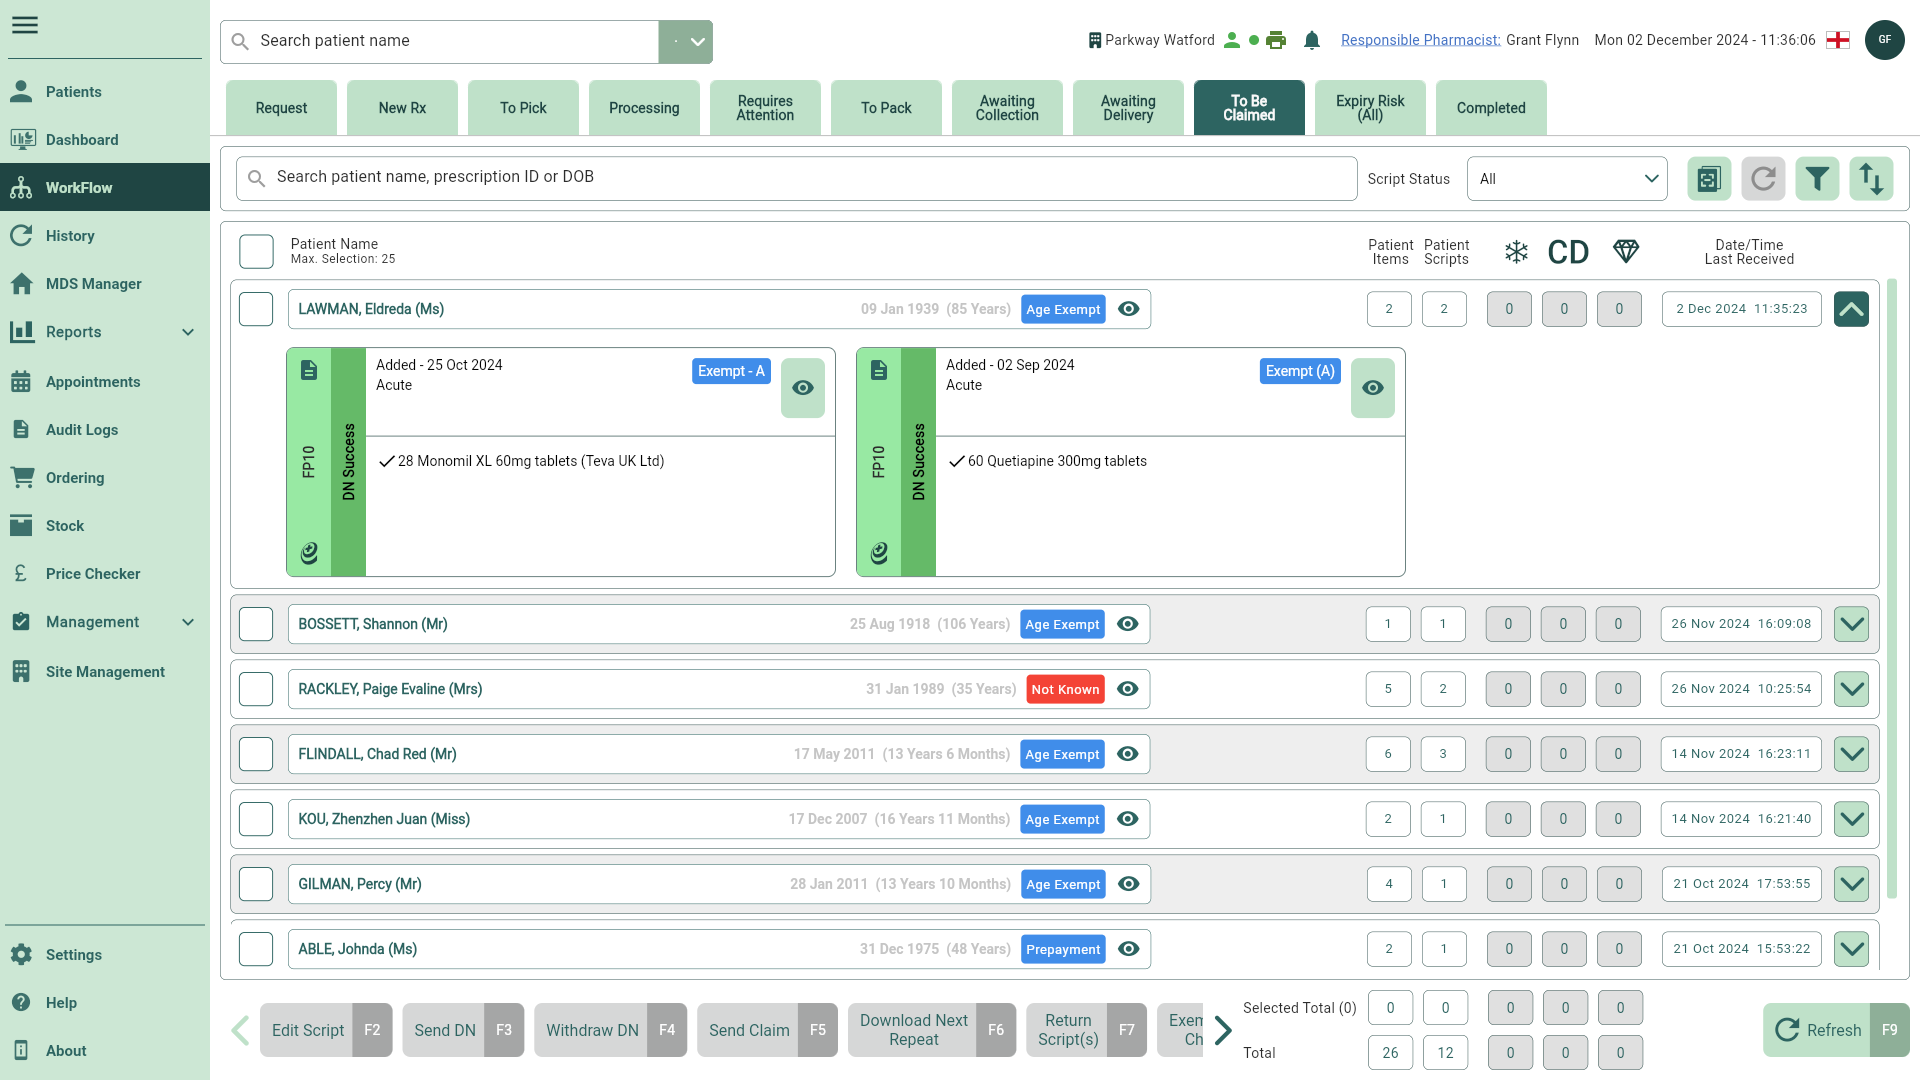
- To begin, select the To Be Claimed tab in Workflow by selecting Workflow from the left-nav and the To Be Claimed tab.
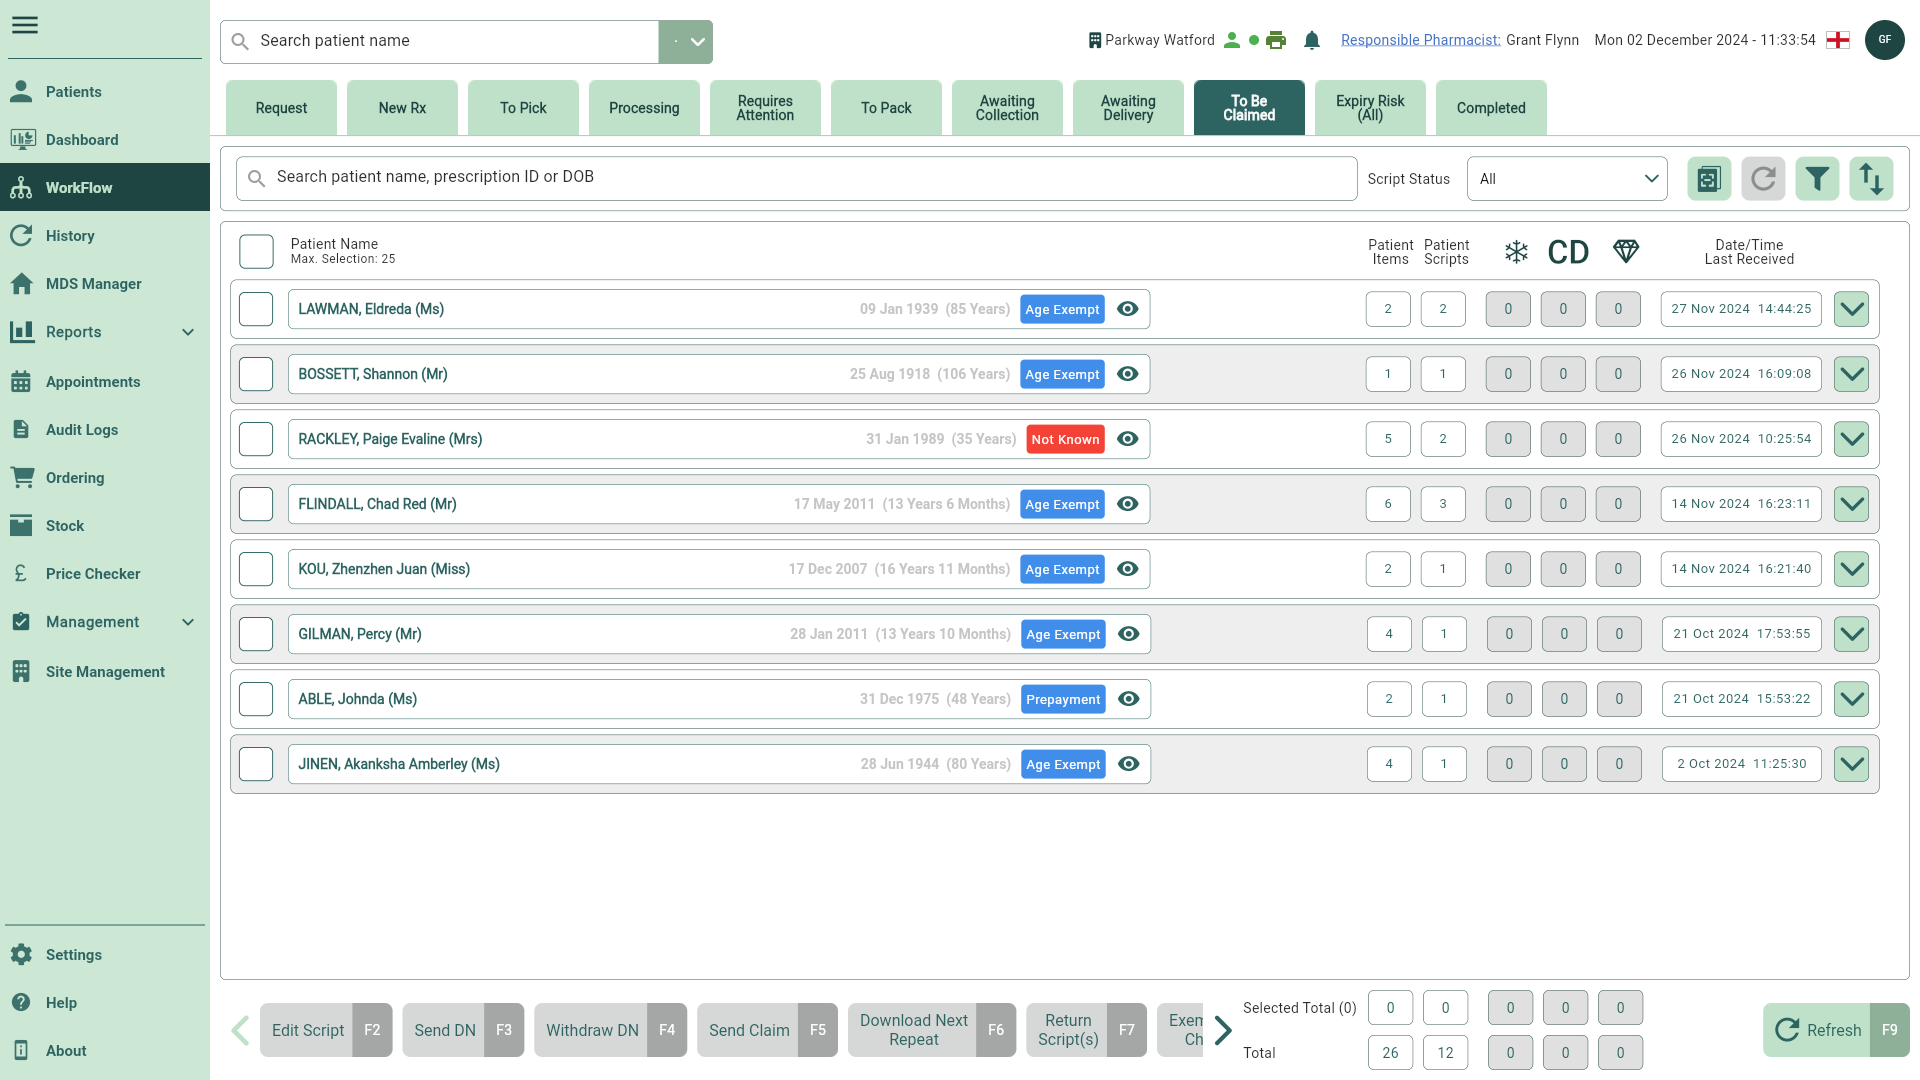
- Select your patient(s) and prescription(s), if required you can use the filters to refine the grid.
You can select multiple scripts to process as a batch or in batches of 25 by using the select all box. When prompted, you will need to confirm that you wish to send all dispense notifications before proceeding.
You can process prescriptions by selecting one patient at a time or by using the select all checkbox. If the number of selected patients exceeds the configured limit (max 25 by default), the function buttons will be disabled until enough patients have been deselected. When prompted, you will need to confirm that you wish to send all dispense notifications before proceeding. Learn more about Workflow settings using our Get to know Workflow article.
It may be necessary to refresh the tab to ensure that any recent updates to prescription statuses are displayed accurately.
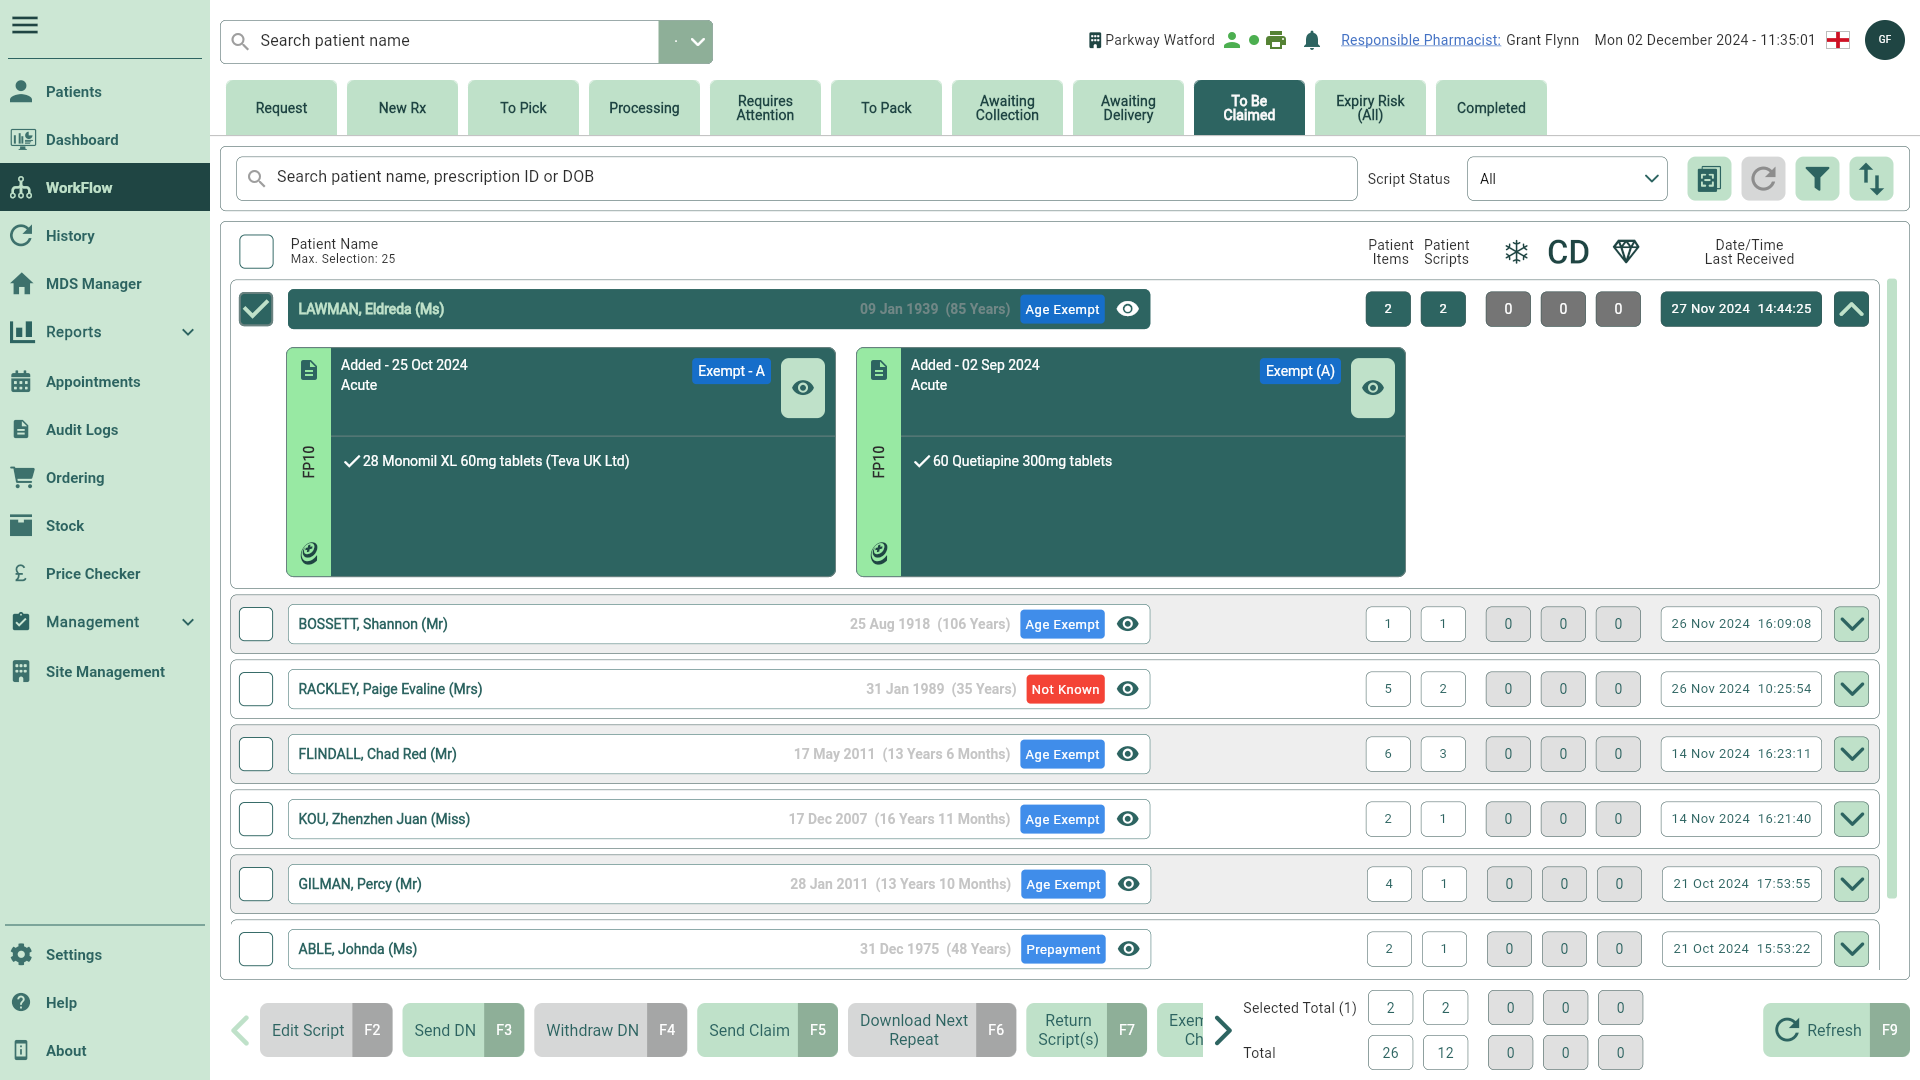
- Select the [Send DN - F3] button to send your dispense notification. The prescription widget will update confirming the dispense notification has been sent successfully.
Dispense Notifications cannot be submitted for prescriptions marked as Clinical check not completed. A prompt will display, requiring a clinical check to be performed before the claim can be submitted. Pharmacist level users can complete this task via the Clinical Check window, which can be accessed via the prompt.
Learn how to perform a clinical check in Workflow
When prompted, select the [Yes - F10] button to open the Clinical Check window.
All patients with scripts marked as Clinical check not completed are displayed.
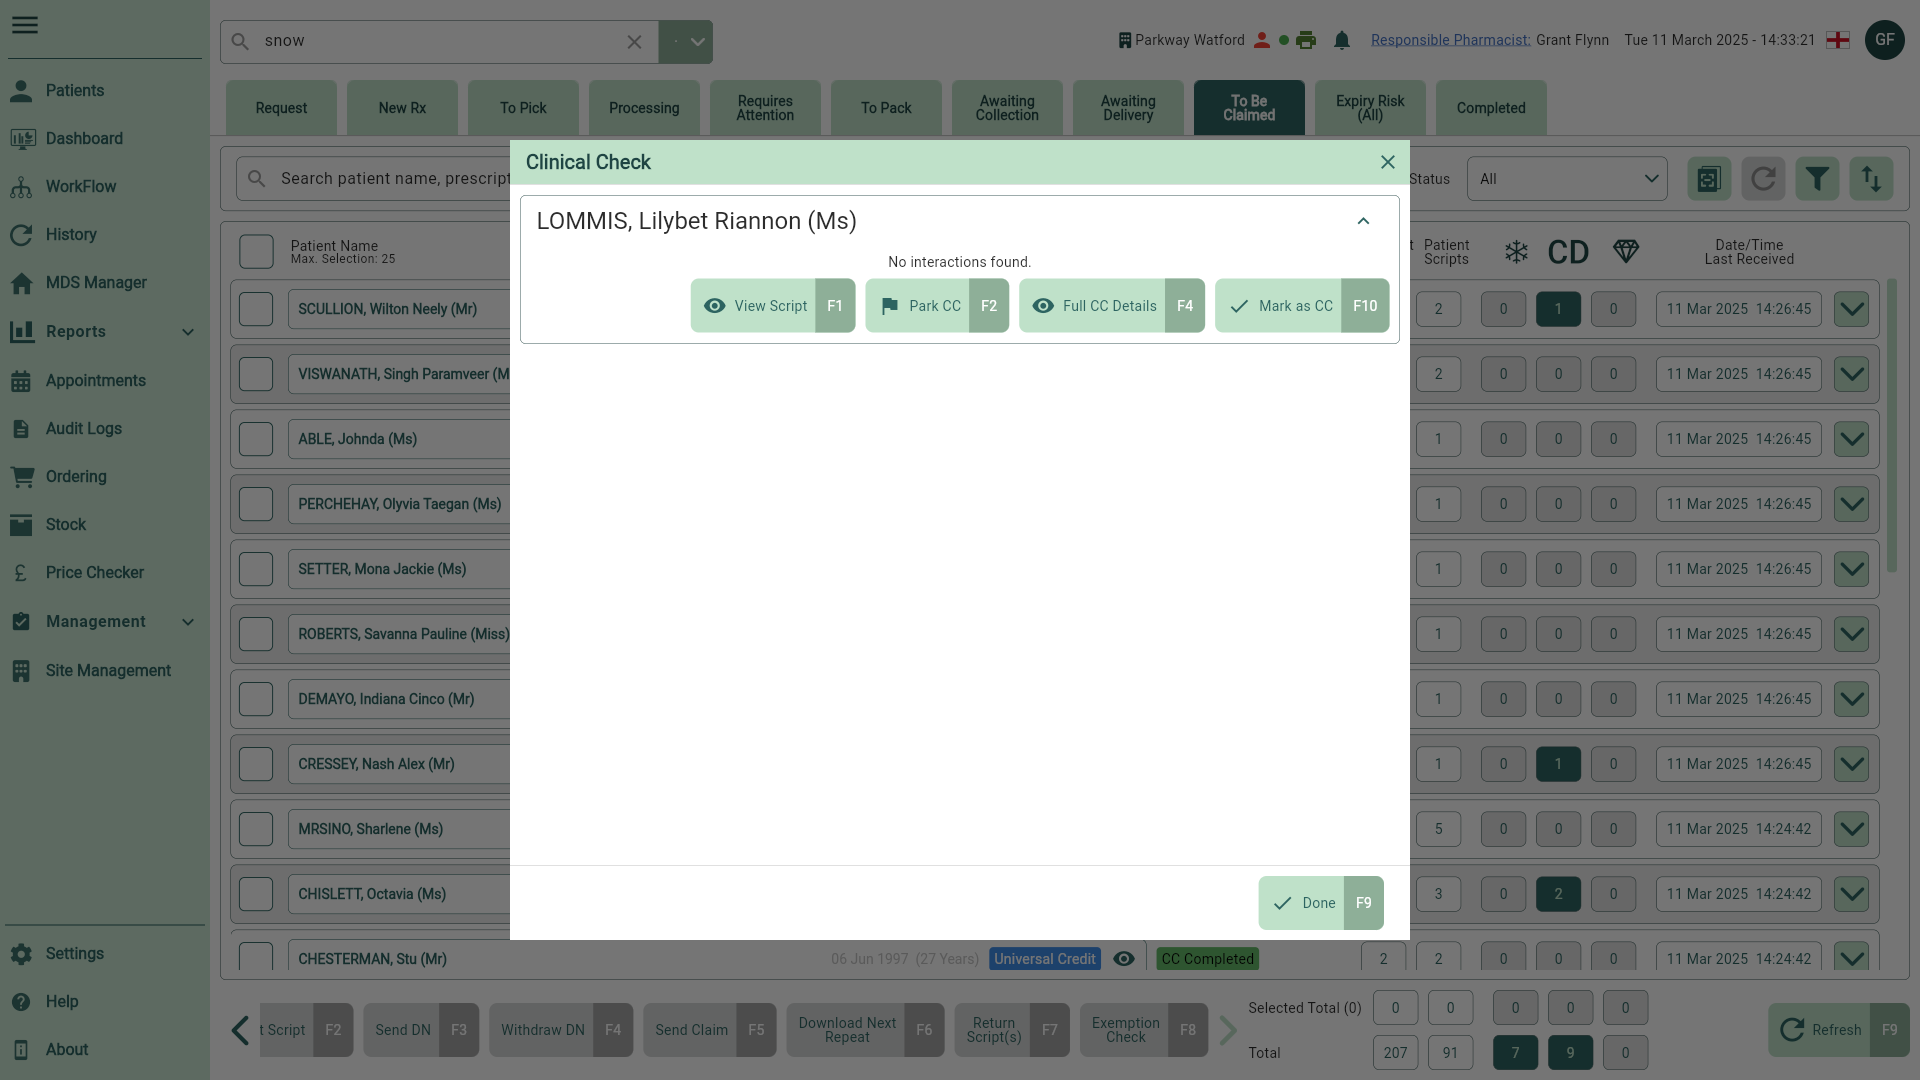
- If you are satisfied all checks are complete, or no alerts have been displayed, select the [Mark as CC - F10] button to complete the clinical check for your patient. A CC Completed badge will be applied and you will automatically be moved to the next patient.
In the Clinical Check window, you can select the [Full CC Details – F4] button for more information to support your clinical decision, or you can park the Clinical Check by selecting the [Park CC – F2] button to flag the script as Clinical check not complete. Additionally, you can view the script in full by selecting the [View Script - F1] button.
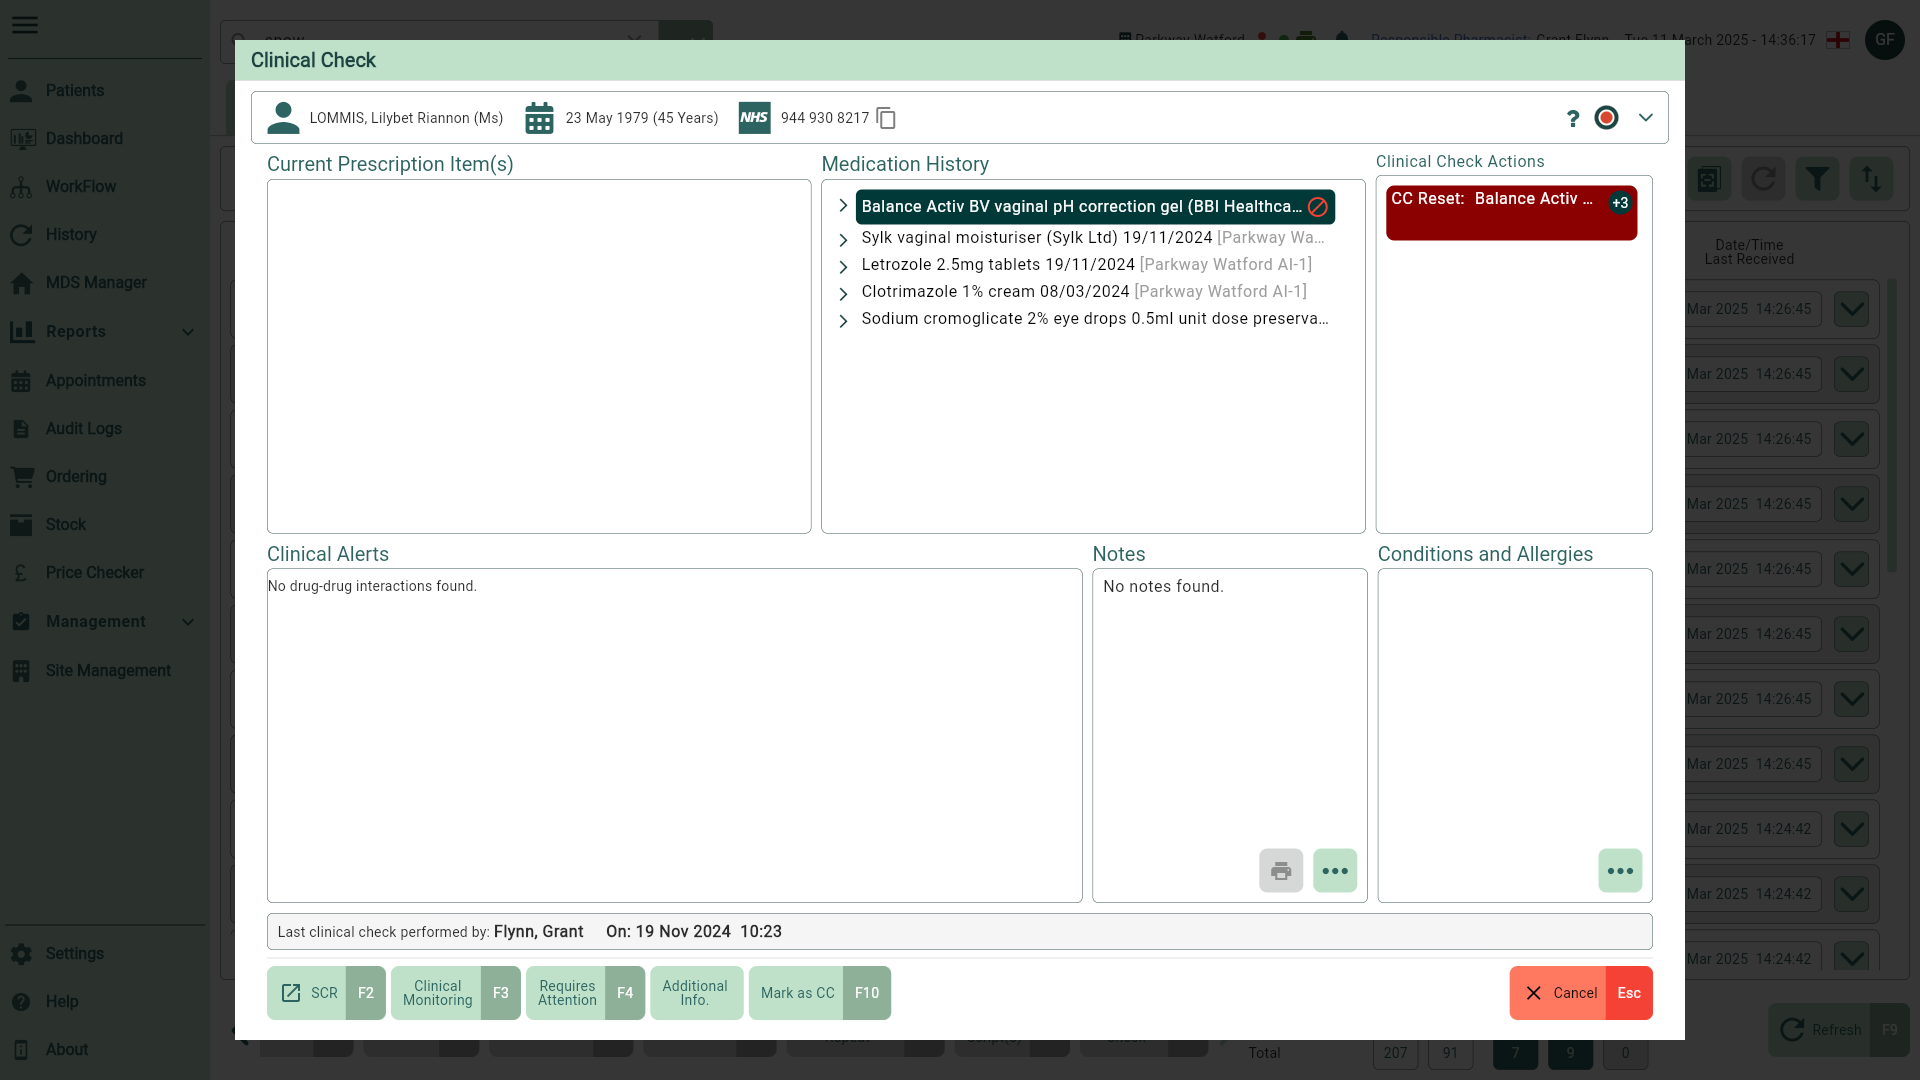
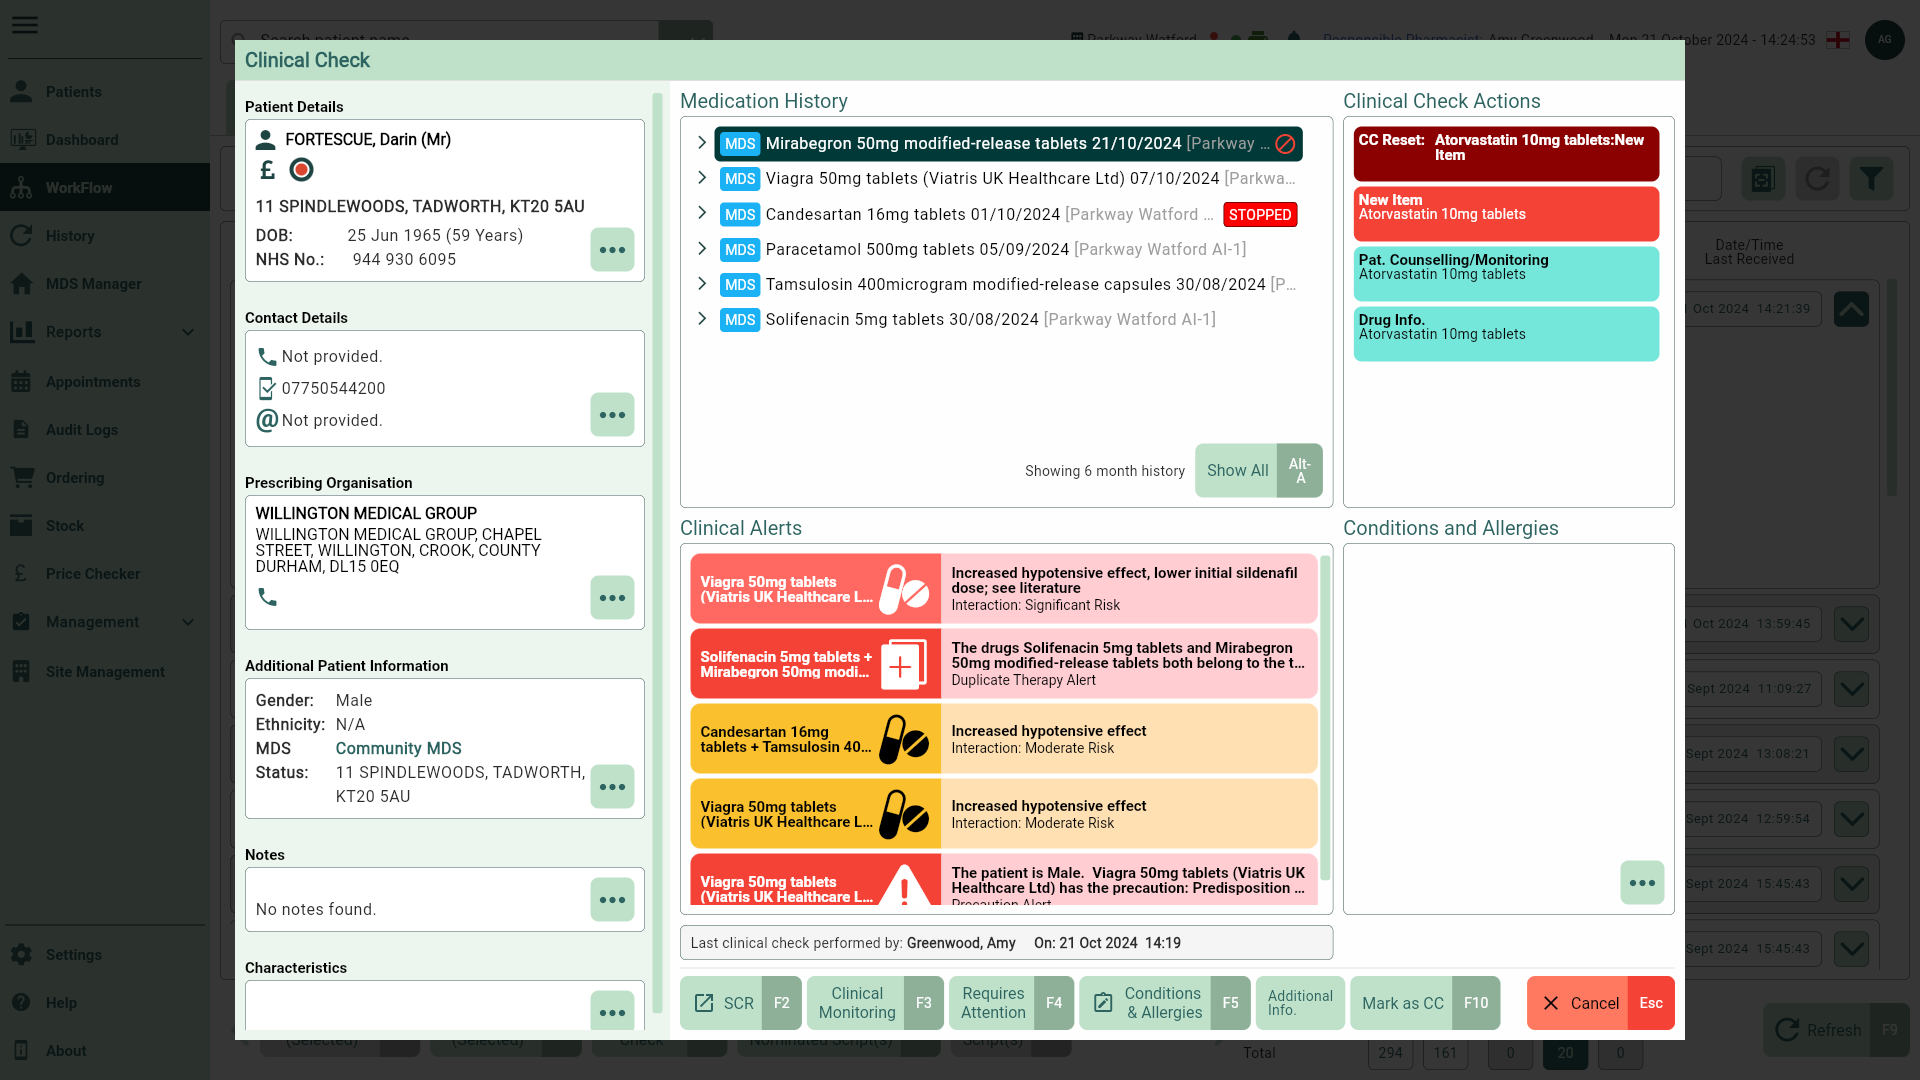
Our Clinical Check details window has been designed to give you all the information you need to make an informed clinical decision during dispensing. The overview displayed allows you to take a deeper look at the patient's details, Medication History, Conditions and Allergies, Clinical Alerts and Clinical Check Actions.
Note: Hover your cursor over the CC Reset action to see the action details in full as a tooltip.
- Once all clinical checks are complete, select the [Done - F9] button to close the Clinical Check window and return to the To Be Claimed tab. Your scripts are automatically added to the DN queue.
Prescriptions set with an exemption status of Not Known cannot be submitted for claims. You must edit the script to update the exemption before sending/resending the DN. You can learn more about editing prescriptions in our Editing prescriptions article.
Learn how to edit scripts with Not Known exemptions
EPS scripts with a Not Known exemption status must be amended to include a valid exemption status or to confirm that the patient is not exempt from charges before they can be successfully submitted for claims. Follow these steps to edit a script using the [Edit Script - F2] button accessible from various tabs within Workflow depending on status of the prescription you want to edit.
- Highlight the script you wish to edit, and select the [Edit Script - F2] button. The Edit Script window displays.
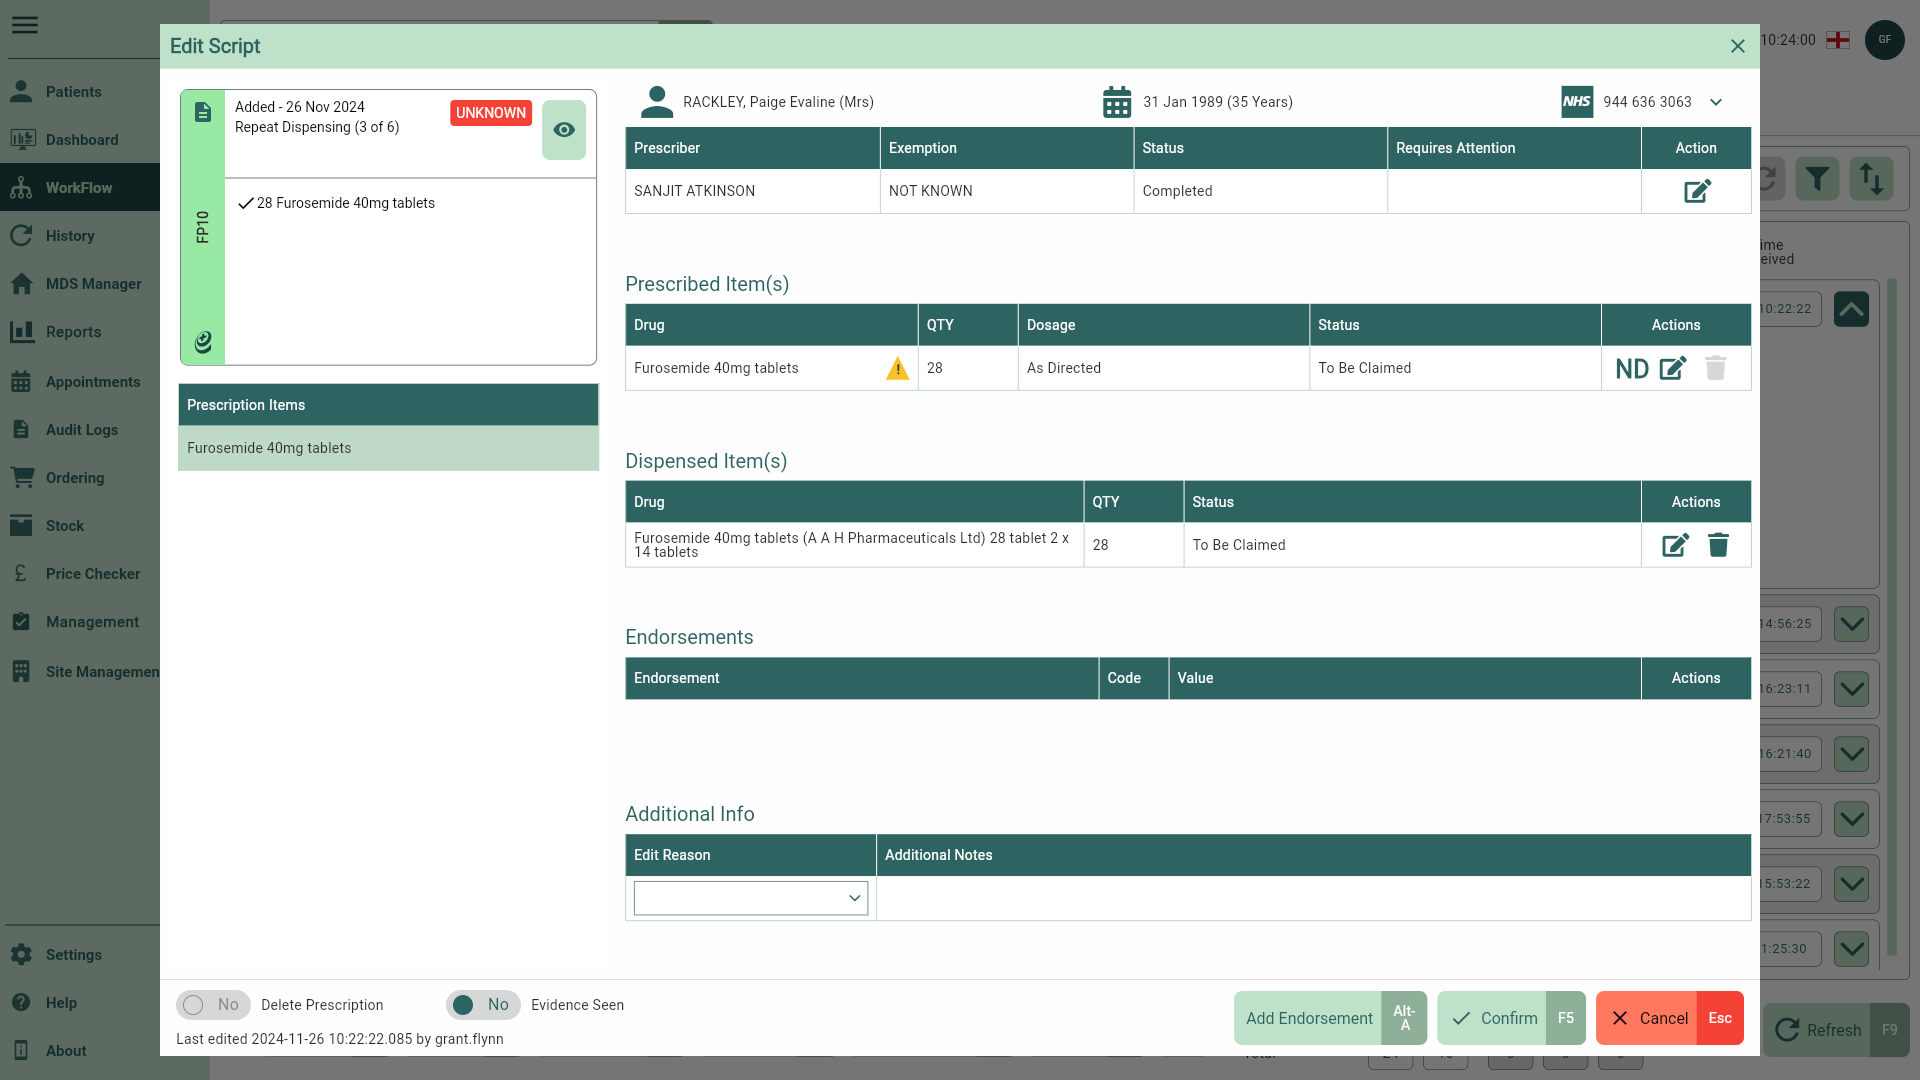
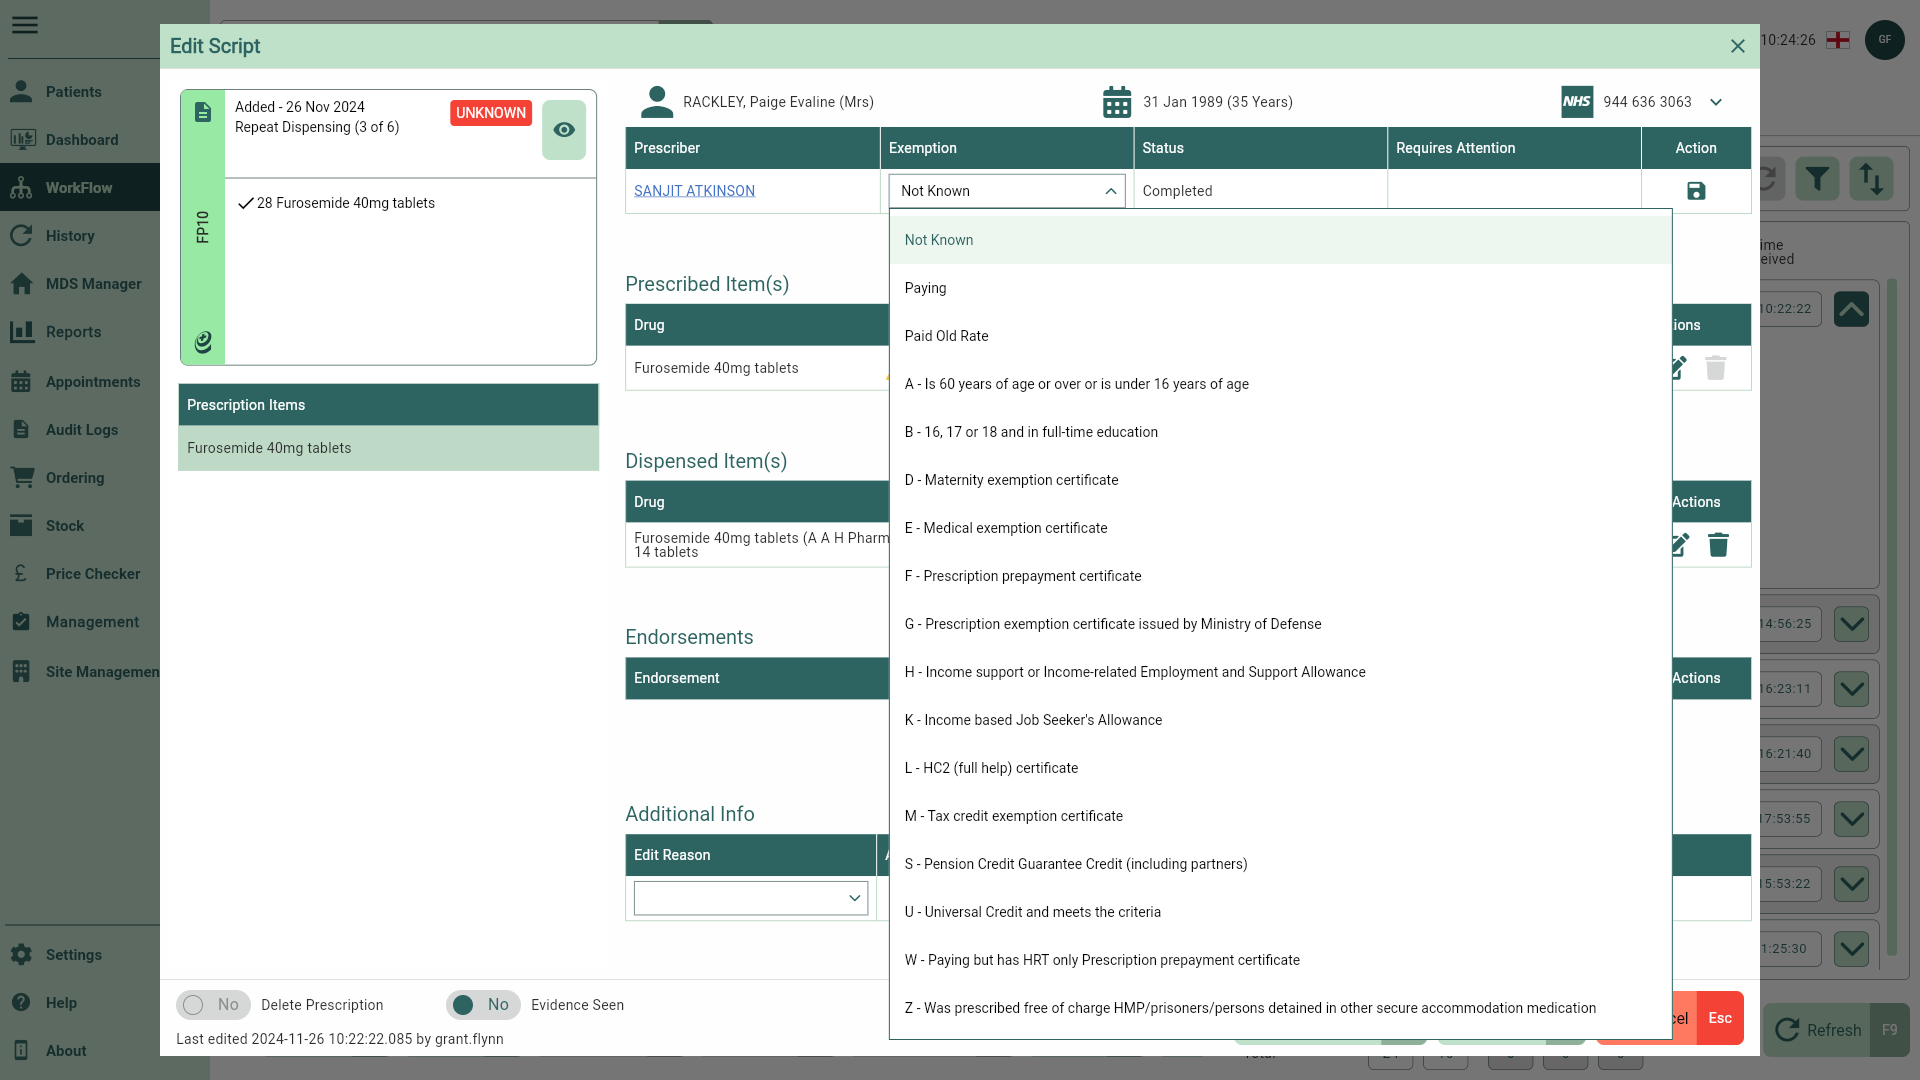
- Select the
 Edit icon in the Action column to enable the Exemption dropdown box where you can select the updated exemption.
- Once amended save your changes by selecting the
 Save icon. Some exemptions cannot be edited, e.g., free-of-charge contraceptives, and you may need to authenticate a valid NHS smartcard to make this change, depending on the status of your prescription. If you have previously dispensed prescriptions for the patient, you will be prompted to update the exemption on these as well as the patient record when editing the exemption on one prescription.
 - Confirm your changes by selecting the [Confirm - F5] button. With the exemption status updated, the DN can now be submitted/re-submitted.
Note: You can learn more about editing patient details in our Editing patients article.
Sending dispense notifications (DNs) using Batch Scan
Use the Batch Scan functionality in Workflow to scan tokens and send dispense notifications as a batch. You can access the Batch Scan function from the following tabs in Workflow:
- New Rx
- To Be Claimed
You will need to authenticate a valid NHS smartcard before you can send dispense notifications. You can learn how to authenticate your smartcard in our Smartcard authentication article.
- To begin, select the To Be Claimed tab in Workflow by selecting Workflow from the left-nav and the To Be Claimed tab.

- Select the
 Batch Scan icon. The Batch Scan window displays.
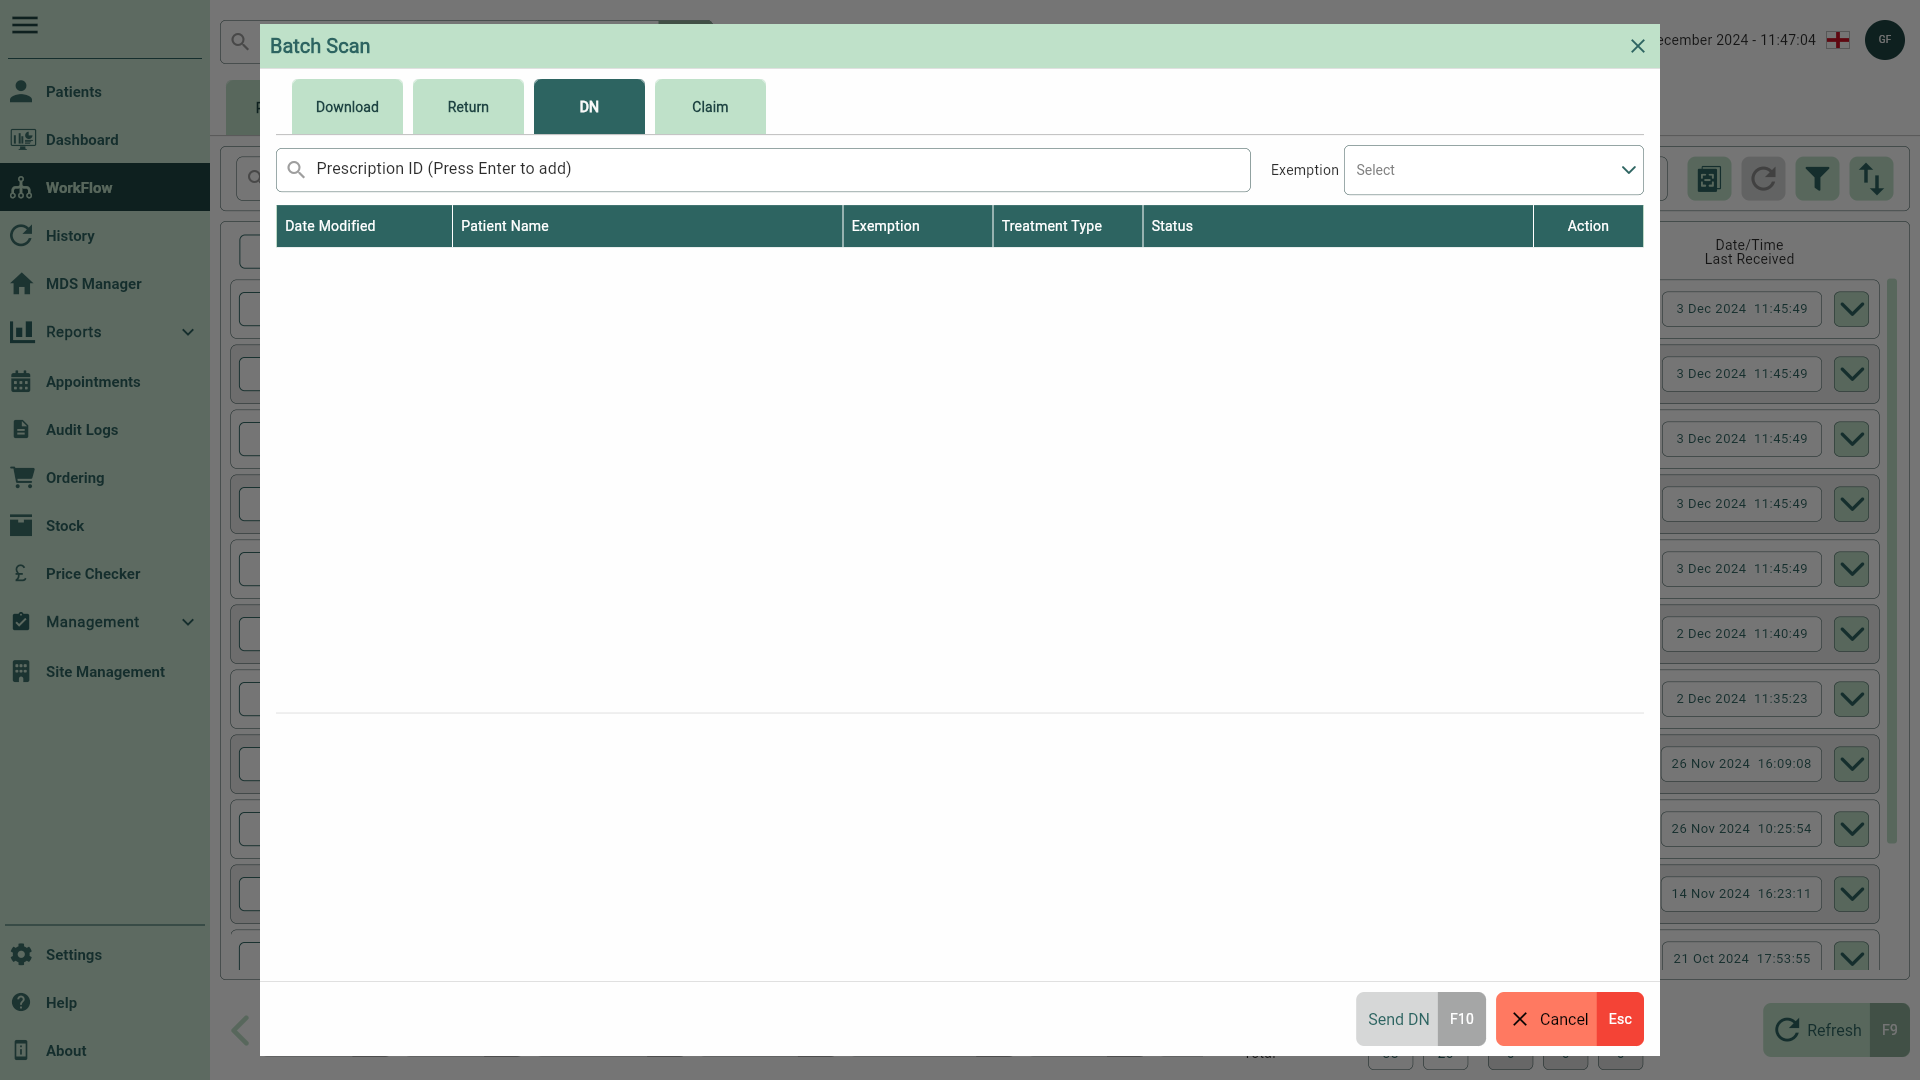
- By default, the DN tab is selected. Start scanning your tokens. Each prescription will display in the grid. You can perform the following actions using the fields below:
If you are unable to scan the prescription, you can type the Prescription ID into the Prescription ID search field and press [Enter] on the keyboard.
| Field | Description |
|---|---|
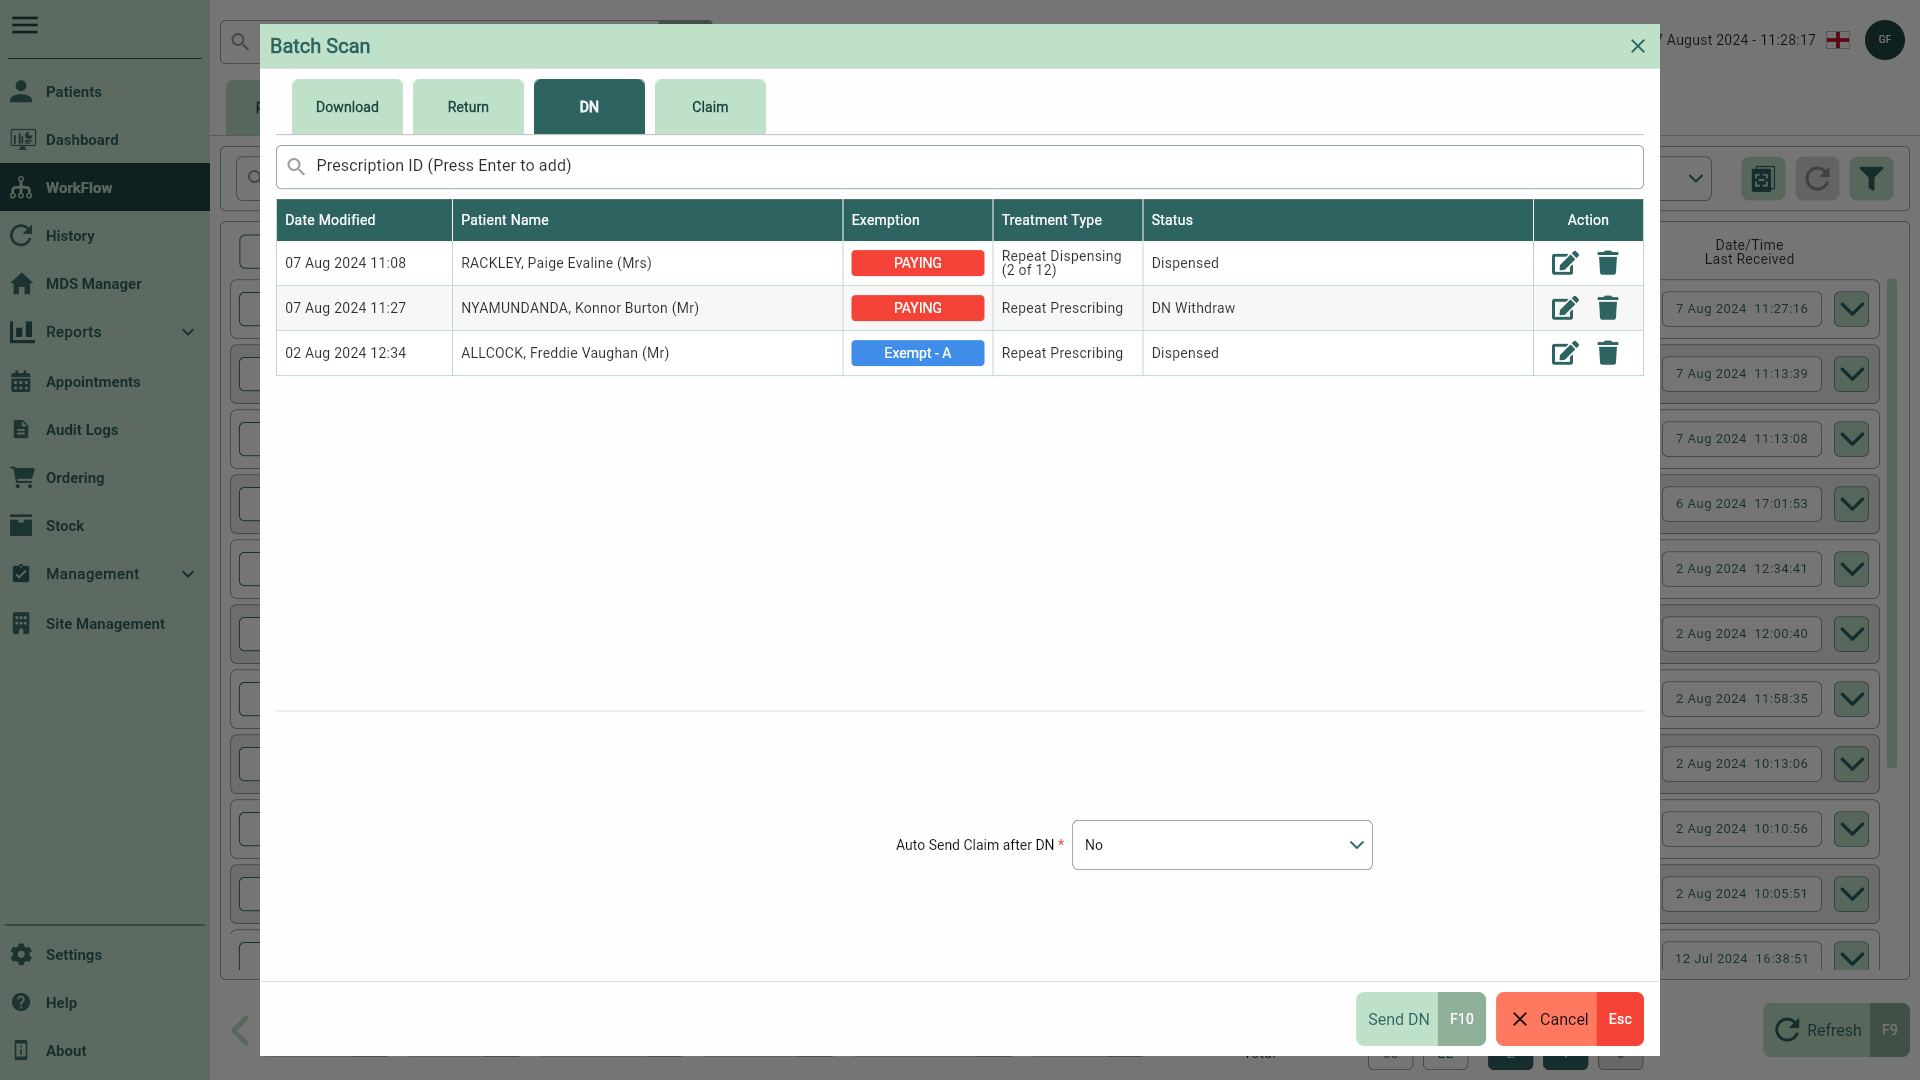
| Grid | At a glance, you can view the date the script was added/modified, the Patient Name, Exemption, Treatment Type and prescription status. Within the Actions column you can:
|
| Auto Send Claim after DN | Set to No by default. Select an option from the Auto Send Claim after DN dropdown. This field is mandatory, and will apply to all scanned scripts. You cannot proceed until this field is complete. |
| Prescription widget | Highlight a scanned script within the grid to display a prescription widget (or prescription box) to display all the useful information pertaining to an individual prescription, including the item(s) it contains, the prescription type and the date it was added.You can view the prescription in full by selecting the  View icon button and any EPS logs by selecting the View icon button and any EPS logs by selecting the  Note icon. Note icon. |
| [Send DN - F10] | Select to send your dispense notification(s) for the scanned script(s). |
| [Cancel - Esc] | Select to cancel and close the window. |
 Delete icon to remove the prescription from the grid.
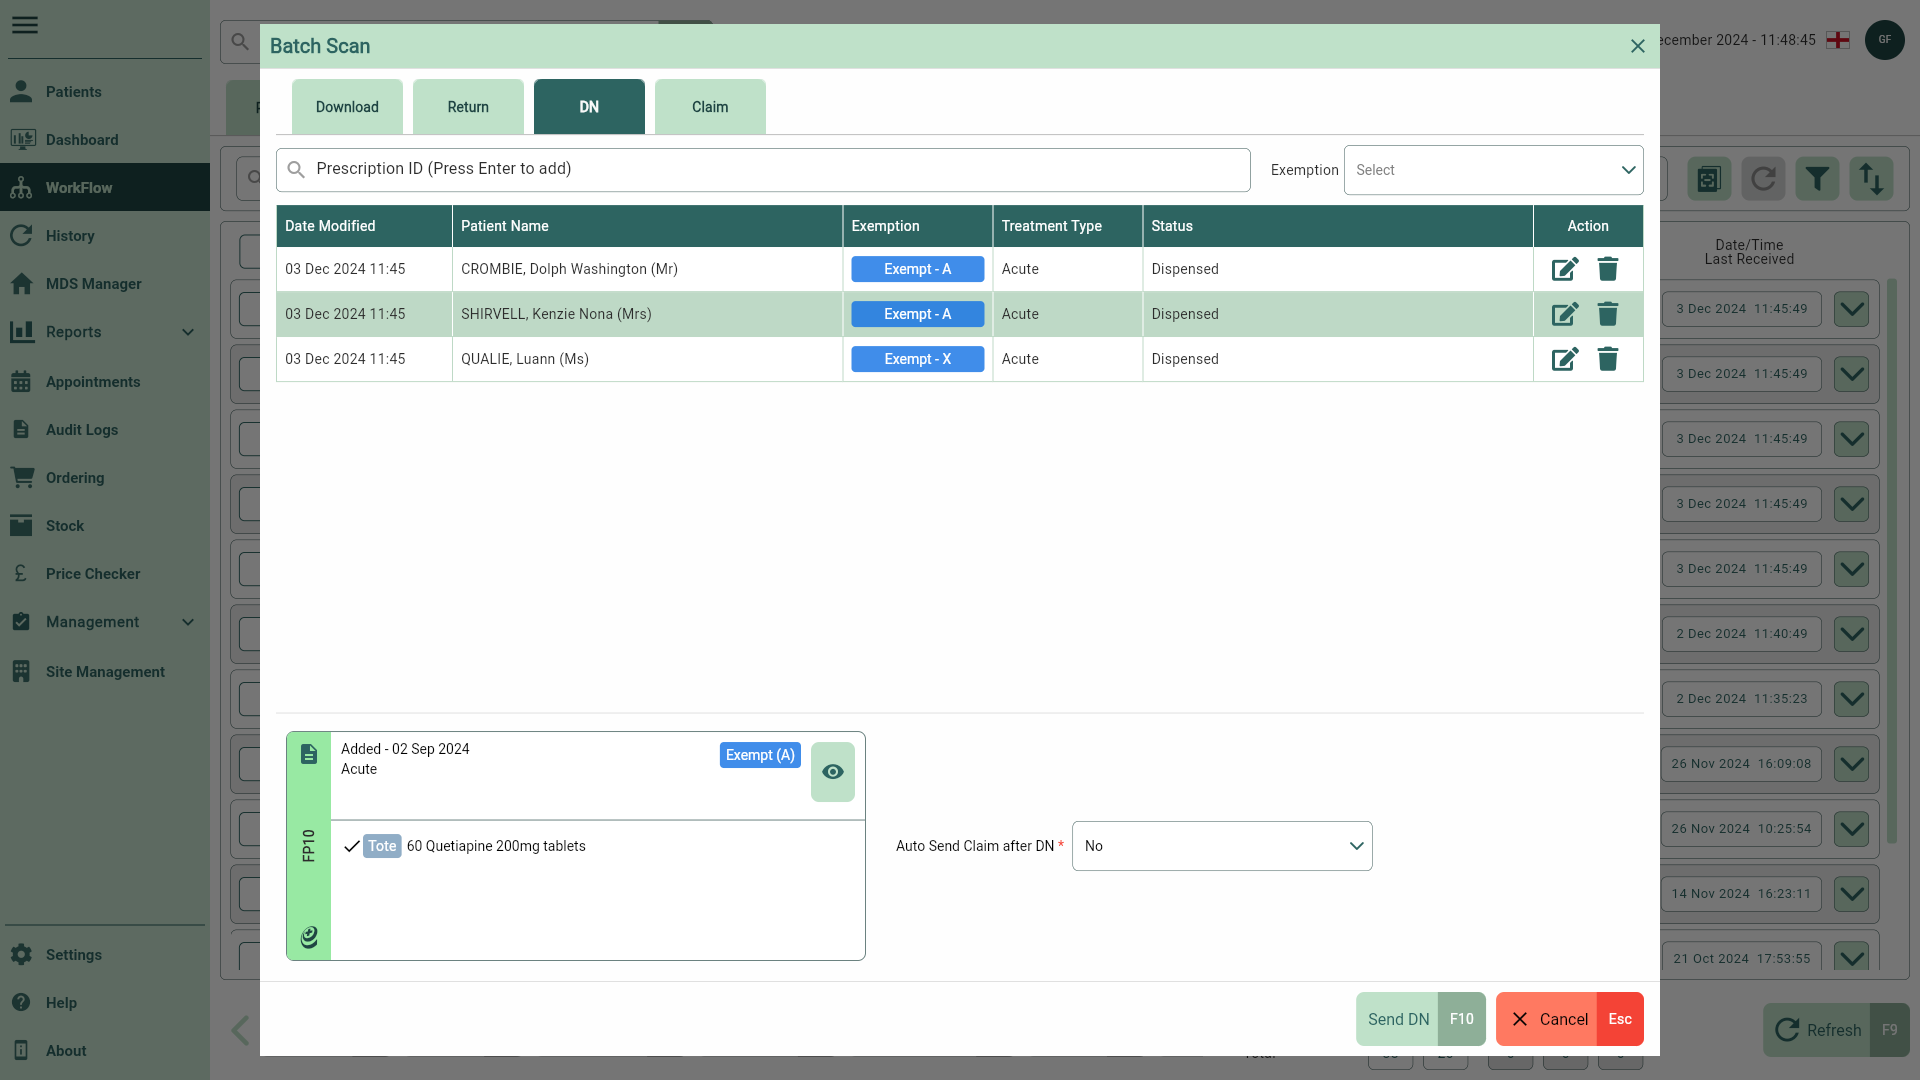
- Once you've finished scanning your token(s) Select the [Send DN - F10] button to send your dispense notification(s). A snackbar displays to confirm the scripts have been added to the DN queue.
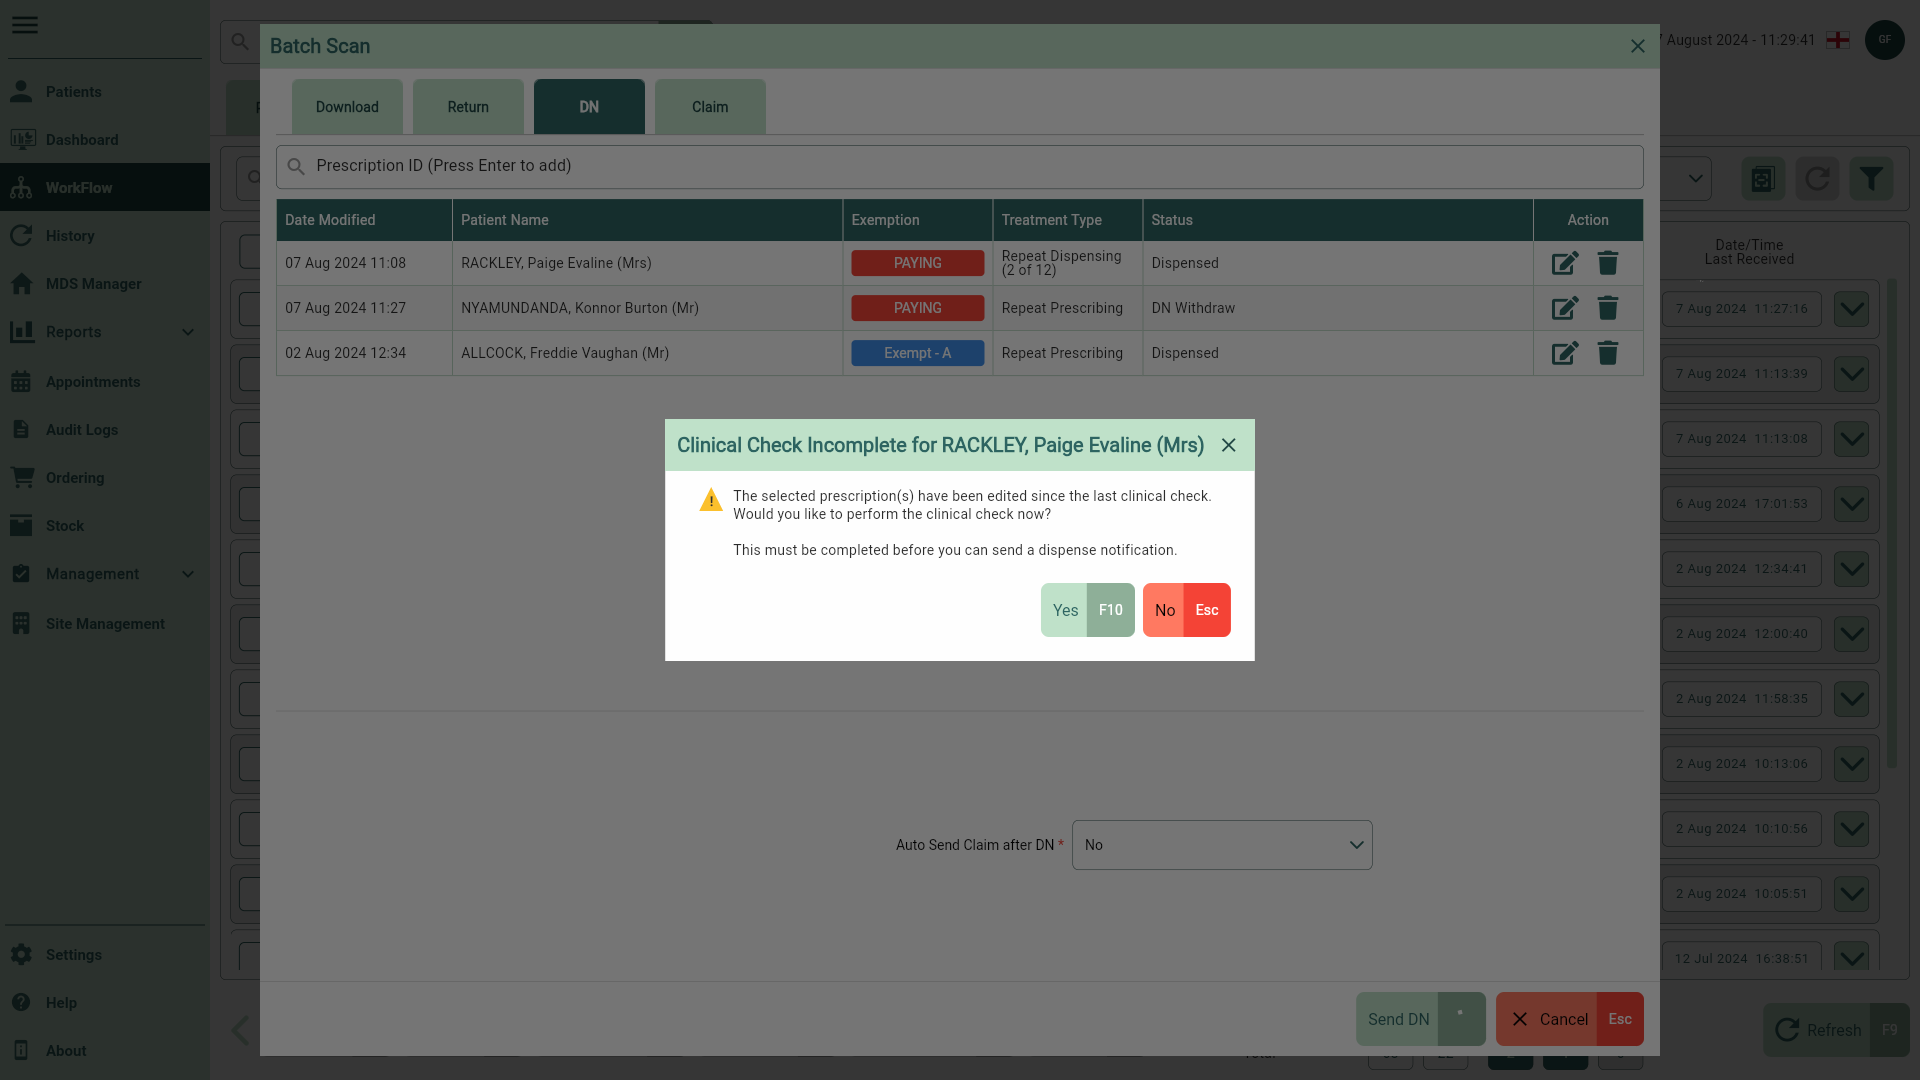
- Dispense Notifications cannot be submitted for prescriptions marked as Clinical check not completed. A prompt will display, requiring a clinical check to be performed before the DN can be submitted. Pharmacist level users can complete this task via the Clinical Check window, which can be accessed via the prompt.
- Prescriptions with an exemption status of Not Known cannot be submitted for claims. You must edit the script to update the exemption before sending/resending the DN. When sending batch DNs, eligible scripts are processed and submitted as usual, while scripts with the Not Known exemption status are flagged. A prompt will display, asking if you wish to review these flagged scripts before submitting the DNs. Alternatively, you can review all flagged scripts in the Requires Attention tab with the reason Exemption marked as not known.
- Once your DNs have been sent the prescription widget will update confirming the dispense notification has been sent successfully.
Learn how to perform a clinical check via Batch Scan
Once all scripts are scanned, select the [Send DN – F10] button to send your dispense notifications.
- The Clinical Check Required prompt will display for any script flagged as Clinical check not completed. When prompted, select the [Yes - F10] button to open the Full Clinical Check Details window.
- If you are satisfied all checks are complete, or no alerts have been displayed, select the [Mark as CC - F10] button to complete the clinical check for your patient.
Our Clinical Check details window has been designed to give you all the information you need to make an informed clinical decision during dispensing. The overview displayed allows you to take a deeper look at the patient's details, Medication History, Conditions and Allergies, Clinical Alerts and Clinical Check Actions.
Note: Hover your cursor over the CC Reset action to see the action details in full as a tooltip.
- The Batch Scan window closes once all checks are complete, and your scripts are automatically added to the DN queue.