Creating owings
If you are unable to fully or partially meet the demand for a specific item, you can create a full or partial owing.
During the Picking step, proceeding with Remaining Quantity against any item will require you to create an owing or mark the item as Not Dispensed.
Creating a full owing
If you are unable to fulfil items on the prescription, you will need to create a full owing.
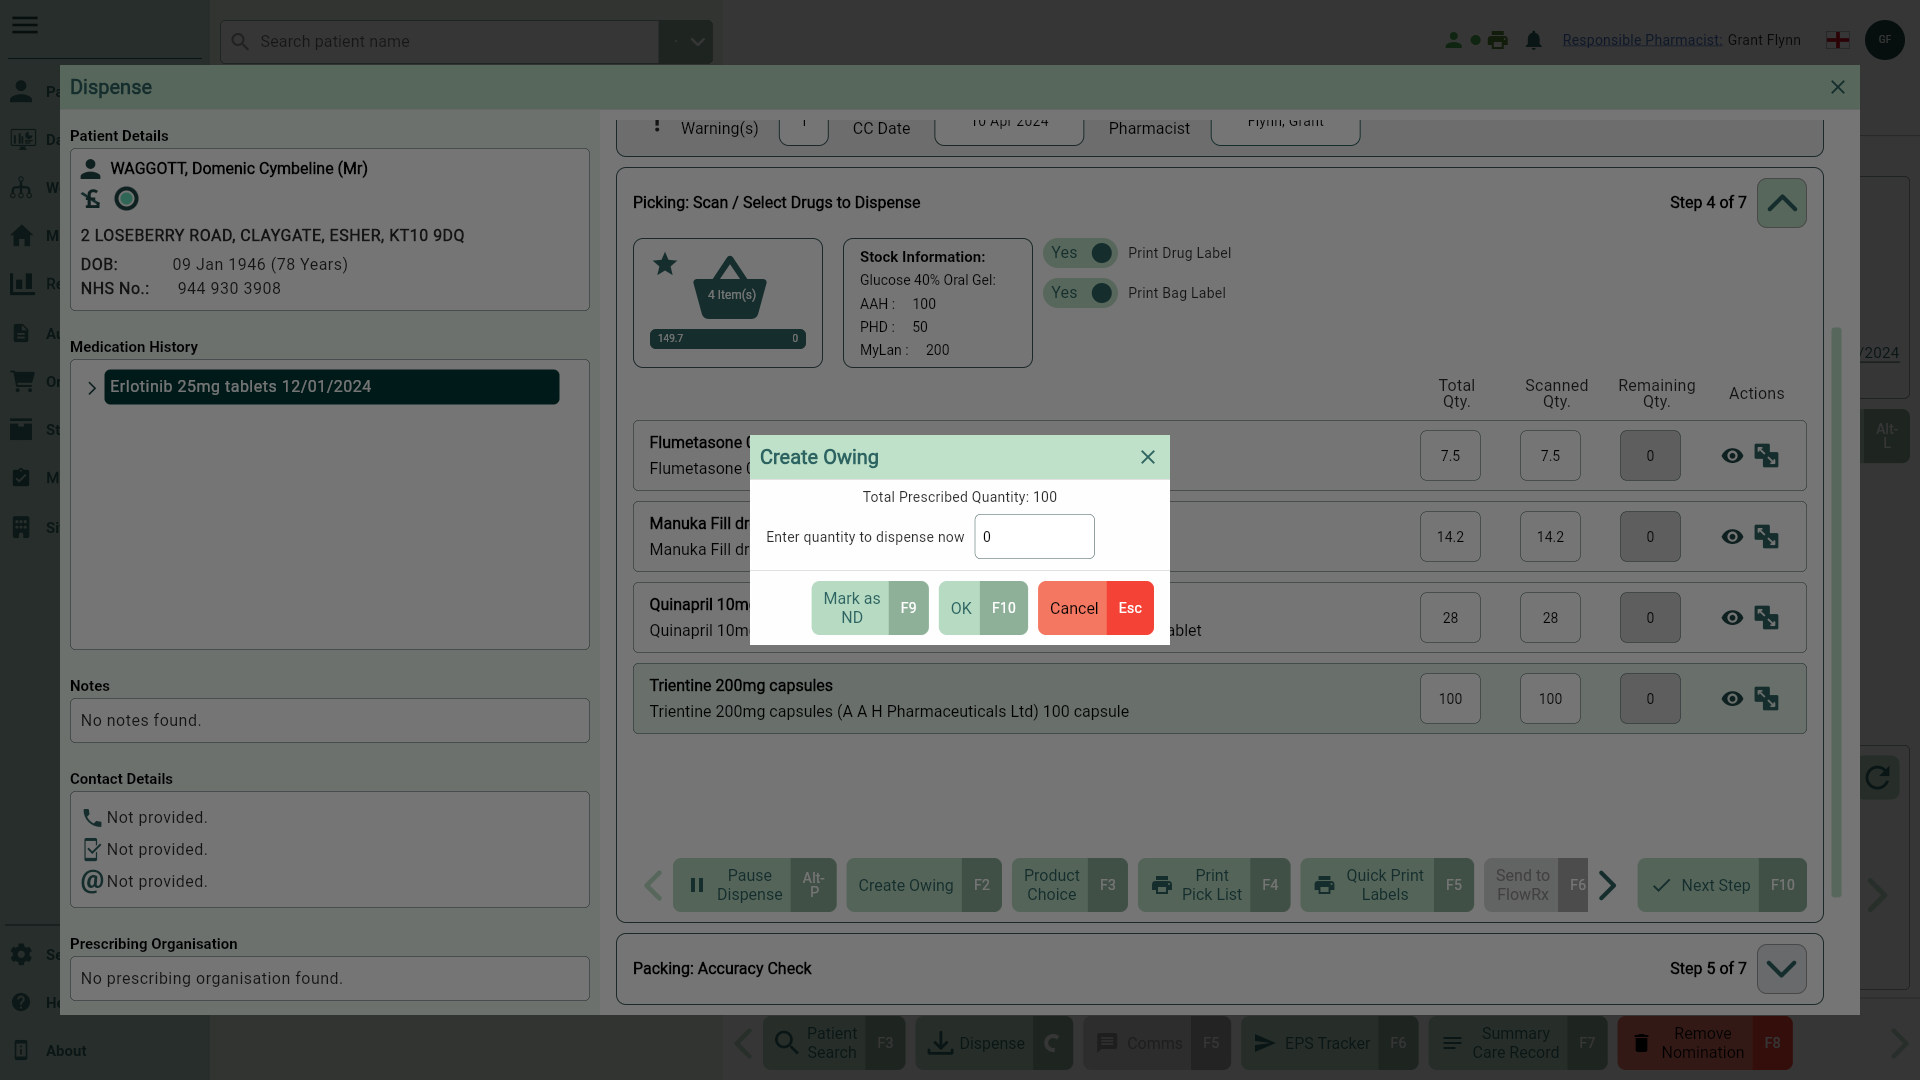
- Start by highlighting your item at the Picking step of the Dispensing Wizard, then select the [Create Owing - F2] button.
- A Create Owing prompt displays asking you to enter the quantity you are dispensing now. Enter 0 to create a full owing and select the [OK - F10] button.
If required you can select the [Mark as ND - F9] button and mark the item as Not Dispensed.
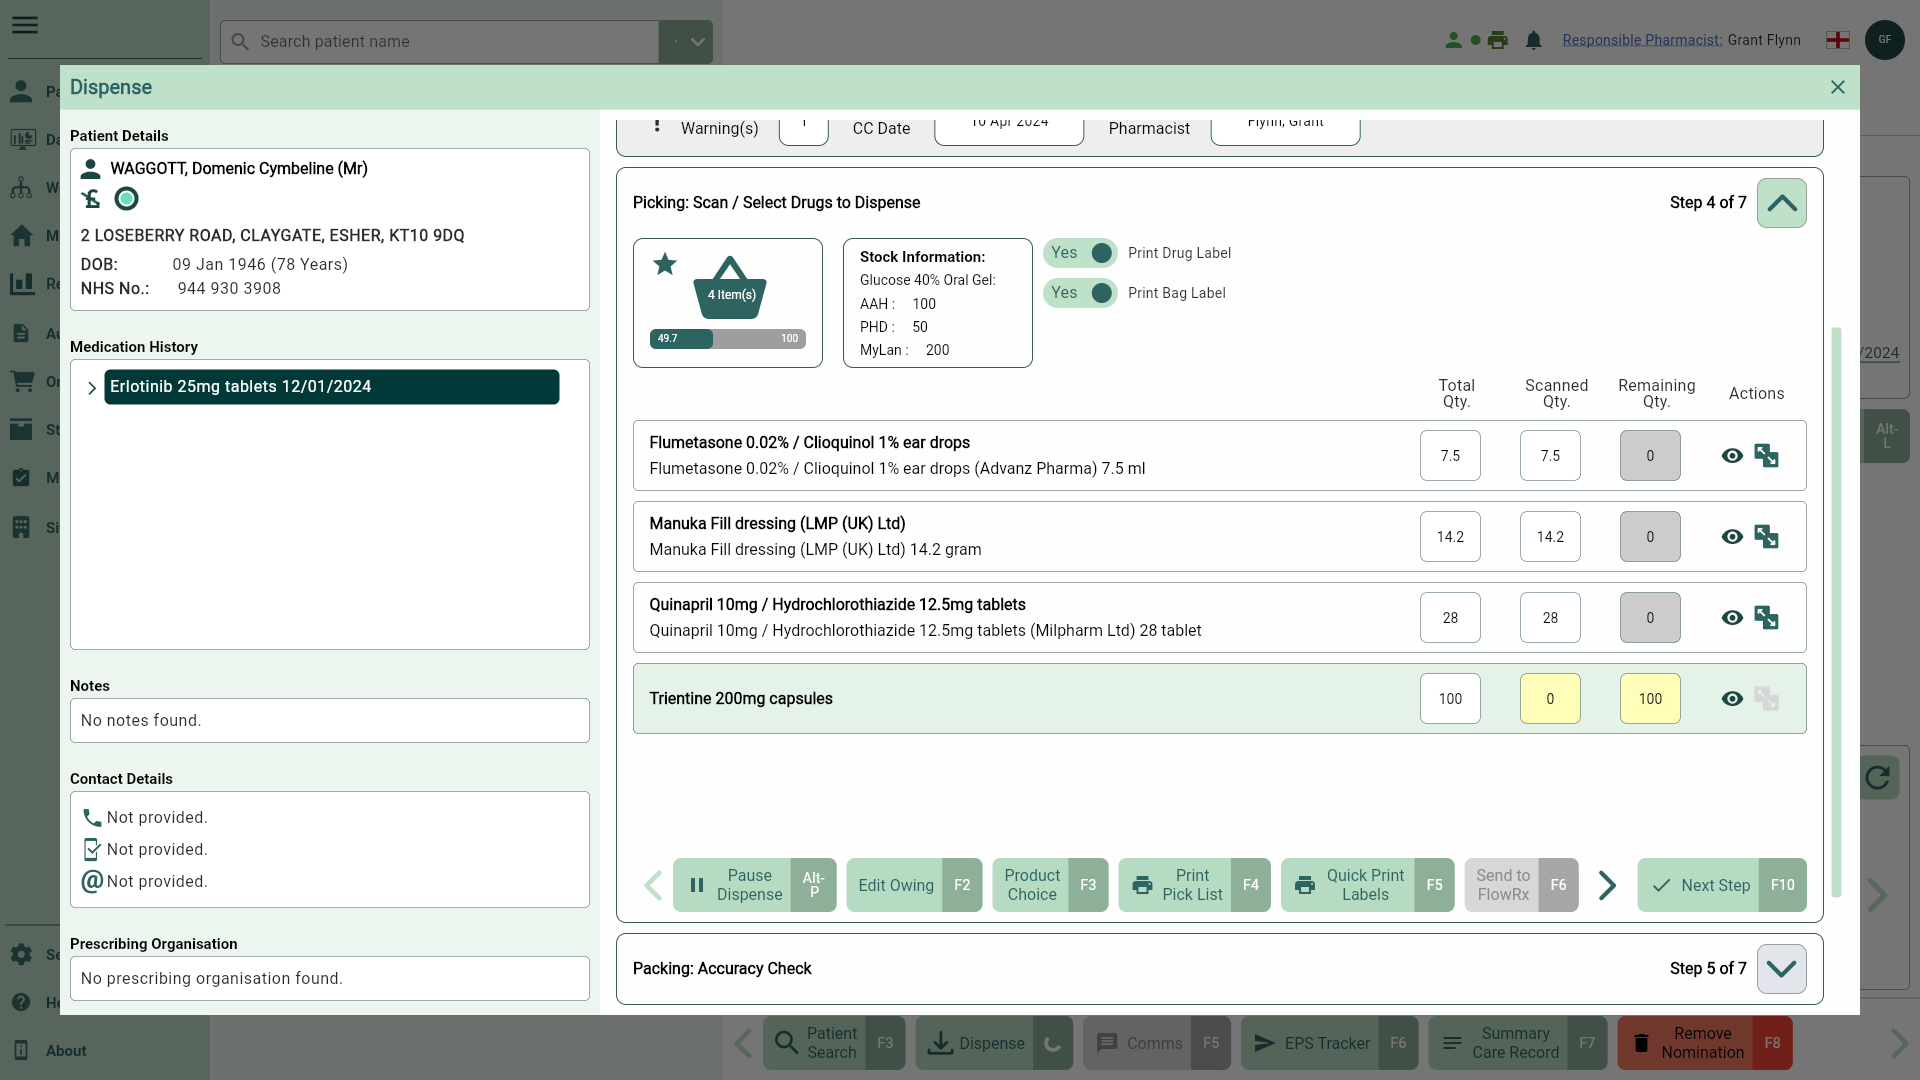
- The Scanned Qty and Remaining Qty fields update to reflect the full owing. The picking basket will not update for fully owed item(s). Select the [Next Step - F10] button to continue through the Dispensing Wizard.
- You can edit your owing at this step using the [Edit Owing - F2] button if required.
- Select the [Label Split - F9] button or the
 Label Split icon in the Actions column if you need to change the number of labels being printed. This will open the Label Split window. You can print the total dispensed quantity on a single label, split the quantity over several labels or add extra labels if required.
Learn how to amend the number of labels being printed from the Label Split window
If you need to split the dispensed quantity across multiple labels, or add extra labels follow steps below:
- Highlight the item in the Picking list and then select the [Label Split – F9] button or the adjacent Label Split icon in the Actions column. The Label Split window displays.

Each standard label is represented in a single row with a quantity to be printed. You can add an extra label by selecting the  Add icon, with the total number of additional labels shown in the totals summary. To reduce the extra label count by one, select the
  Minus icon. To remove a row, select the
  Delete icon. Note: the Delete icon is disabled if only one label remains in the grid.
From here, use the available function keys to manage your label preferences:
[Single – F1]: Select to print the total quantity onto one label.
[Split – F2]: Add an additional row to the grid, the total quantity is 'split' and divided by the total number of rows.
[No. of Labels – F3]: Select to manually enter a numerical value which will then automatically split the total quantity across the labels accordingly.
[Move Last Up – F4]: The removed quantity will be added to the total to the row above. The [Move Last Up - F4] button is disabled when only one label is displayed in the grid.
[Extra Label – F5]: Adds an extra label to the selected row. The total number of extra labels are indicated in the totals summary.
- Confirm your selection using the [Confirm - F10] button.
Creating a partial owing
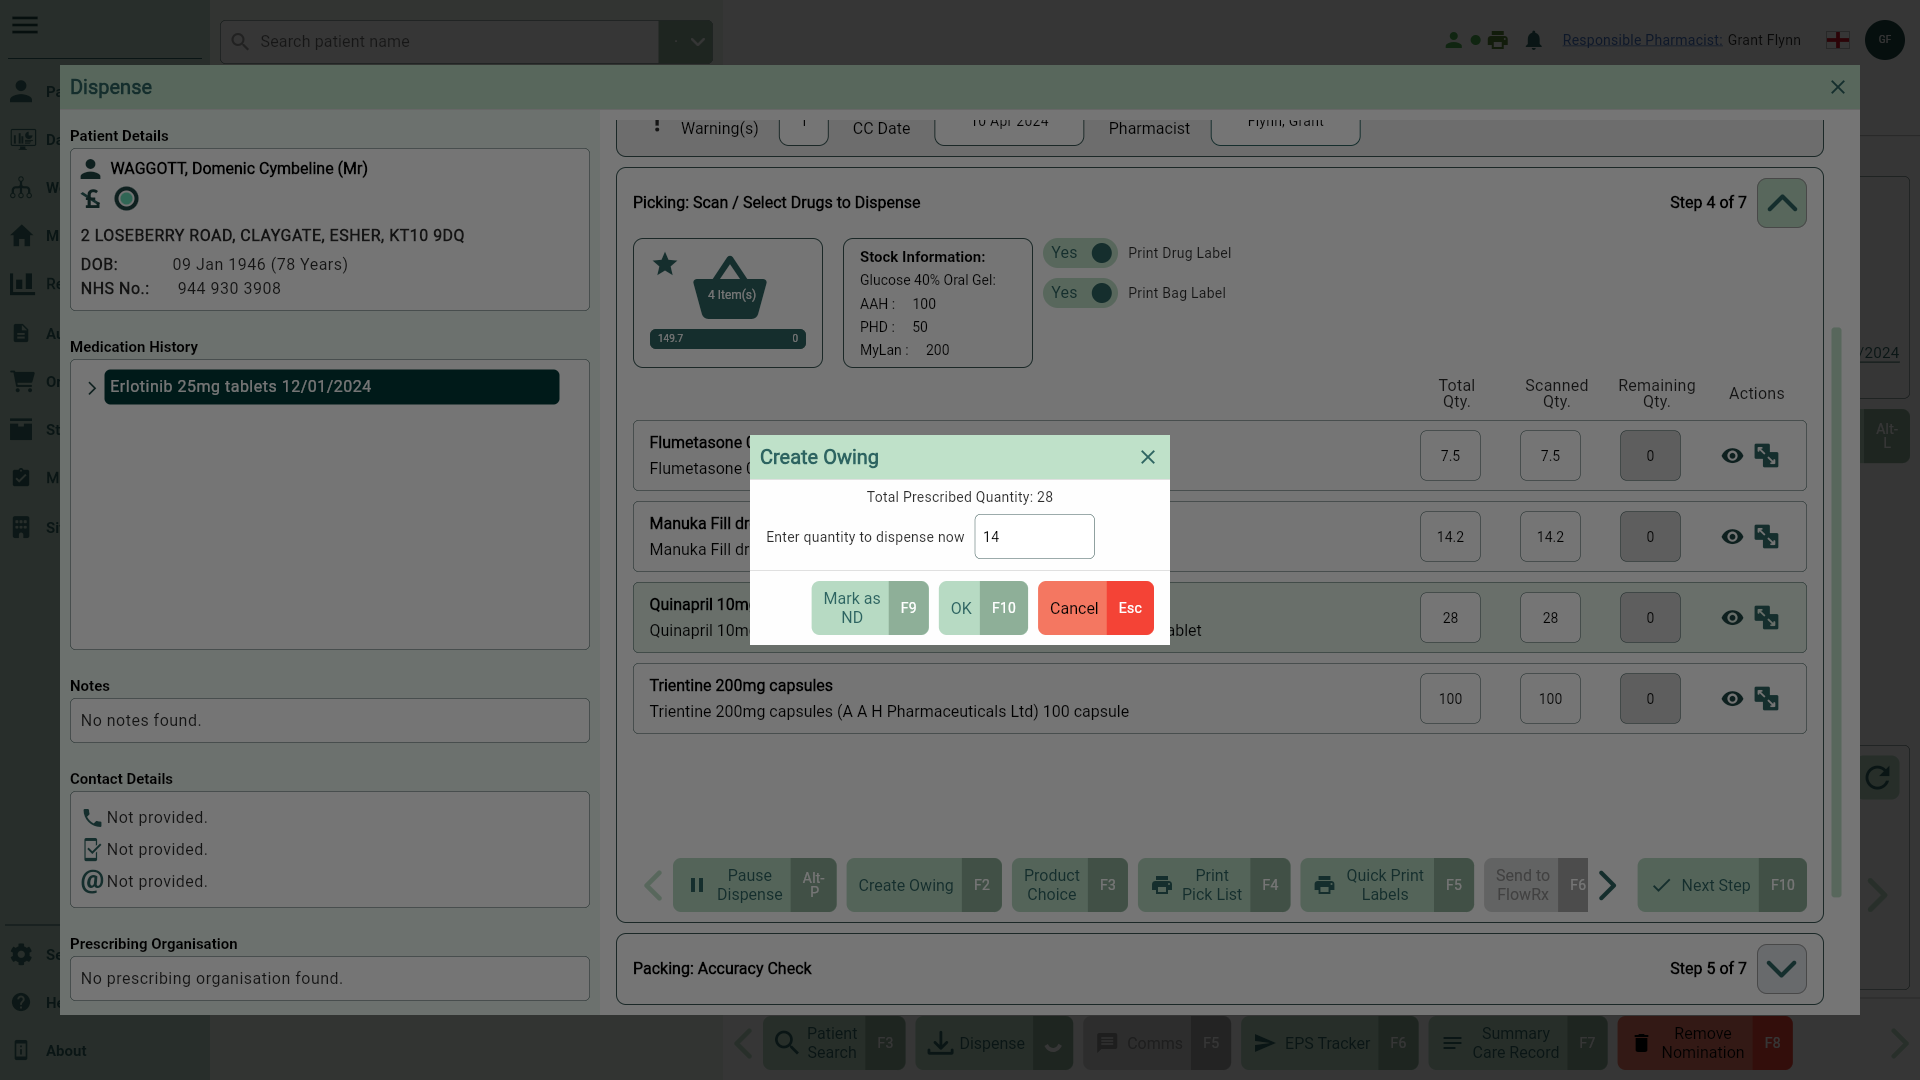
- To begin, highlight your item at the Picking step of the Dispensing Wizard, then select the [Create Owing - F2] button.
- A Create Owing prompt displays. Enter the partial quantity you are dispensing now and select the [OK - F10] button.
- The Scanned Qty and Remaining Qty fields update to reflect the partial owing. Select the [Next Step - F10] button to continue through the Dispensing Wizard.
- You can edit your owing at this step using the [Edit Owing - F2] button if required.
- Select the [Label Split - F9] button or the Label Split icon in the Actions column if you need to change the number of labels being printed. This will open the Label Split window. You can print the total dispensed quantity on a single label, split the quantity over several labels or add extra labels if required.
Learn how to amend the number of labels being printed from the Label Split window
If you need to split the dispensed quantity across multiple labels, or add extra labels follow steps below:
- Highlight the item in the Picking list and then select the [Label Split – F9] button or the adjacent Label Split icon in the Actions column. The Label Split window displays.
Each standard label is represented in a single row with a quantity to be printed. You can add an extra label by selecting the Add icon, with the total number of additional labels shown in the totals summary. To reduce the extra label count by one, select the Minus icon. To remove a row, select the Delete icon. Note: the Delete icon is disabled if only one label remains in the grid.
From here, use the available function keys to manage your label preferences:
[Single – F1]: Select to print the total quantity onto one label.
[Split – F2]: Add an additional row to the grid, the total quantity is 'split' and divided by the total number of rows.
[No. of Labels – F3]: Select to manually enter a numerical value which will then automatically split the total quantity across the labels accordingly.
[Move Last Up – F4]: The removed quantity will be added to the total to the row above. The [Move Last Up - F4] button is disabled when only one label is displayed in the grid.
[Extra Label – F5]: Adds an extra label to the selected row. The total number of extra labels are indicated in the totals summary.
- Confirm your selection using the [Confirm - F10] button.

Creating a partial owing from the Product Choice window
A partial owing can be created from the Product Choice window.
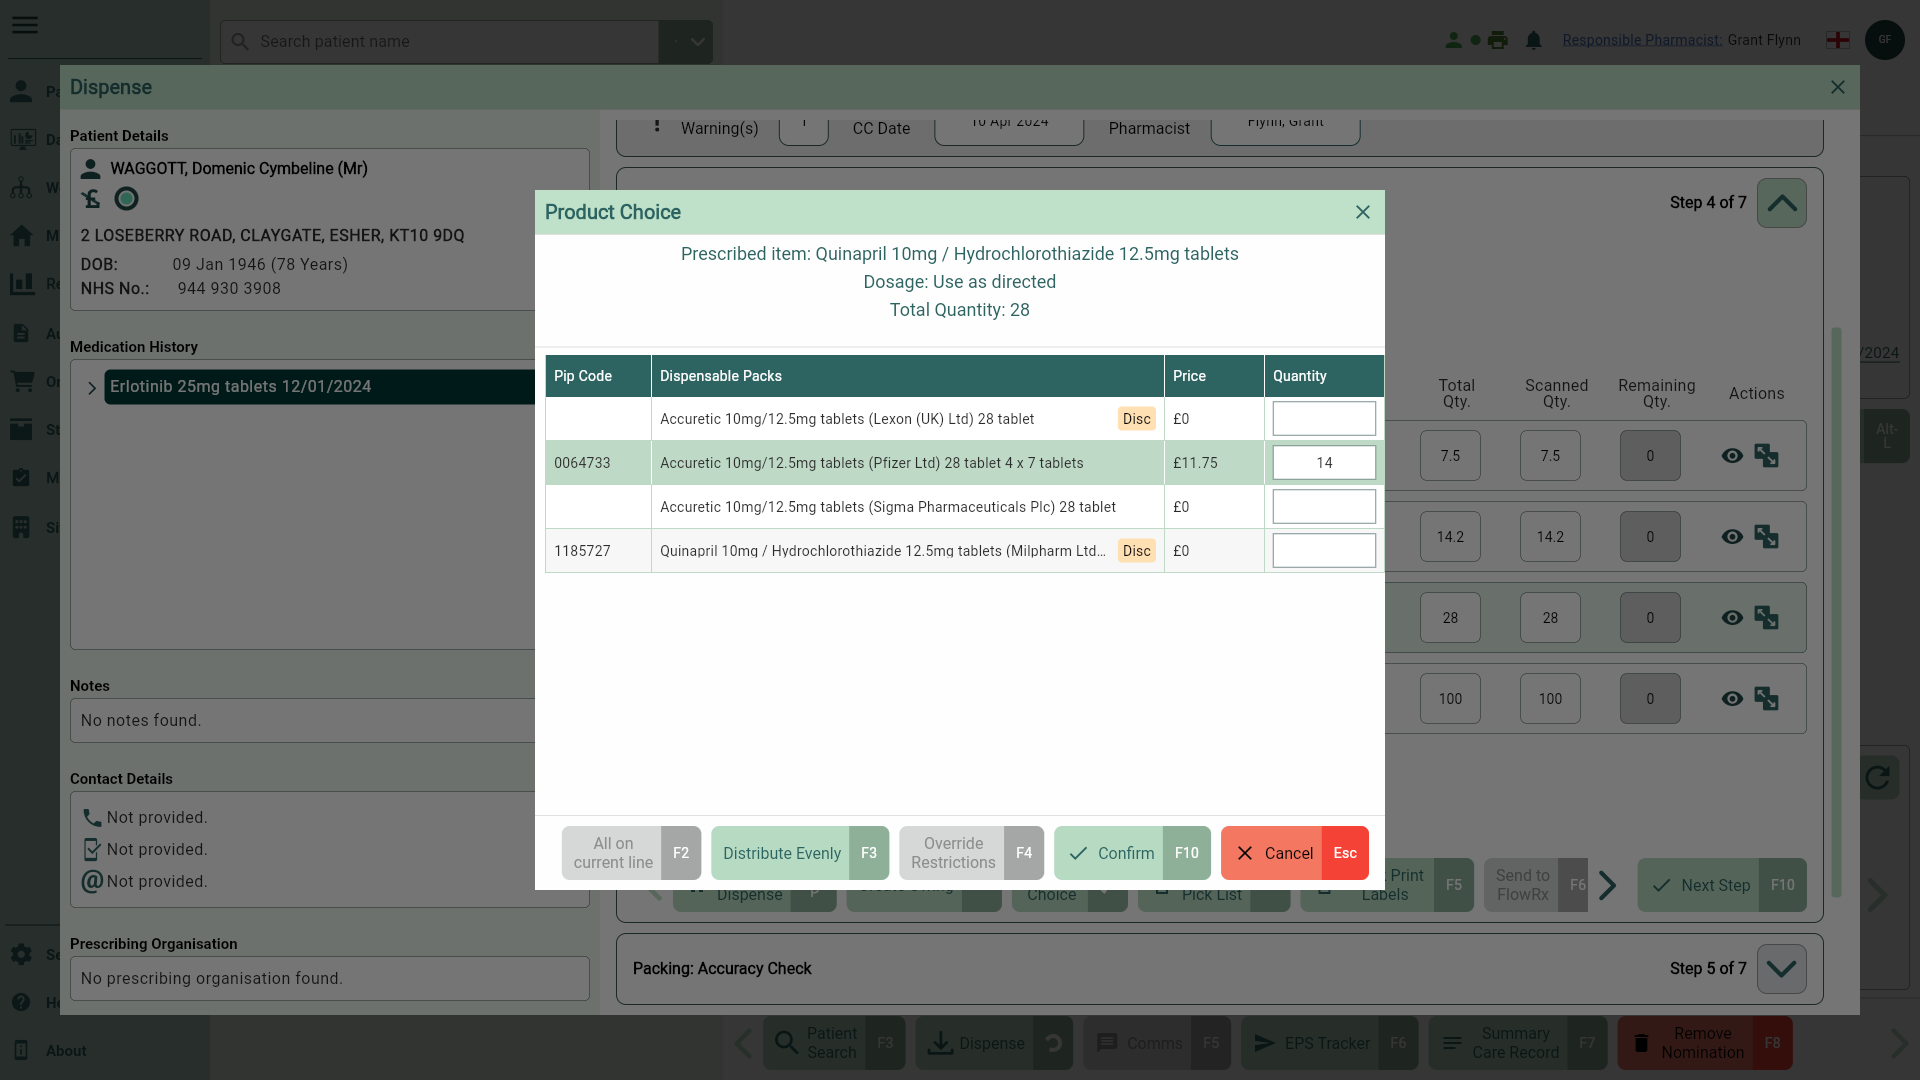
- To begin, during the Picking step of the Dispensing Wizard highlight your item in the picking list.
- Select the [Product Choice - F3] button. The Product Choice window displays with a list of dispensable packs based on your current restrictions.
- Enter the partial quantity you're dispensing now against the correct dispensable pack ensuring the total quantity does not exceed the prescribed quantity and select the [Confirm - F10] button.
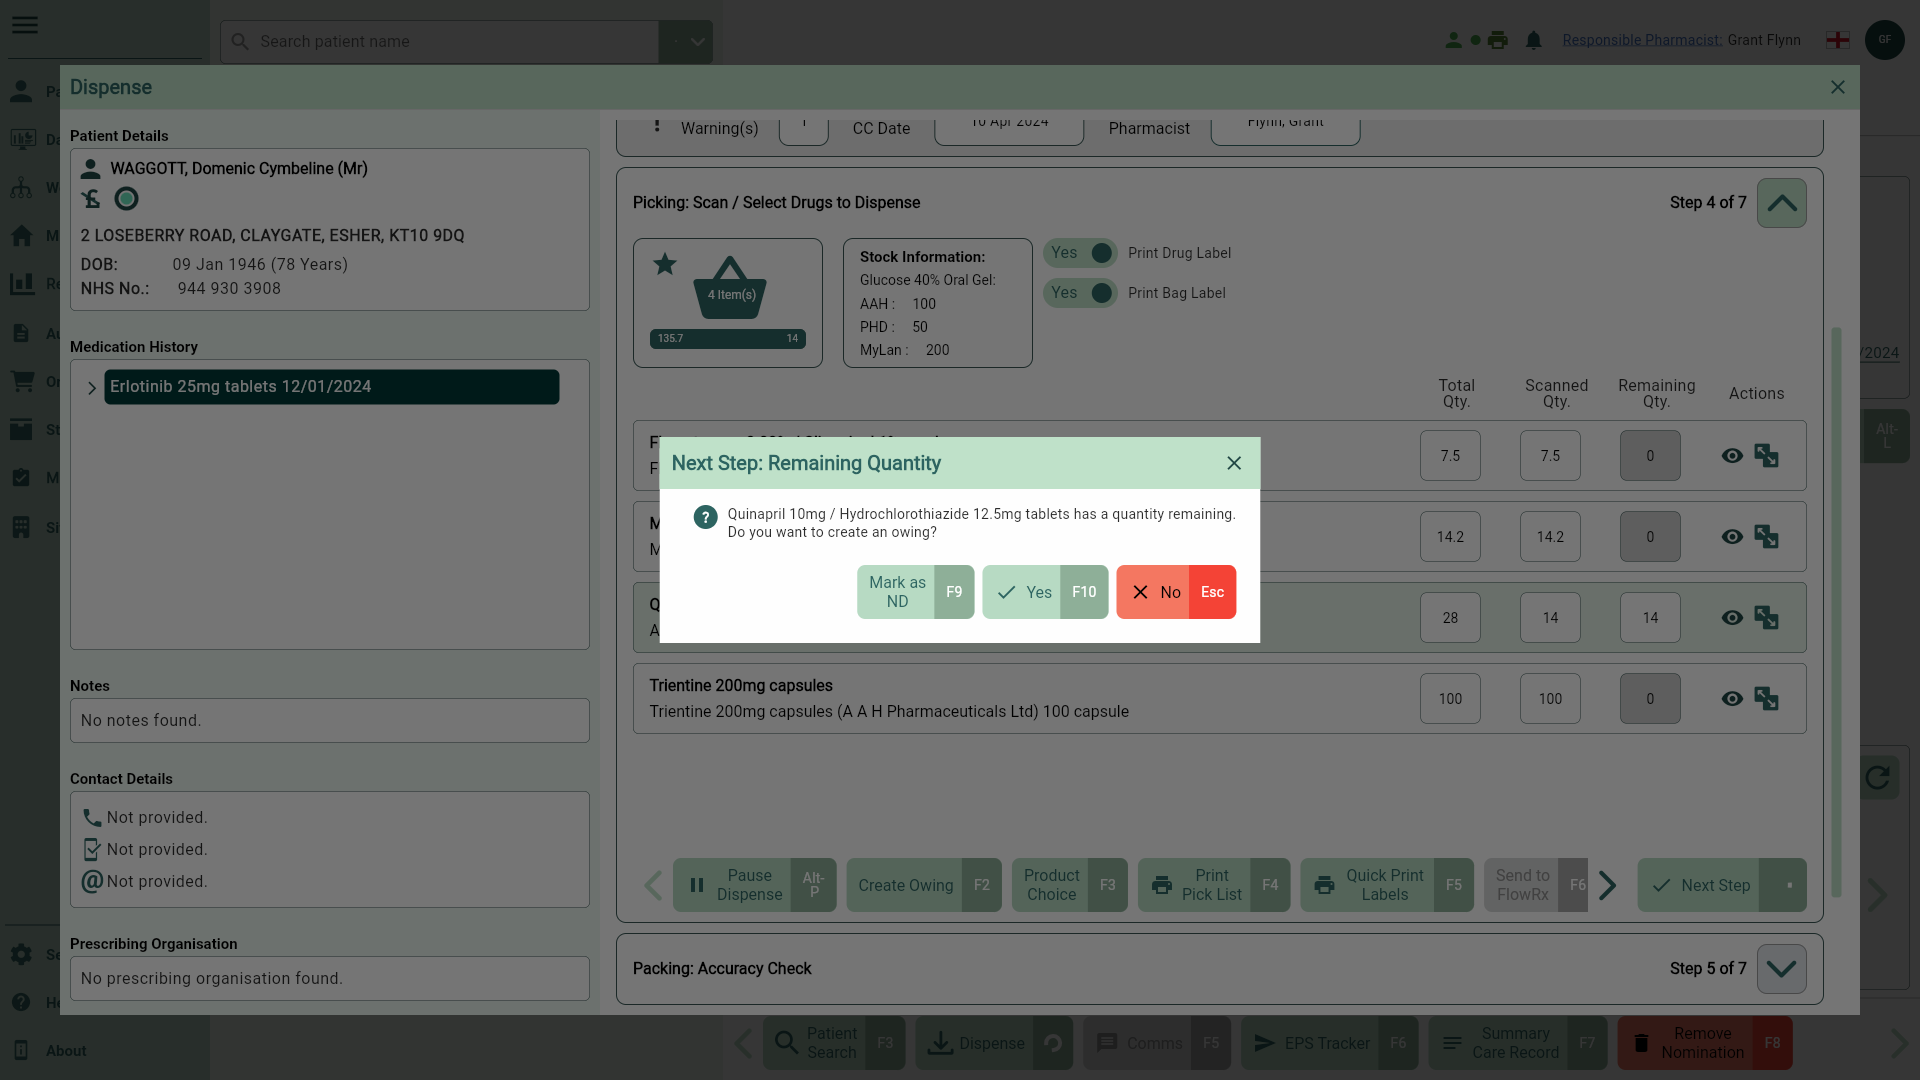
- The Scanned Qty and Remaining Qty fields update to reflect the partial owing. Select the [Next Step - F10] button
- A Remaining Quantity prompt displays prompting you to create an owing for the remaining quantity. Select the [Yes - F10] button.
Creating owings from Dispensing History
You cannot create an owing for an EPS prescription with a Claim Success status.
If a dispense notification (DN) has been sent, and you create an owing, The CRM will withdraw and resend the DN to update the item status and quantity. You will need to authenticate a valid NHS smartcard before you can perform this task.
- Open Dispensing History by selecting History from the left-nav.
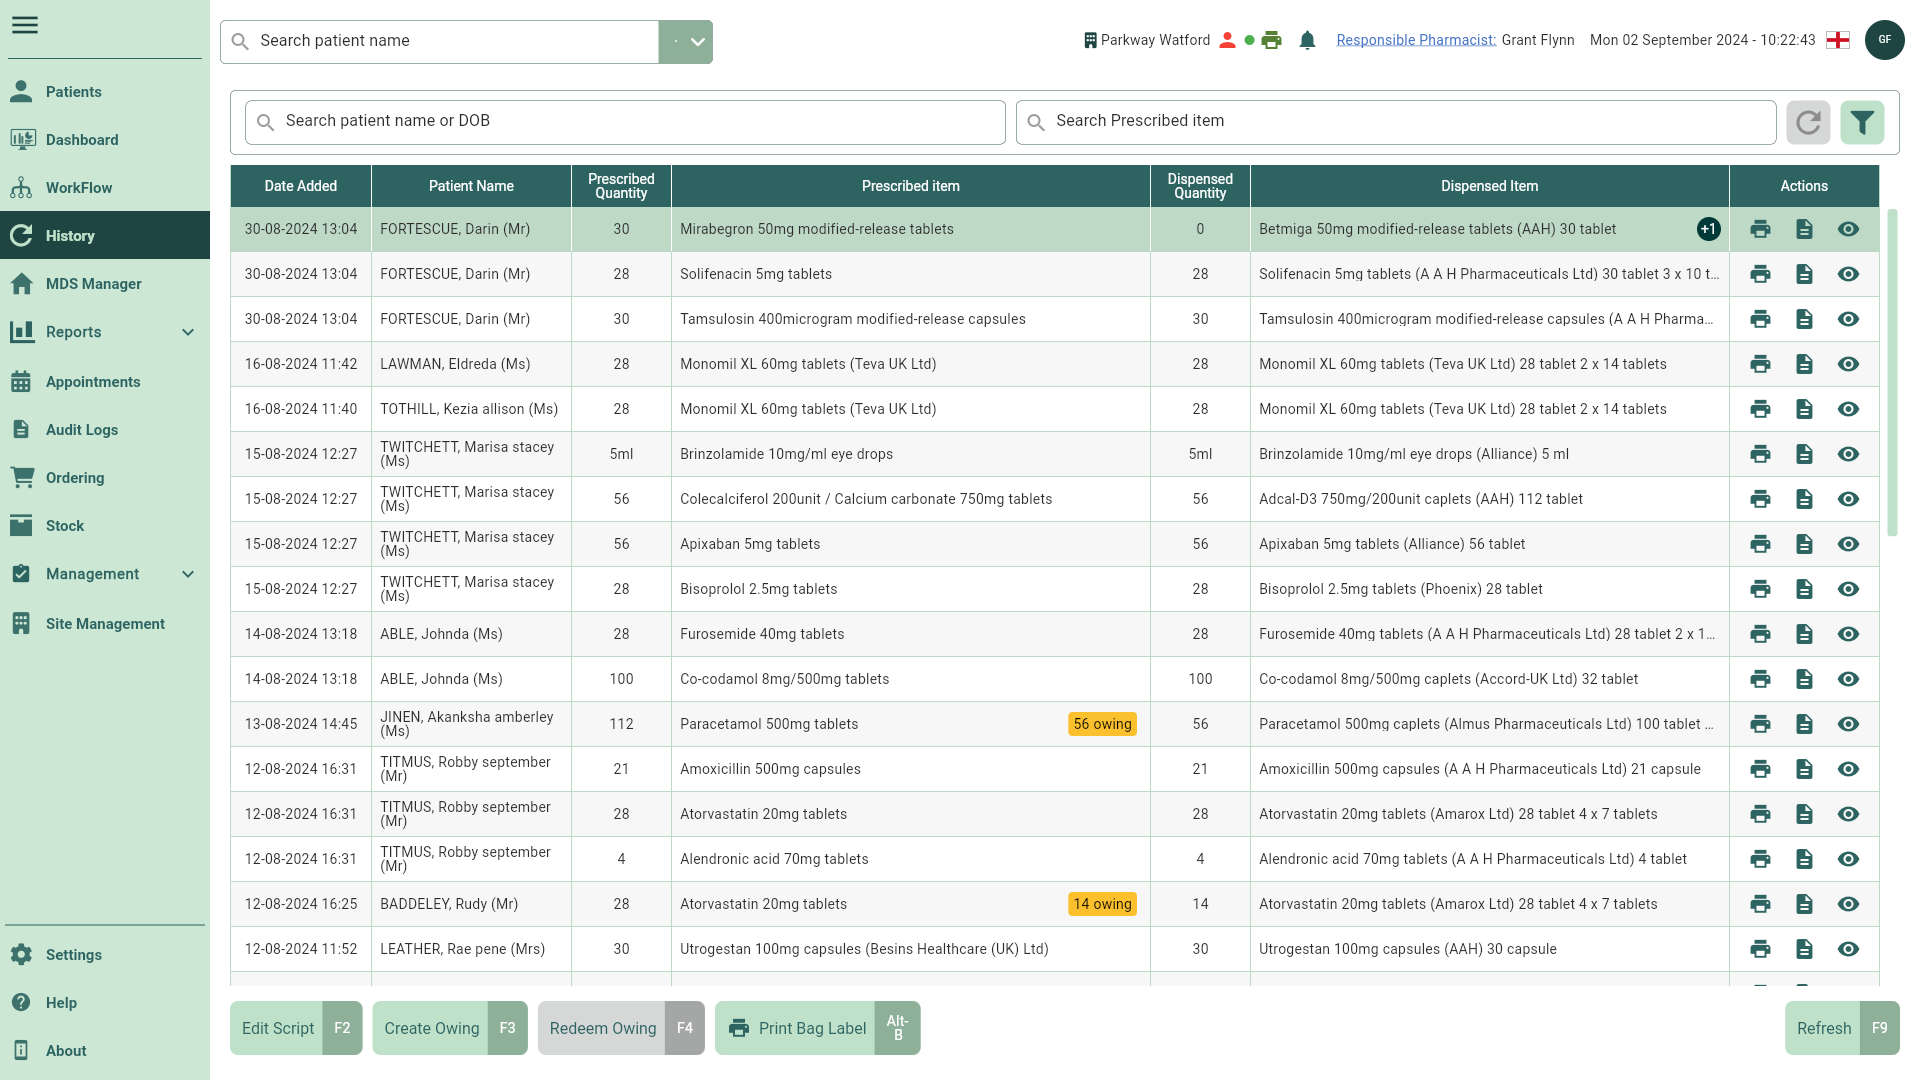
- Highlight the required patient and the prescribed item within the grid, then select the [Create Owing - F3] button. The Edit Owing prompt displays.

- Enter the quantity you're dispensing now and select the [OK - F10] button to confirm.
You can also mark the item as Not Dispensed by selecting the [Mark as ND - F9] button.
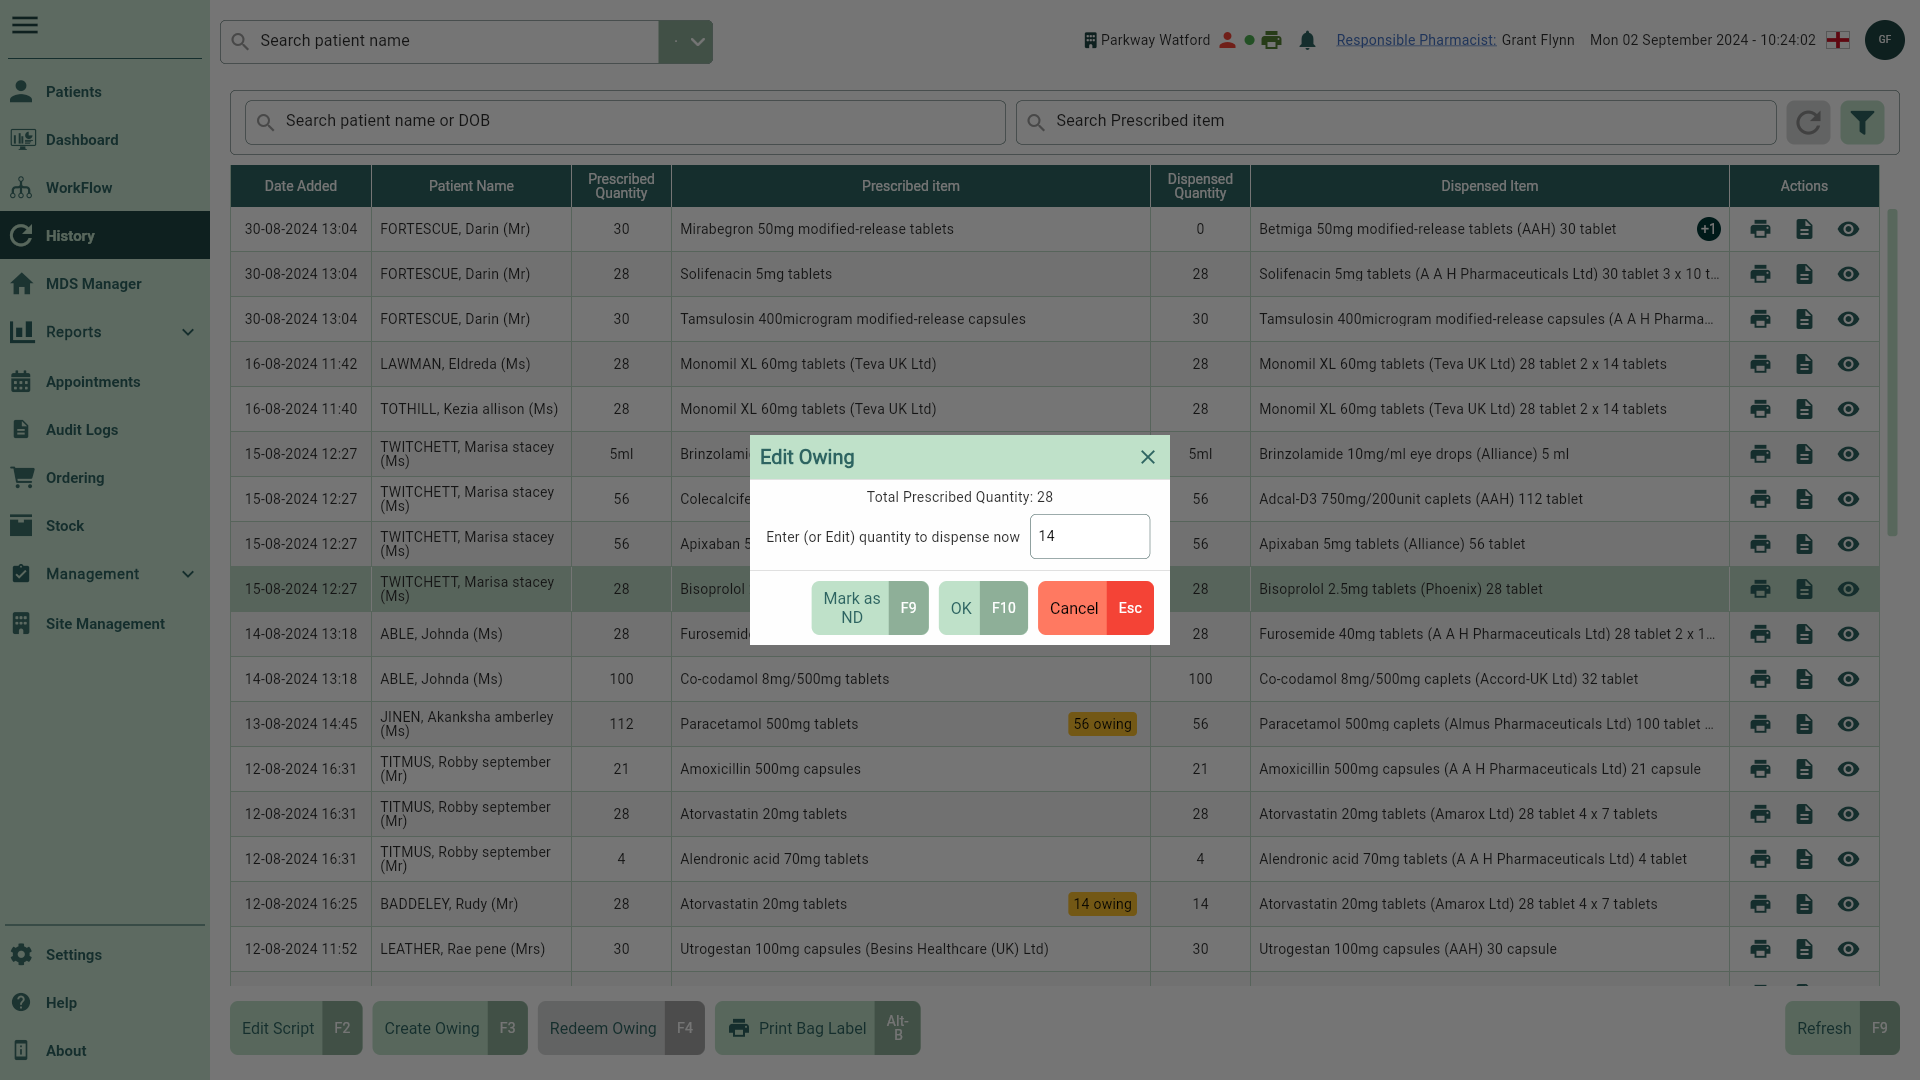
- The Prescribed Item field updates with an OWING badge, and the quantity owed.
Creating a full owing from Workflow
Processing
- To begin, open the Processing tab in Workflow by selecting Workflow from the left-nav and the Processing tab.
- Locate and select the required Pick List from the left panel.
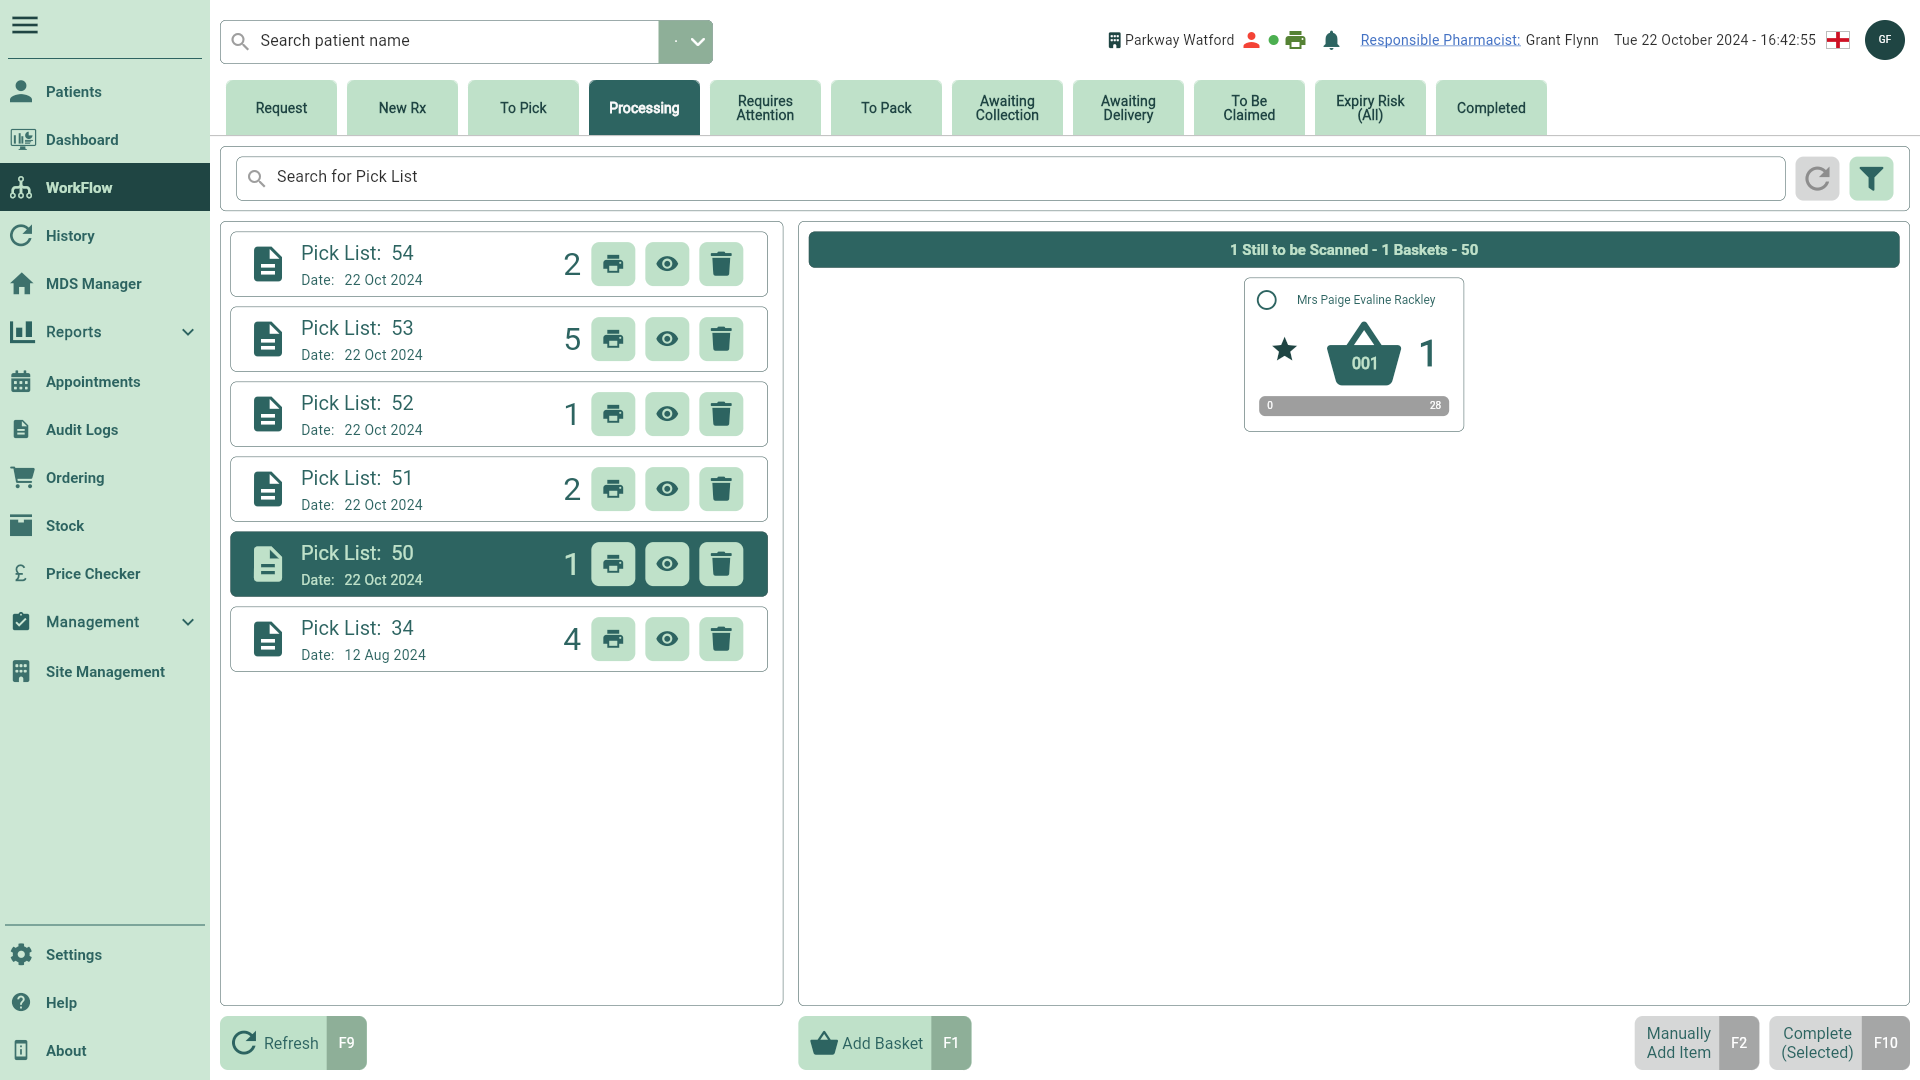
- Start scanning the items you are dispensing now.
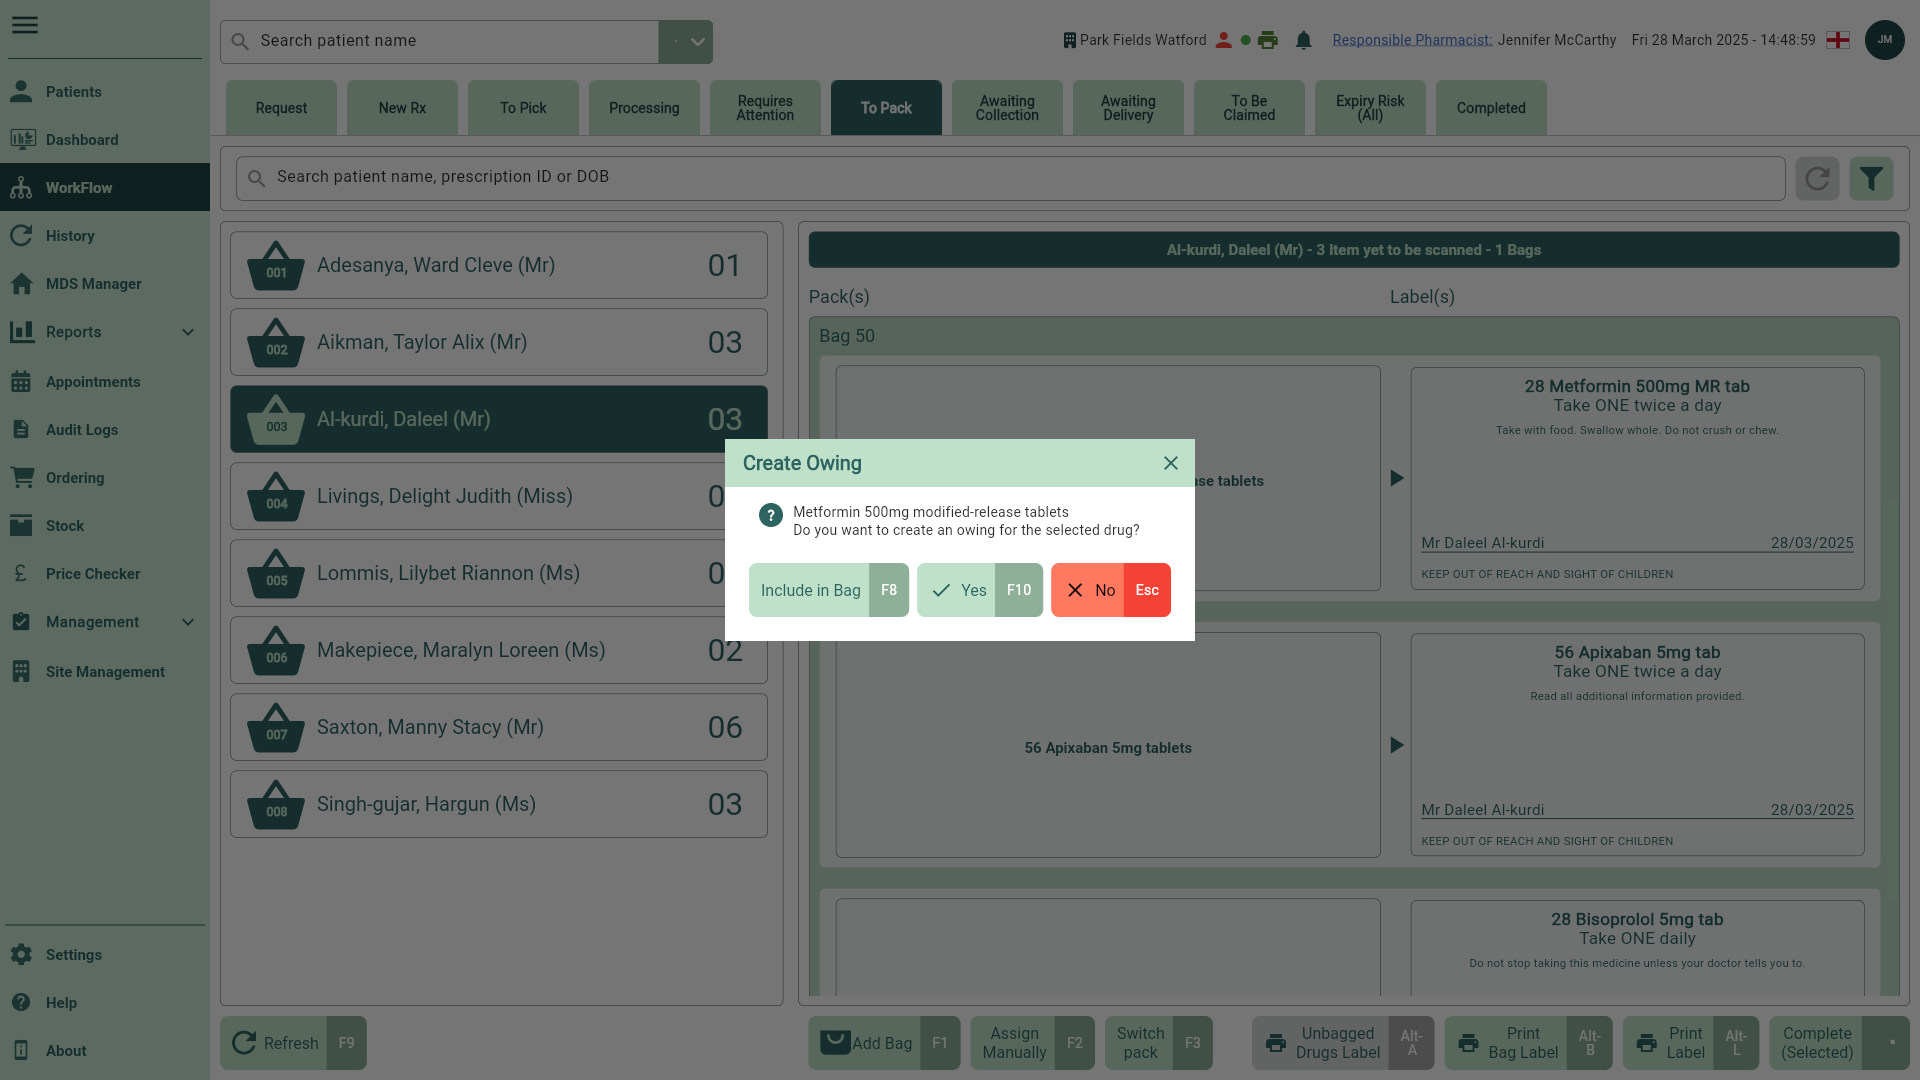
- Highlight the completed basket and then select the [Complete (Selected) - F10] button. The Create Owing prompt displays.

From here, you can:
- Select the [Mark as ND - F9] button to mark the item as Not Dispensed
- Select the [Yes - F10] button to create a full owing
- Select the [No - Esc] button to cancel and close the prompt. You will return to the Processing tab and no further action is taken.
To create the owing and close the prompt, either select the [Yes - F10] button or scan the bag label barcode. An owing label is generated.
All owings will be marked with a OWING badge in the patients Medication History.
To Pack
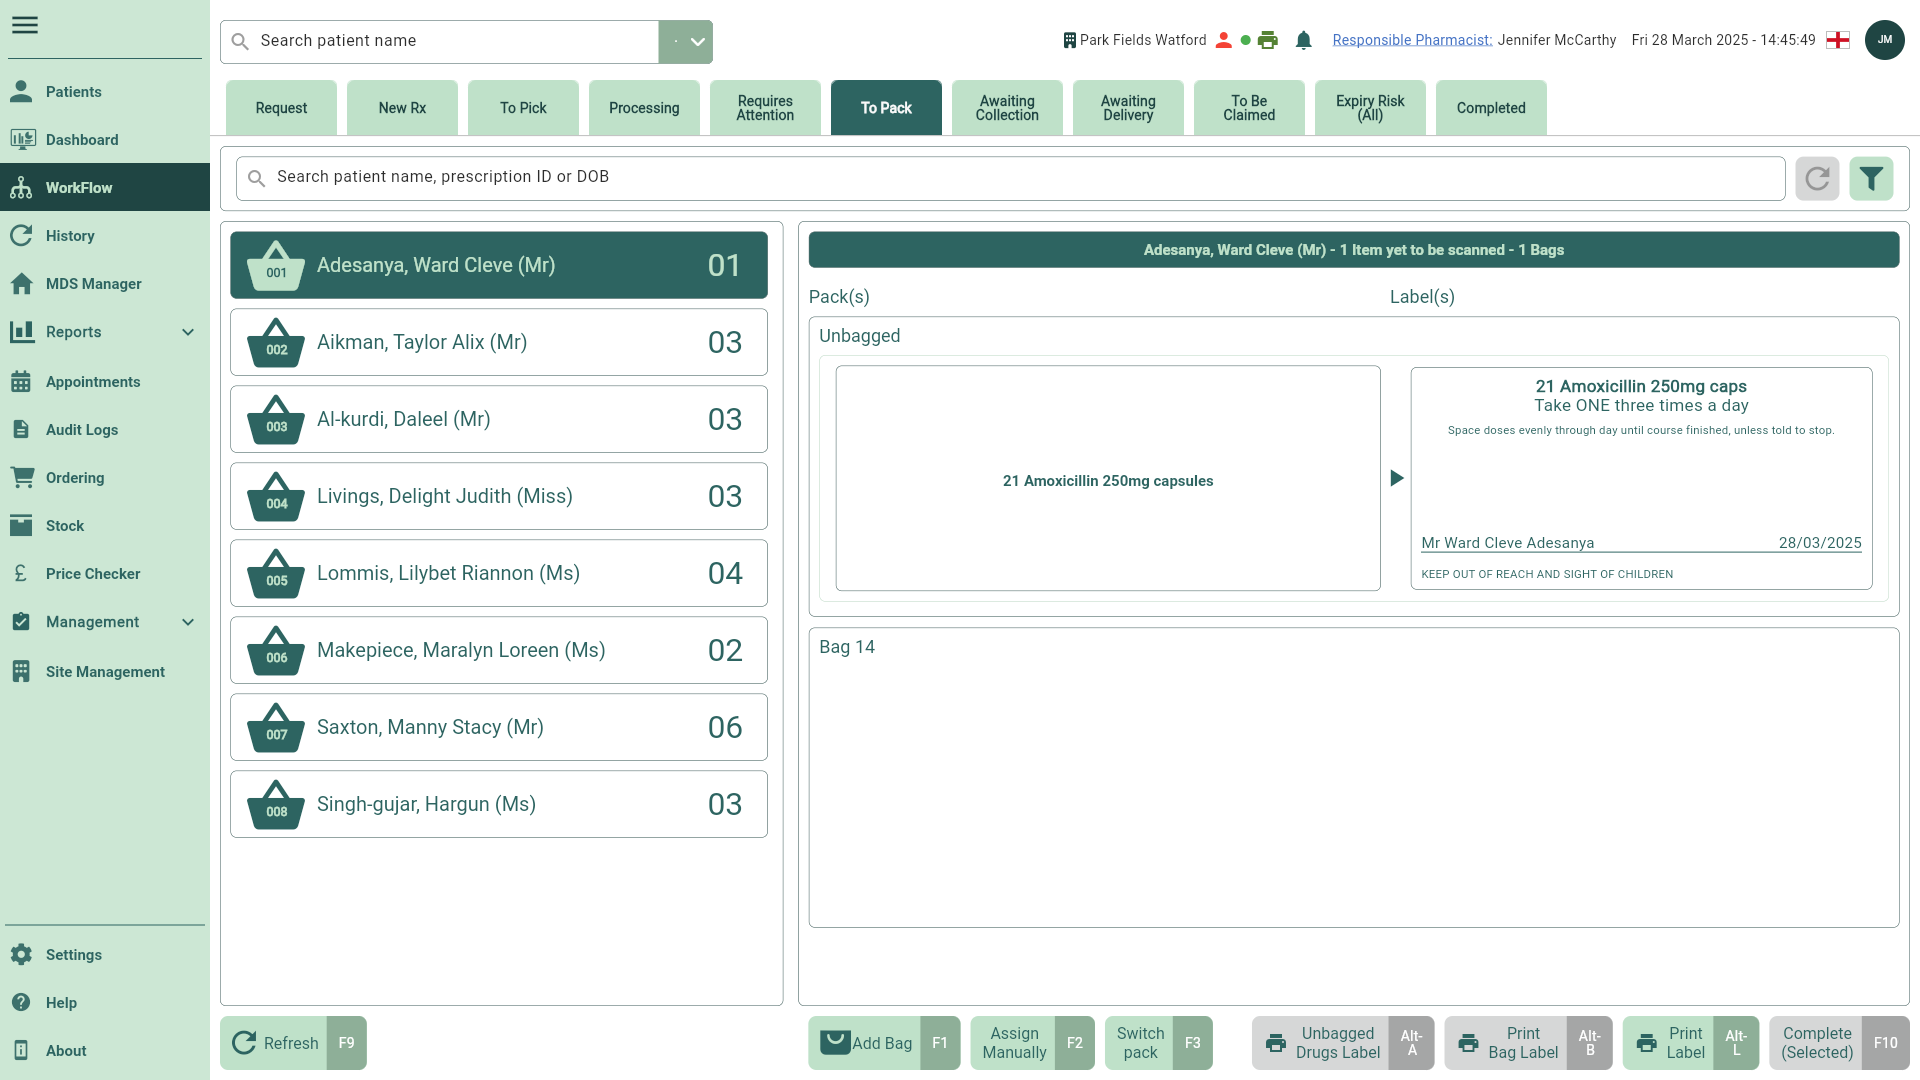
- To begin, open the To Pack tab in Workflow by selecting Workflow from the left-nav and the To Pack tab
Scan your bag label while working in Workflow to jump to the corresponding patient and bag in the To Pack tab.
- Locate and select the required patient pack list from the left panel, if required you can use the filters to refine the grid.
Select the [Refresh - F9] button on the To Pack Workflow tab to see any recent pack lists.

- Begin scanning and bagging the items you are dispensing now. A snackbar will display each time an item is successfully scanned and added to the designated bag.
You can add additional bags for larger quantities of items if required by selecting the [Add Bag - F1] button.
When completing a split bag, any remaining unbagged items will remain in the To Pack tab until completed.
- Highlight the completed bag and then select the [Complete (Selected) - F10] button. The Create Owing prompt displays for items that have not been bagged.
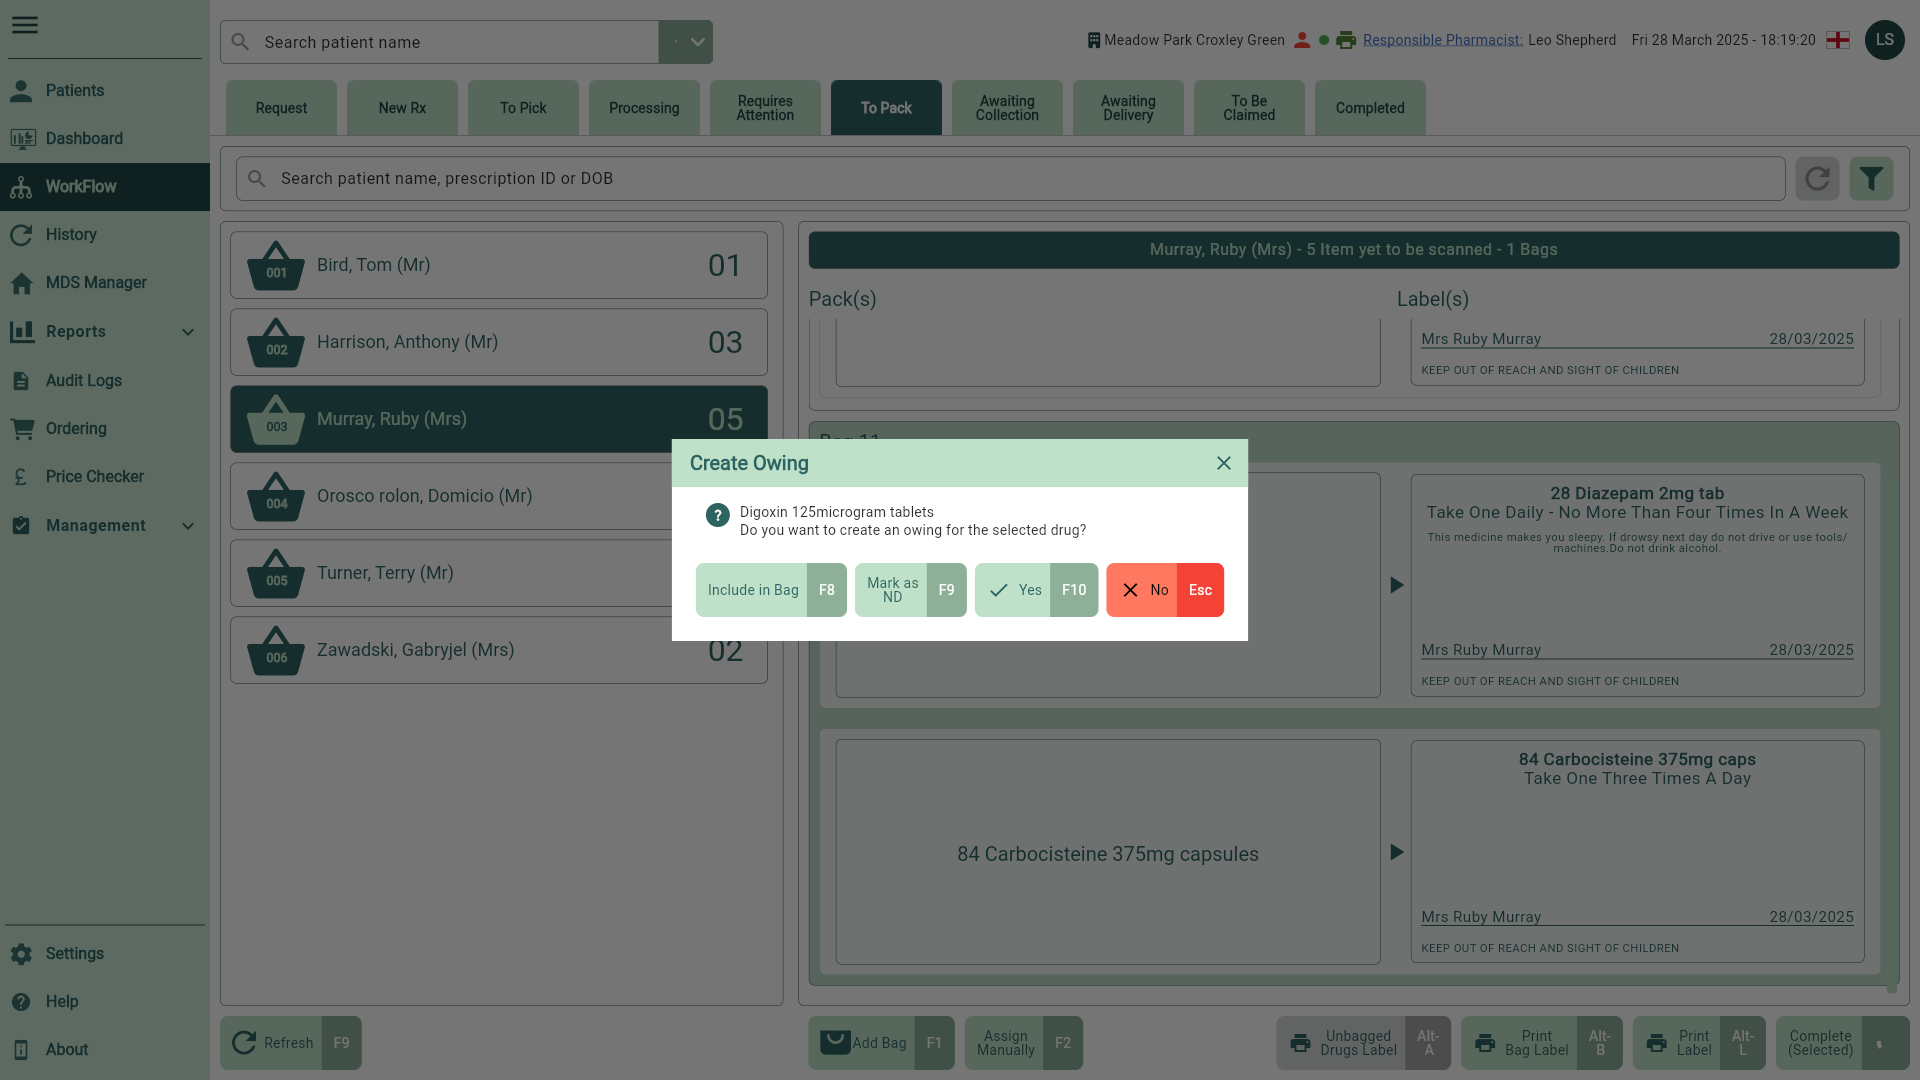
From here, you can:
- Use the [Include In Bag - F8] button to update the In Bag Qty for the selected item
- Use the [Mark as ND - F9] button to mark the item as Not Dispensed
- Use the [Yes - F10] button to create an owing
- Use the [No - Esc] button to cancel and close the prompt. You will return to the To Pack tab and no further action is taken.
To create an owing and generate your owing label(s), select the [Yes - F10] button or scan the bag label barcode. The item is removed from the To Pack tab and will remain on the Processing tab until redeemed.
All owings will be marked with a OWING badge.
Creating partial owings from Workflow
Processing
- To begin, open the Processing tab in Workflow by selecting Workflow from the left-nav and the Processing tab.
- Locate and select the required Pick List from the left panel.
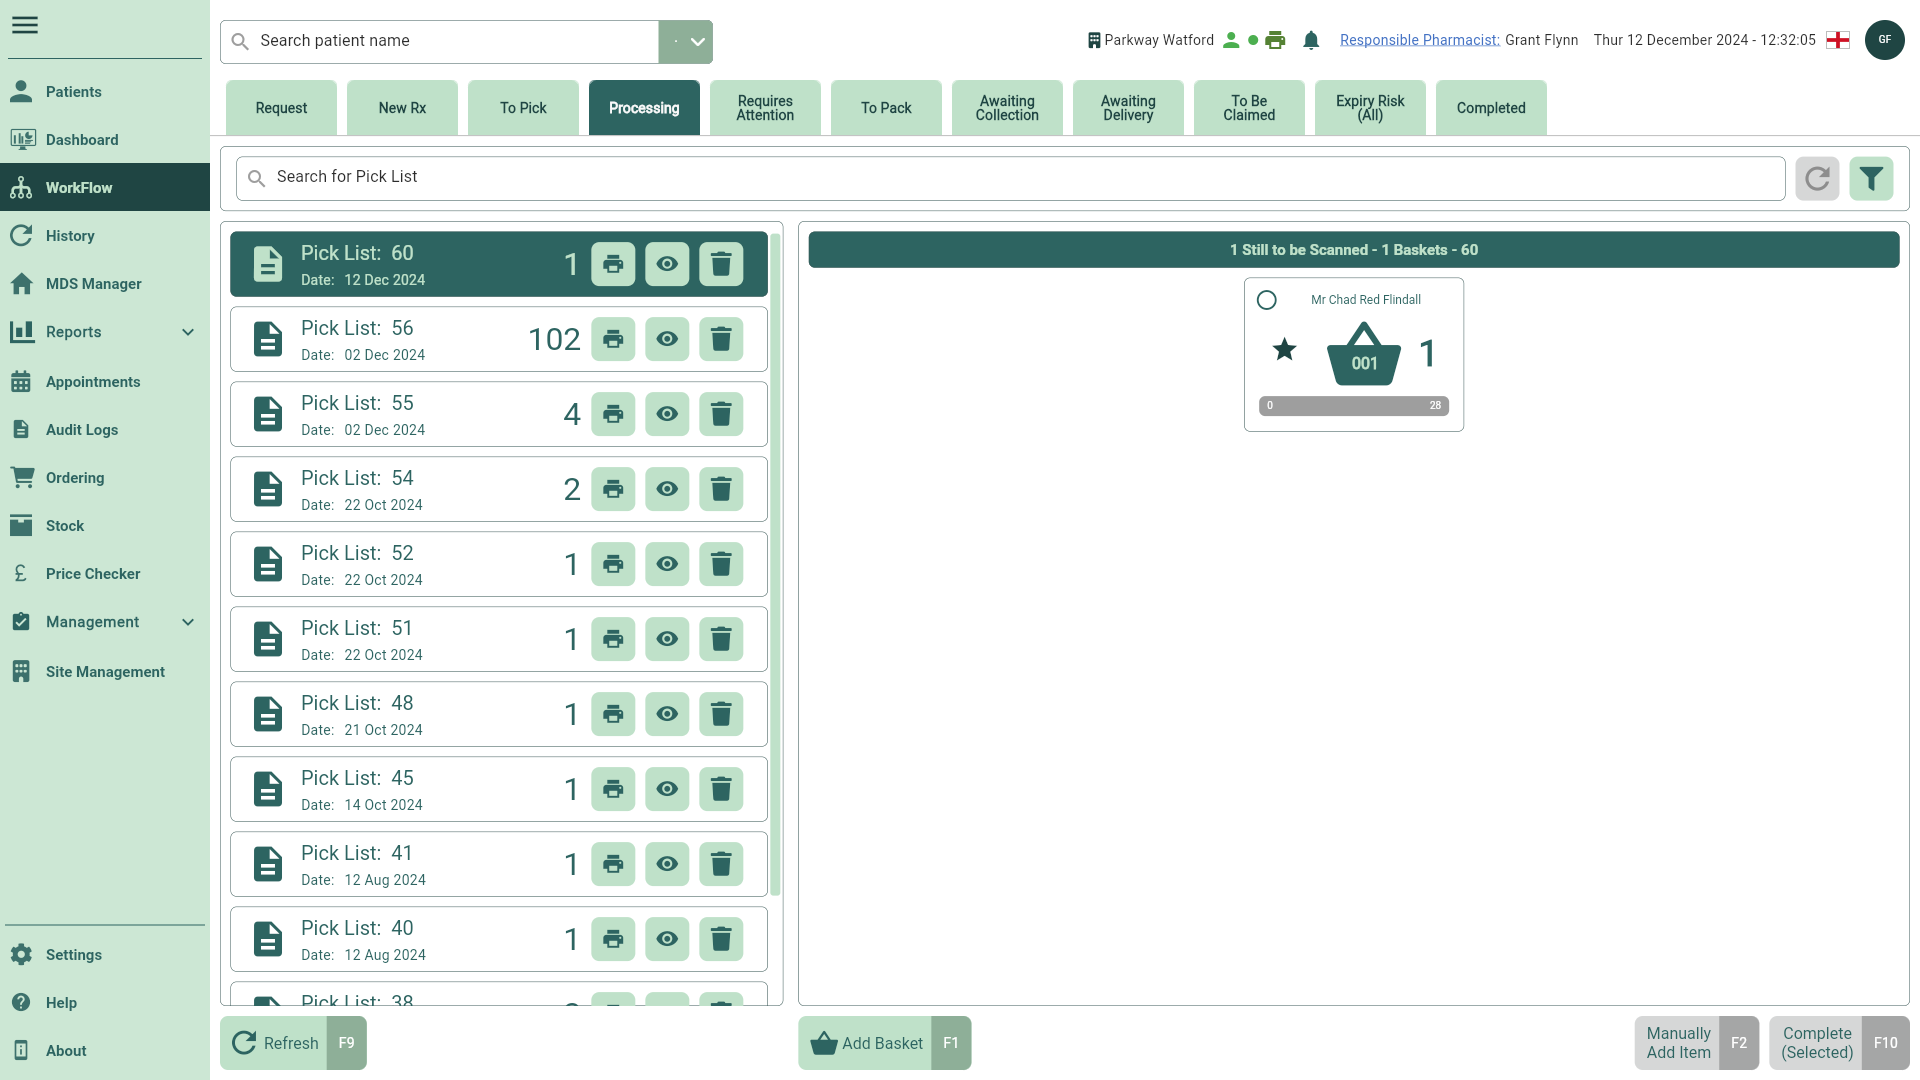
- Highlight the required basket and start scanning the items you are dispensing now.
Alternatively, you can select the [Manually Add Item -F2] button to add an item via the Product Choice window. A list of dispensable packs based on your current restrictions will be displayed. Enter the partial quantity you're dispensing now against the correct dispensable pack.
- Once all items are scanned, select the [Complete (Selected) - F10] button. The Create Owing prompt displays.
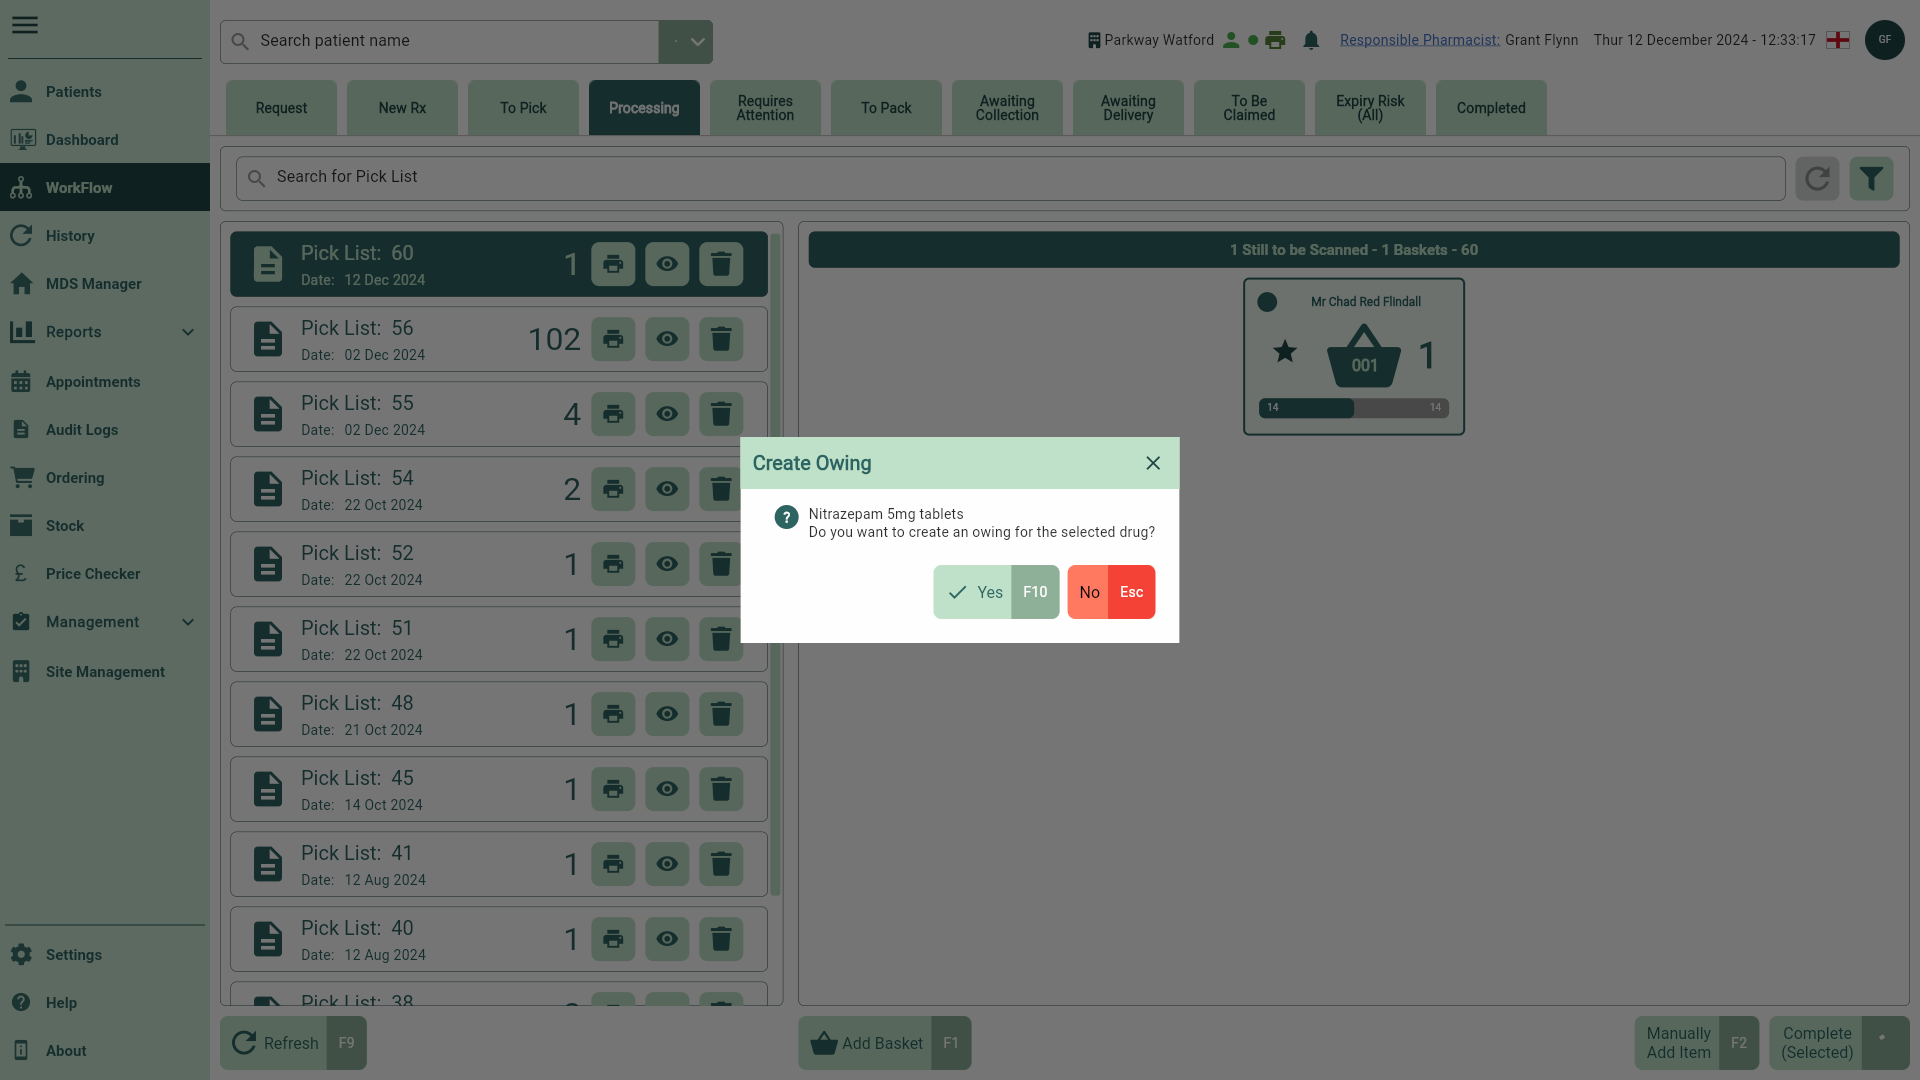
From here, you can:
- Select the [Yes - F10] button to create a partial owing.
- Select the [No - Esc] button to cancel and close the prompt. You will return to the Processing tab and no further action is taken.
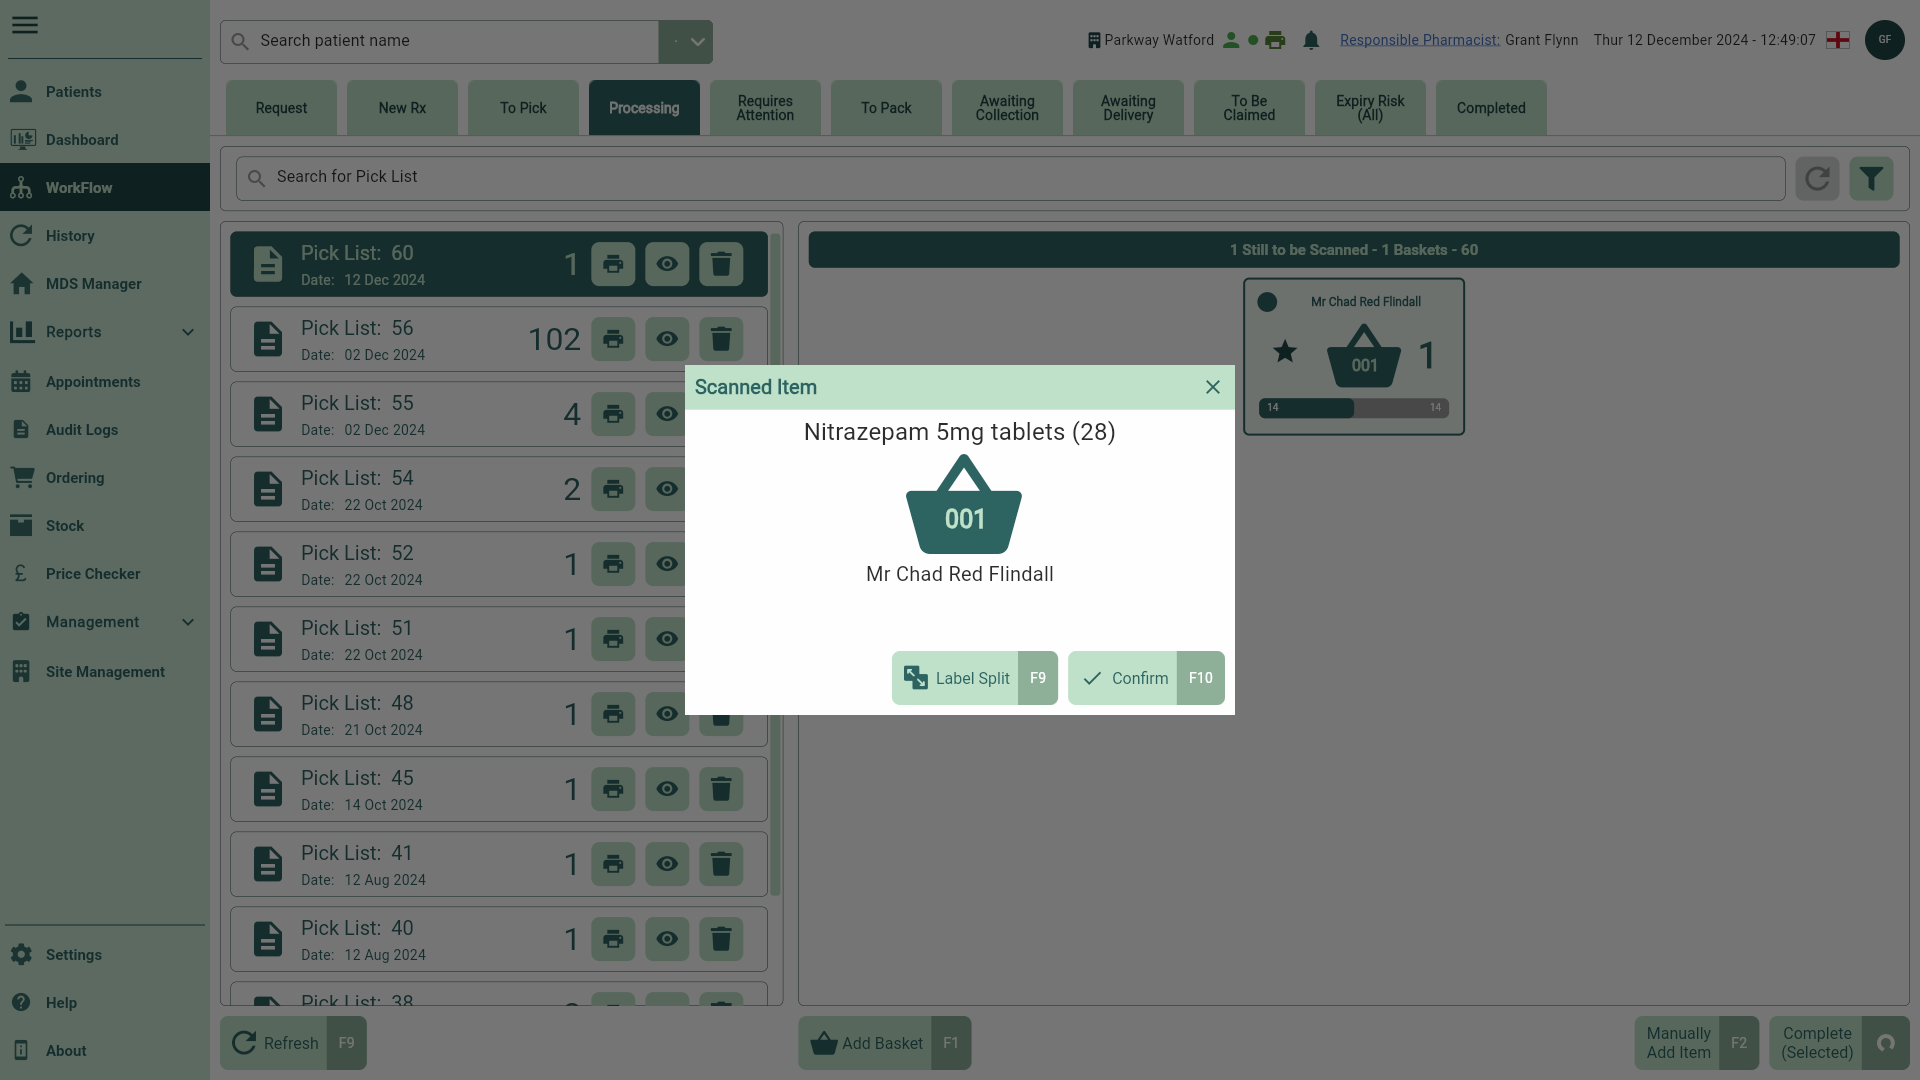
To create the owing, either select the [Yes — F10] button or scan the bag label barcode to generate your owing labels. Once actioned, the Scanned Item prompt displays. Select the [Confirm - F10] button to confirm. Your pick list/scanned quantity are moved to the To Pack tab.
An additional Create Owing prompt will display for each unscanned item per script. If required, you can mark an item as Not Dispensed when prompted by selecting the [Mark as ND - F9] button.
- Select the [Label Split - F9] button if you need to change the number of labels being printed. This will open the Label Split window. You can print the total dispensed quantity on a single label, split the quantity over several labels or add extra labels if required.
Learn how to amend the number of labels being printed from the Label Split window
If you need to split the dispensed quantity across multiple labels, or add extra labels follow steps below:
- Highlight the item in the Picking list and then select the [Label Split – F9] button or the adjacent Label Split icon in the Actions column. The Label Split window displays.
Each standard label is represented in a single row with a quantity to be printed. You can add an extra label by selecting the Add icon, with the total number of additional labels shown in the totals summary. To reduce the extra label count by one, select the Minus icon. To remove a row, select the Delete icon. Note: the Delete icon is disabled if only one label remains in the grid.
From here, use the available function keys to manage your label preferences:
[Single – F1]: Select to print the total quantity onto one label.
[Split – F2]: Add an additional row to the grid, the total quantity is 'split' and divided by the total number of rows.
[No. of Labels – F3]: Select to manually enter a numerical value which will then automatically split the total quantity across the labels accordingly.
[Move Last Up – F4]: The removed quantity will be added to the total to the row above. The [Move Last Up - F4] button is disabled when only one label is displayed in the grid.
[Extra Label – F5]: Adds an extra label to the selected row. The total number of extra labels are indicated in the totals summary.
- Confirm your selection using the [Confirm - F10] button.
All owings will be marked with a OWING badge in the patients Medication History.
To Pack
- To begin, open the To Pack tab in Workflow by selecting Workflow from the left-nav and the To Pack tab.
Scan your bag label while working in Workflow to jump to the corresponding patient and bag in the To Pack tab.
- Locate and select the required patient pack list from the left panel, if required you can use the filters to refine the grid.
Select the [Refresh - F9] button on the To Pack Workflow tab to see any recent pack lists.
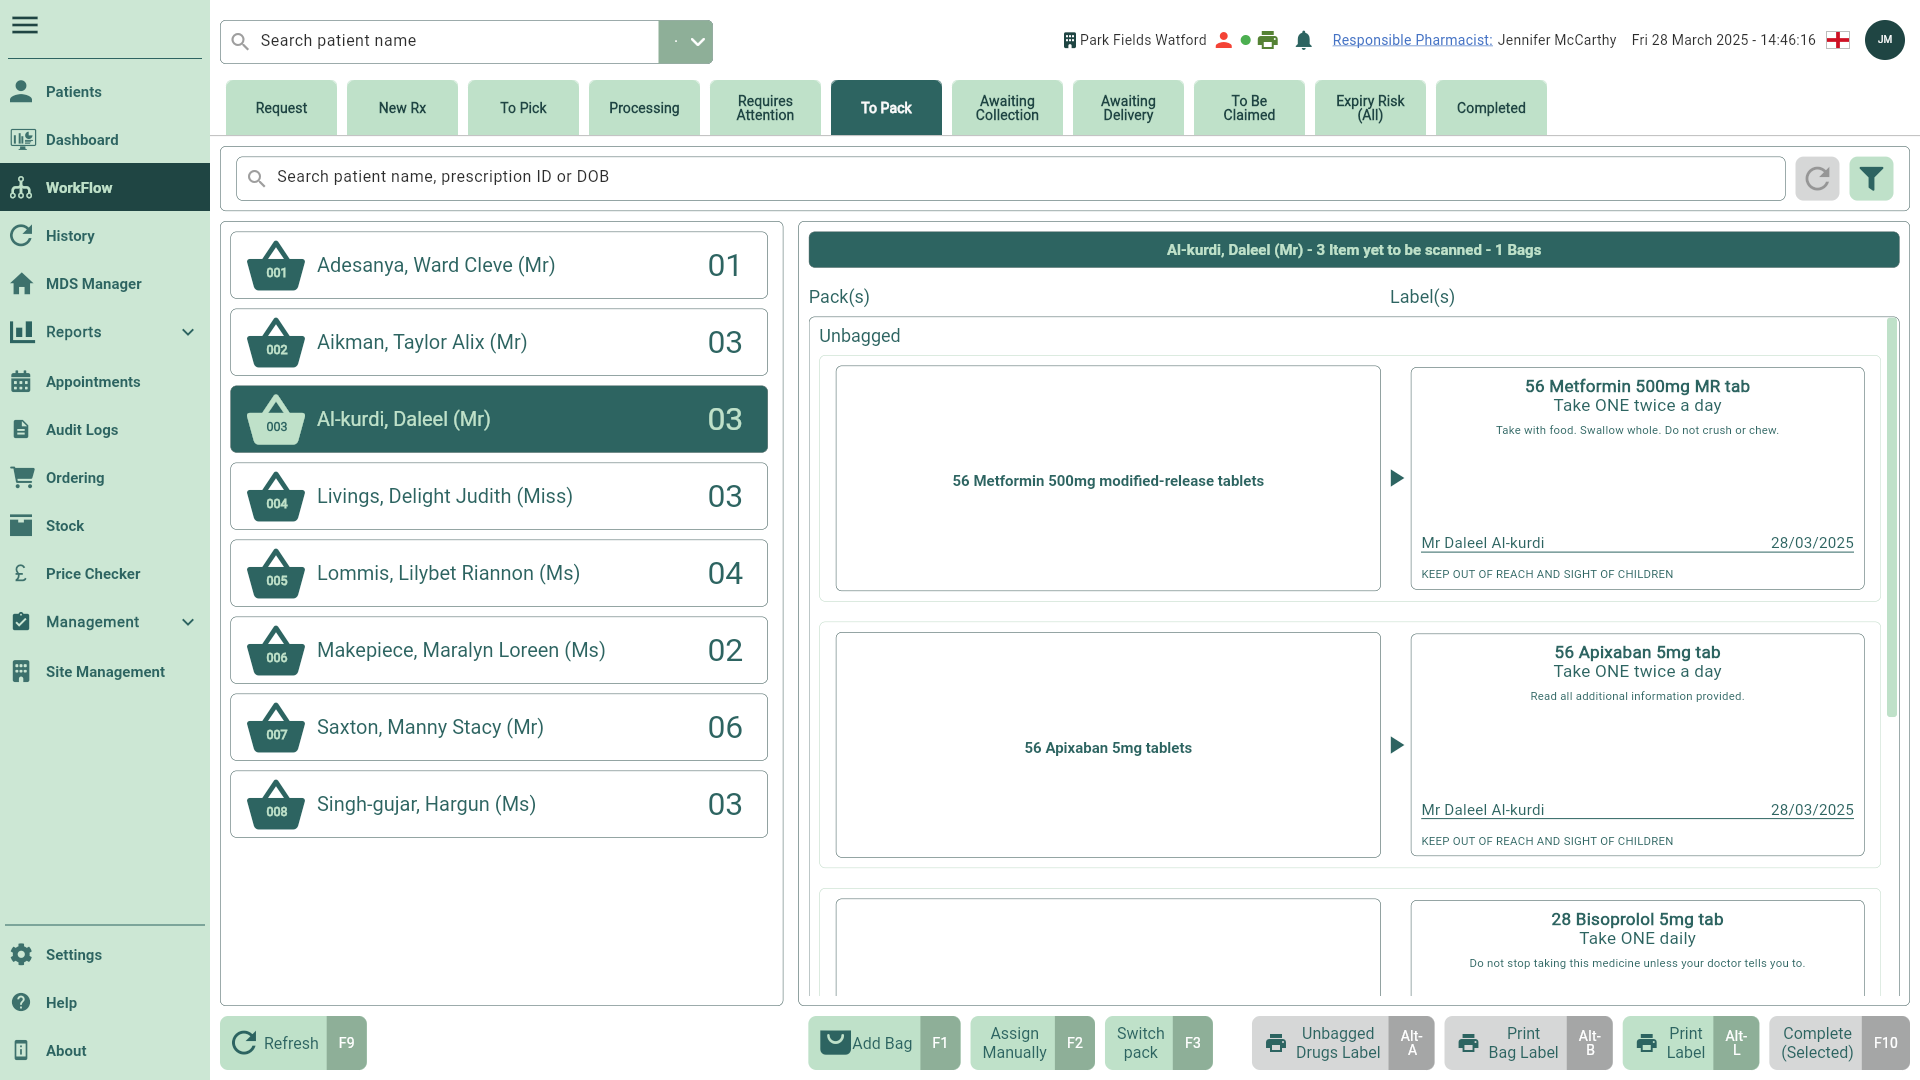
- Start scanning the items you are dispensing now, and continue until all items have been bagged. A snackbar will display each time an item is successfully scanned and added to the designated bag.
You can add additional bags for larger quantities of items if required by selecting the [Add Bag - F1] button.
When completing a split bag, any remaining unbagged items will remain in the To Pack tab until completed.
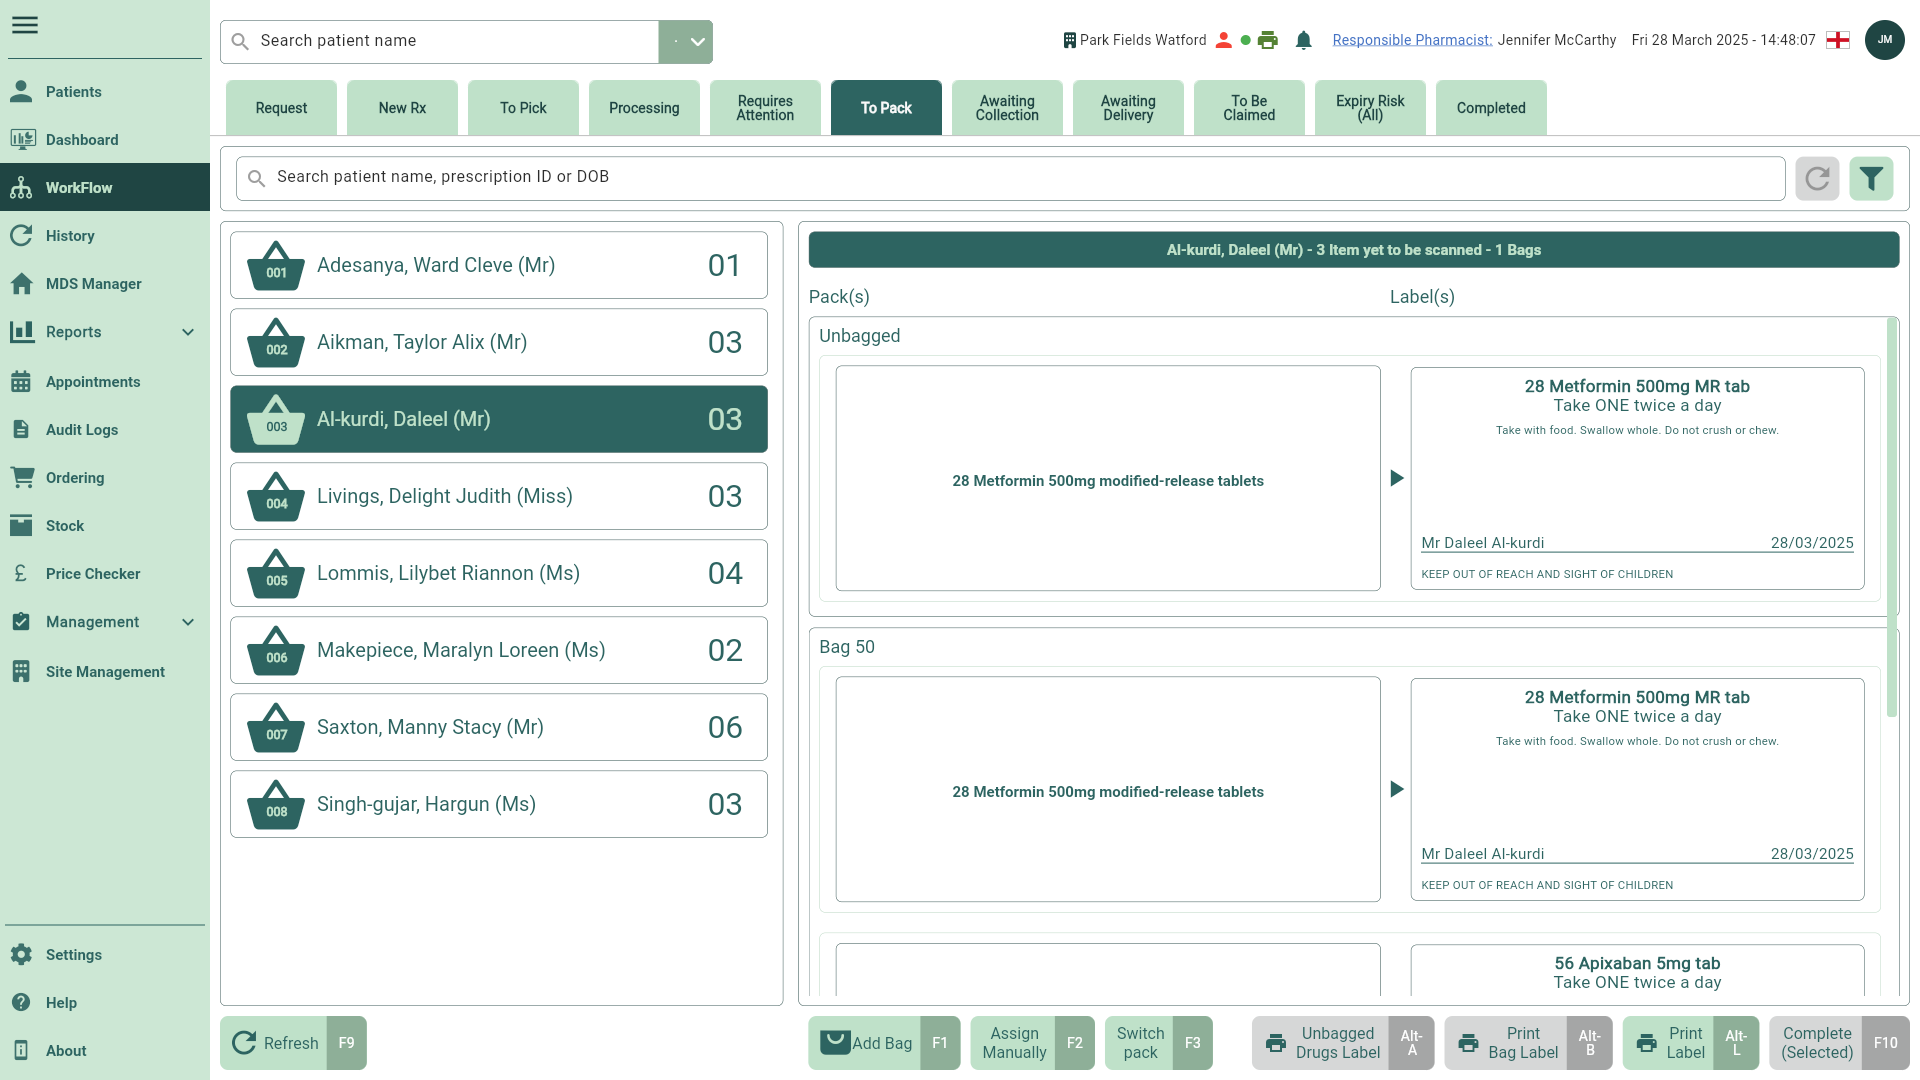
- Highlight the completed bag and then select the [Complete (Selected) - F10] button. The Create Owing prompt displays.
From here, you can:
- Use the [Include In Bag - F8] button to update the In Bag Qty for the selected item
- Use the [Yes - F10] button to create an owing
- Use the [No - Esc] button to cancel and close the prompt. You will return to the To Pack tab and no further action is taken.
To create a partial owing and close the prompt, select the [Yes — F10] button or scan the bag label barcode. The scanned quantity is updated, and your owing label(s) is generated.
All owings will be marked with a OWING badge.
Creating owings from Edit Script
You are able to create an owing from the Edit Scripts window after your prescriptions have been processed/saved. You'll need to edit the dispensed item's Quantity to a lower value to create an owing. You can access the Edit Scripts window from several tabs in the Workflow module. They are;
- Requires Attention
- To be Claimed
- Awaiting Collection
- Awaiting Delivery
- Completed
You can also access the Edit Script window within the Dispensing History, through the Medication History grid, or in the patient’s CRM.
You will be required to authenticate a valid NHS smartcard to edit certain fields in the Edit Script window if your prescription is in the DN Success, DN Withdraw Rejection, Claim Success (reclaim in claim period) and Claim Spine Rejection status.
You will be unable to make any amendments to the prescription if your EPS prescription is in the DN Success (partial) status. You will be required to complete any owings before you can make any edits. Additionally, you will be unable to make any amendments to prescriptions that have been claimed where the claim period has passed.
- To begin, access the Edit Script window using one of the methods below:
You can only edit one prescription at a time.
| Module/Area | Access |
|---|---|
| Workflow |
|
| Dispensing History |
|
| Medication History in the Patient's CRM |
|
- Select the
 Edit icon in the Dispensed Item(s) Actions column.
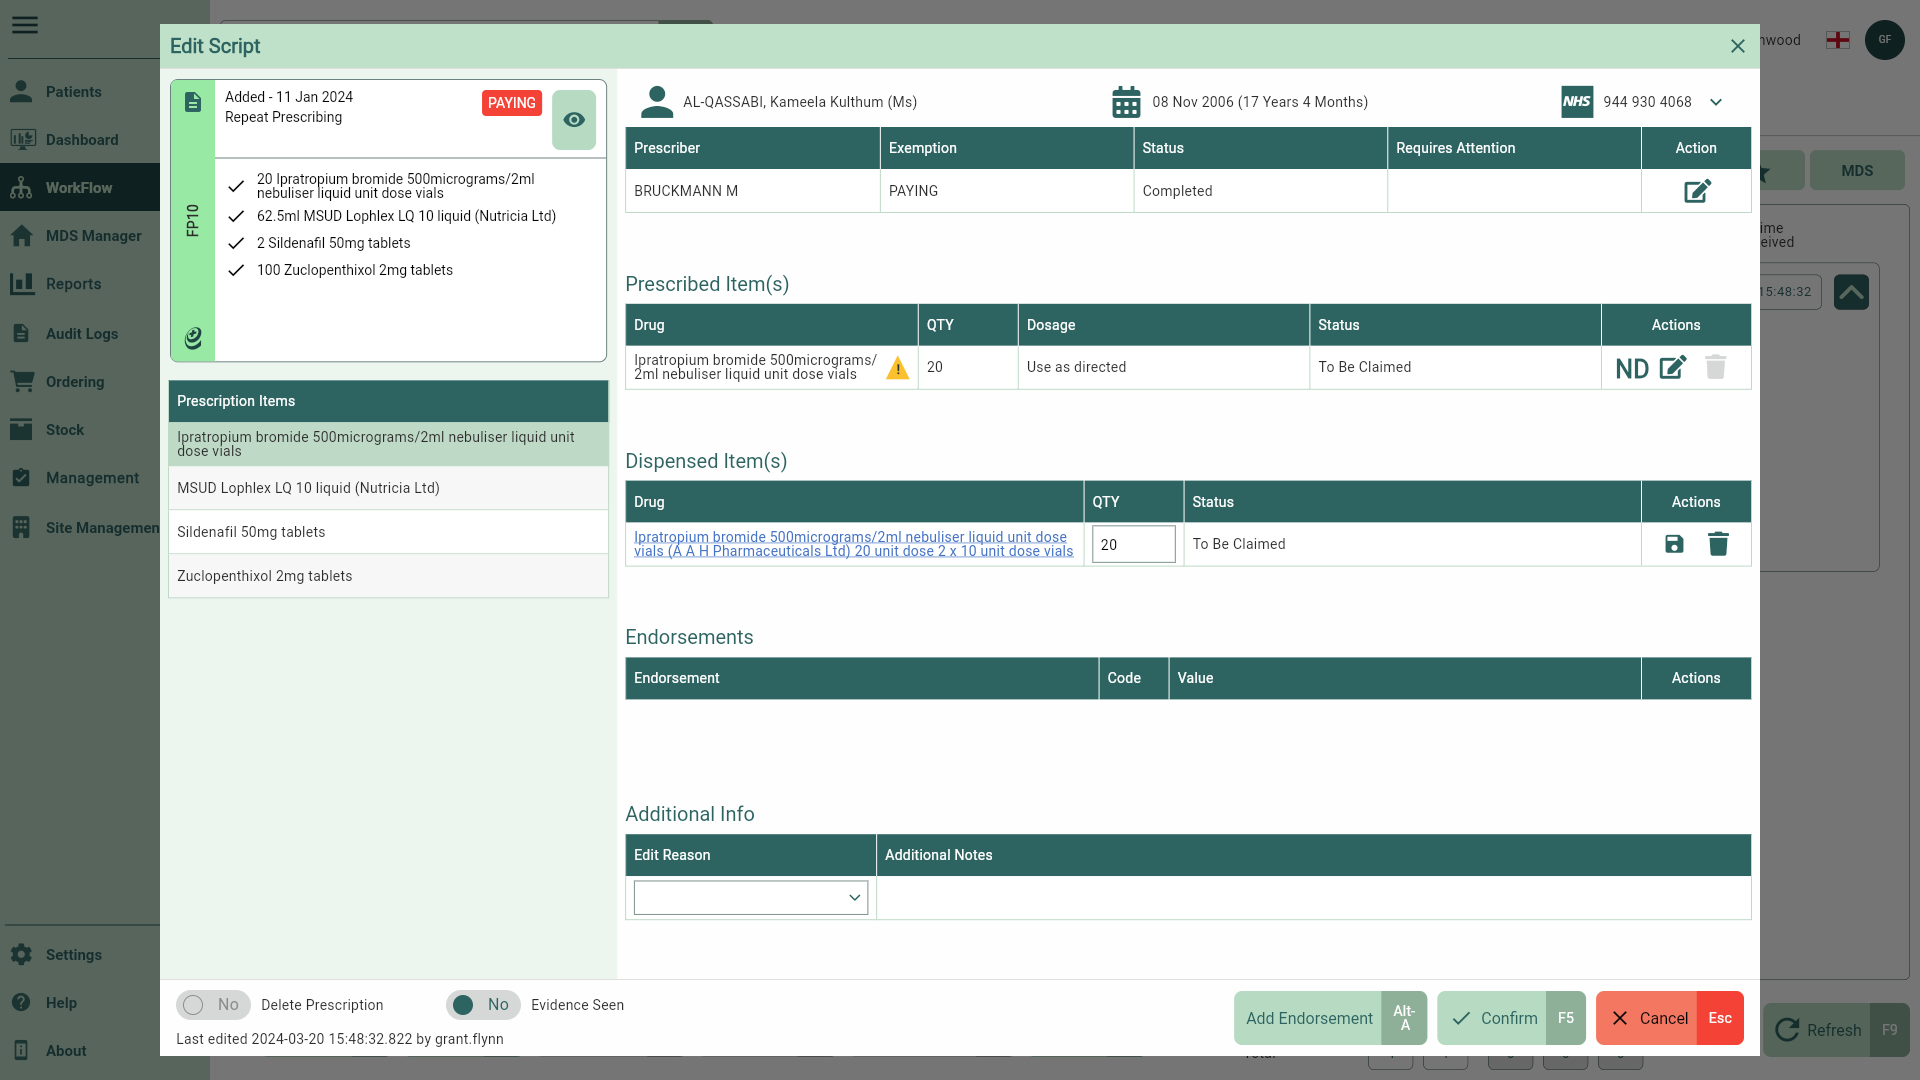
If you need to give a different item, or create a full owing, you can select the Delete icon in the Dispensed Item(s) Actions column.
- In the Quantity field, enter the total amount dispensed, and then select the
 Save icon to save your changes. An Owing badge will display in the Prescription Items field.
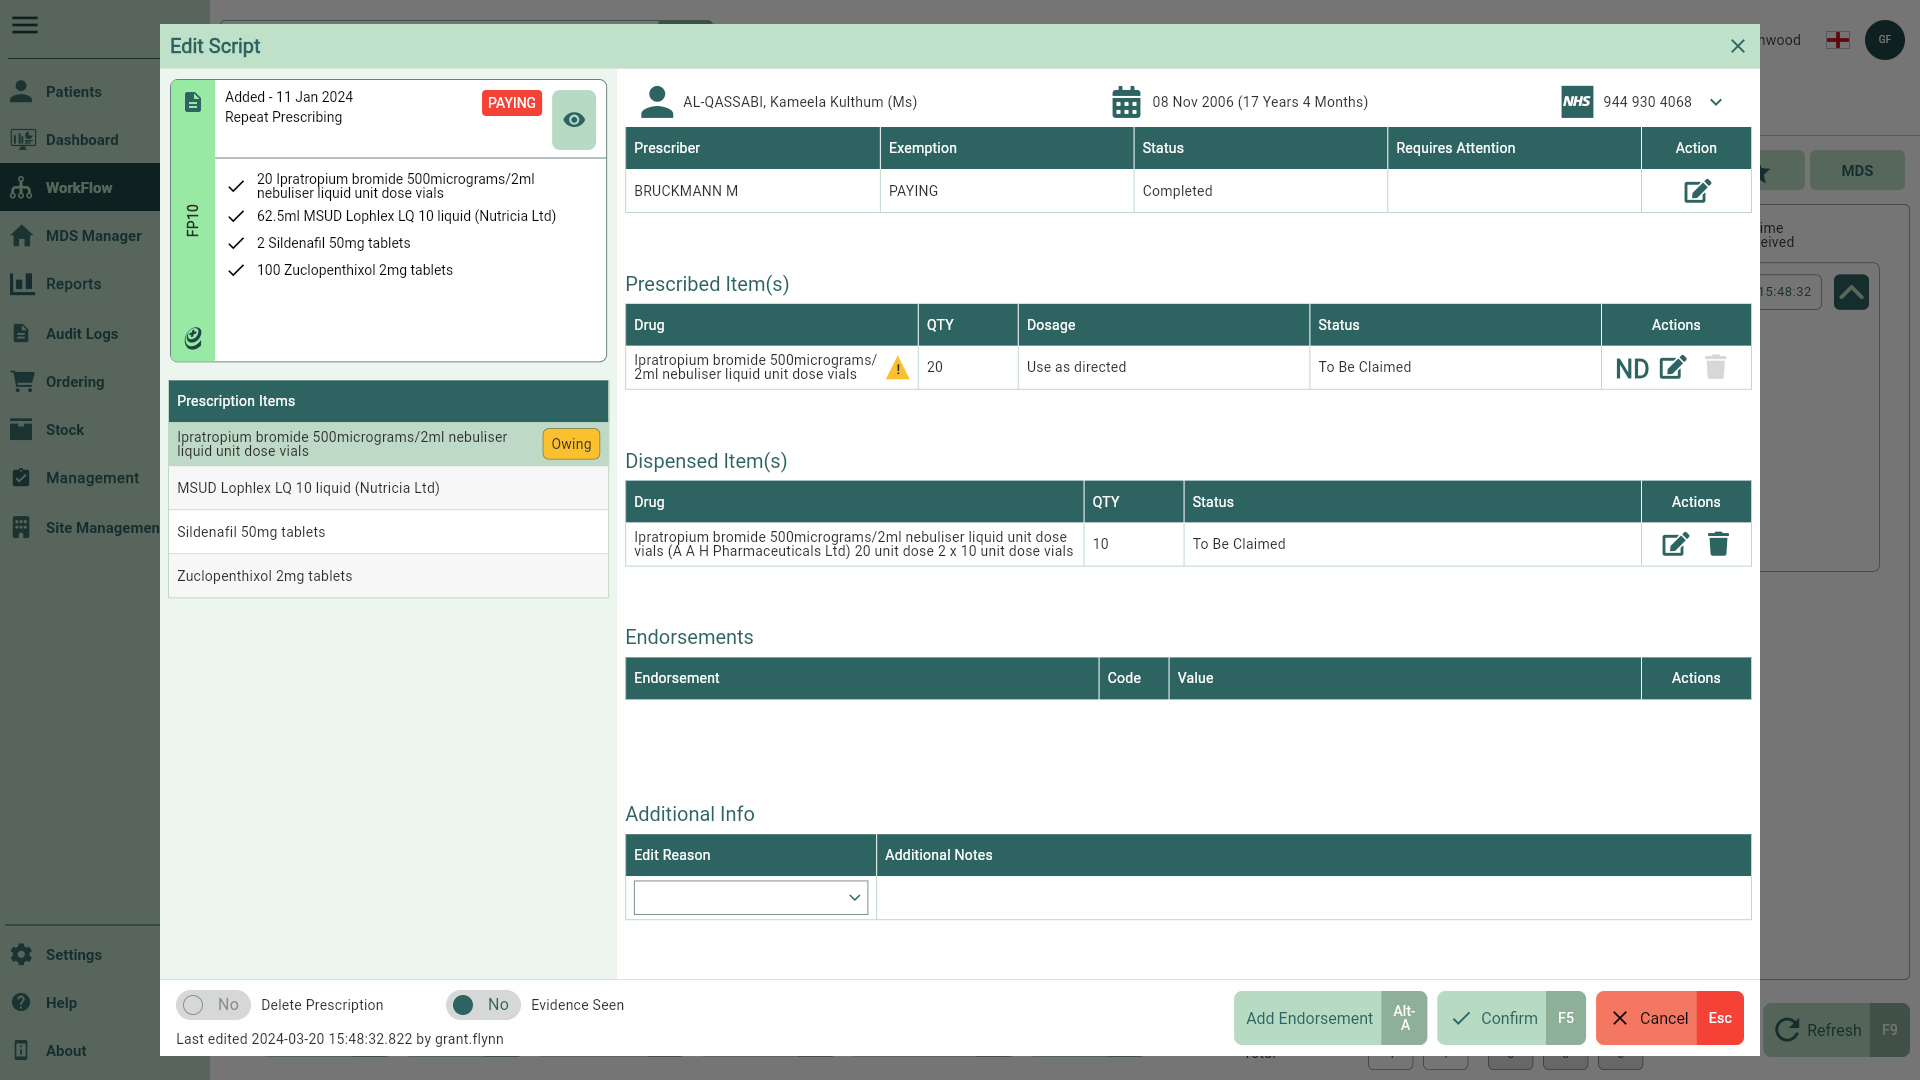
- Select the [Confirm – F5] button.
The prescription will remain in the Requires Attention Workflow tab until it has been fully redeemed.
Related/useful articles
Redeeming owings
Learn how to redeem owings.