Managing user access to branches
Invite and associate your current users to additional branches within your organisation, or if your user is no longer associated with a branch, learn how to remove them.
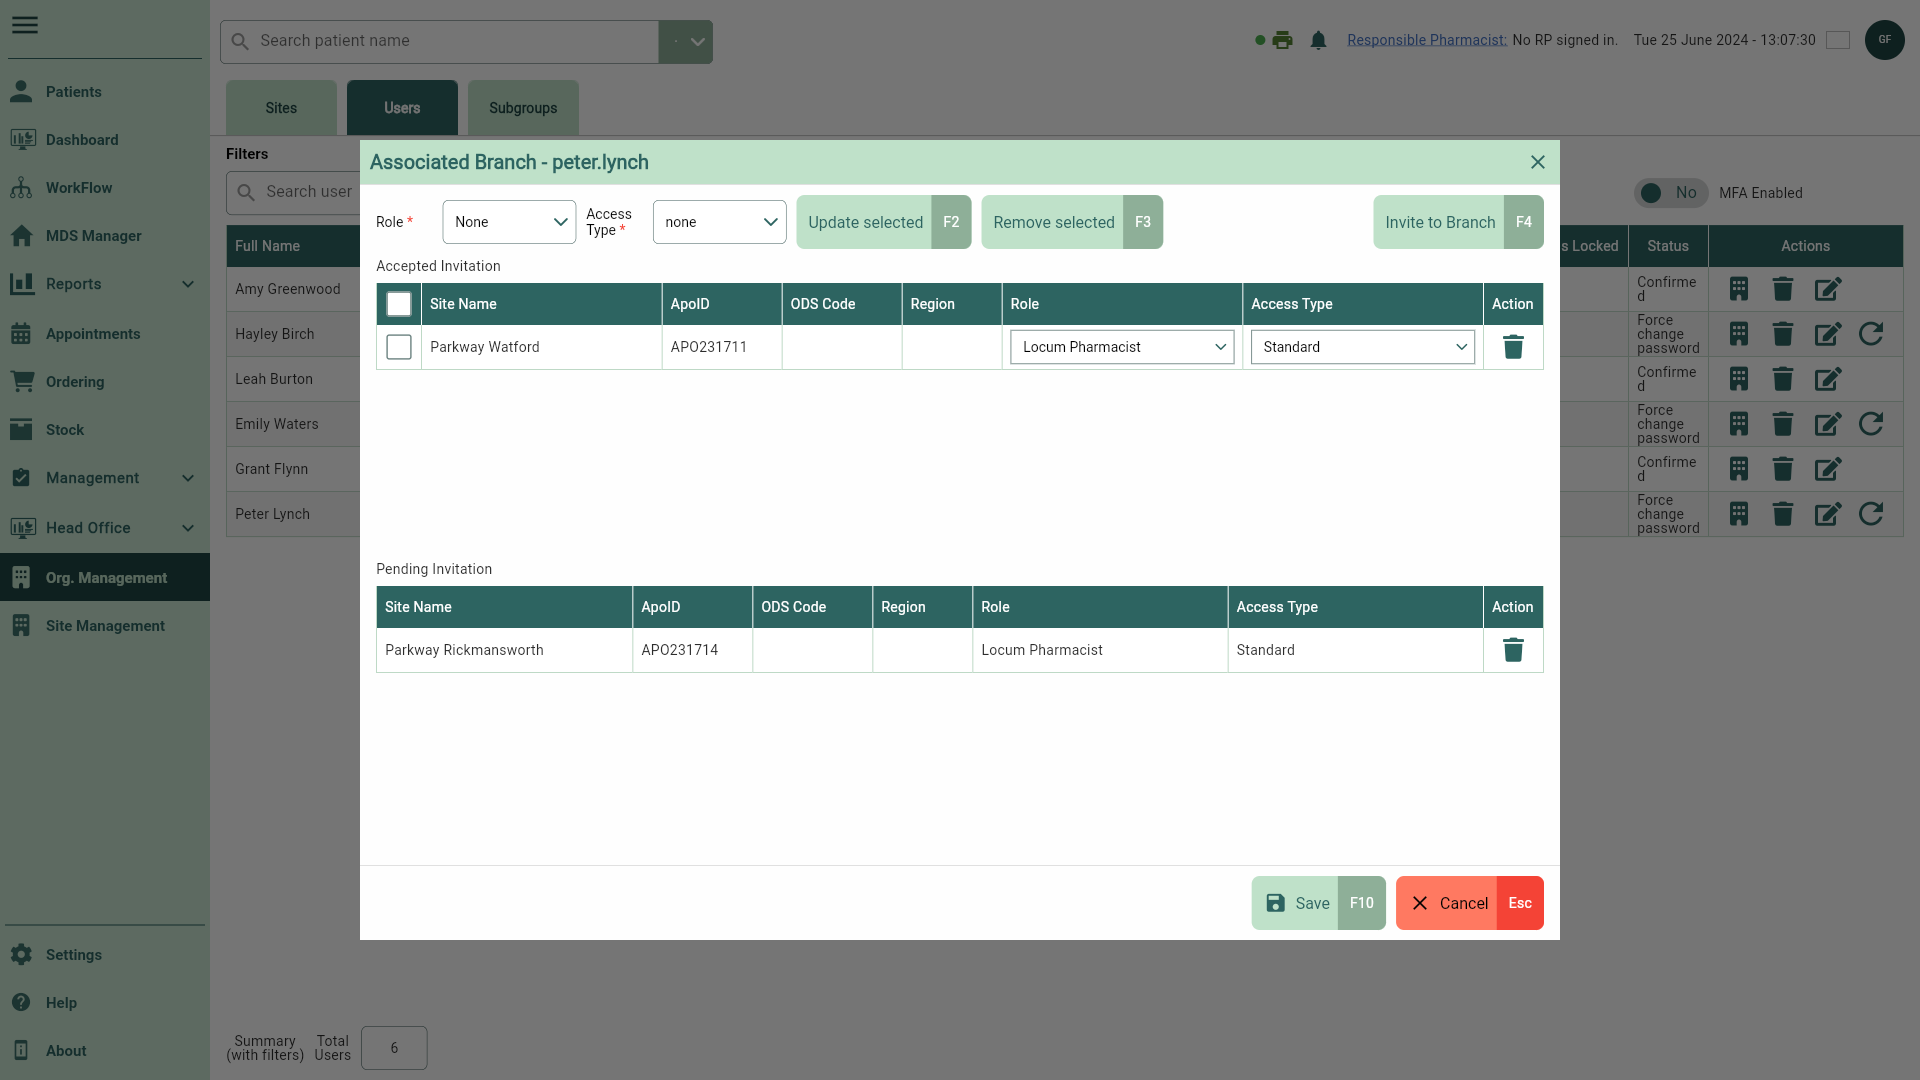
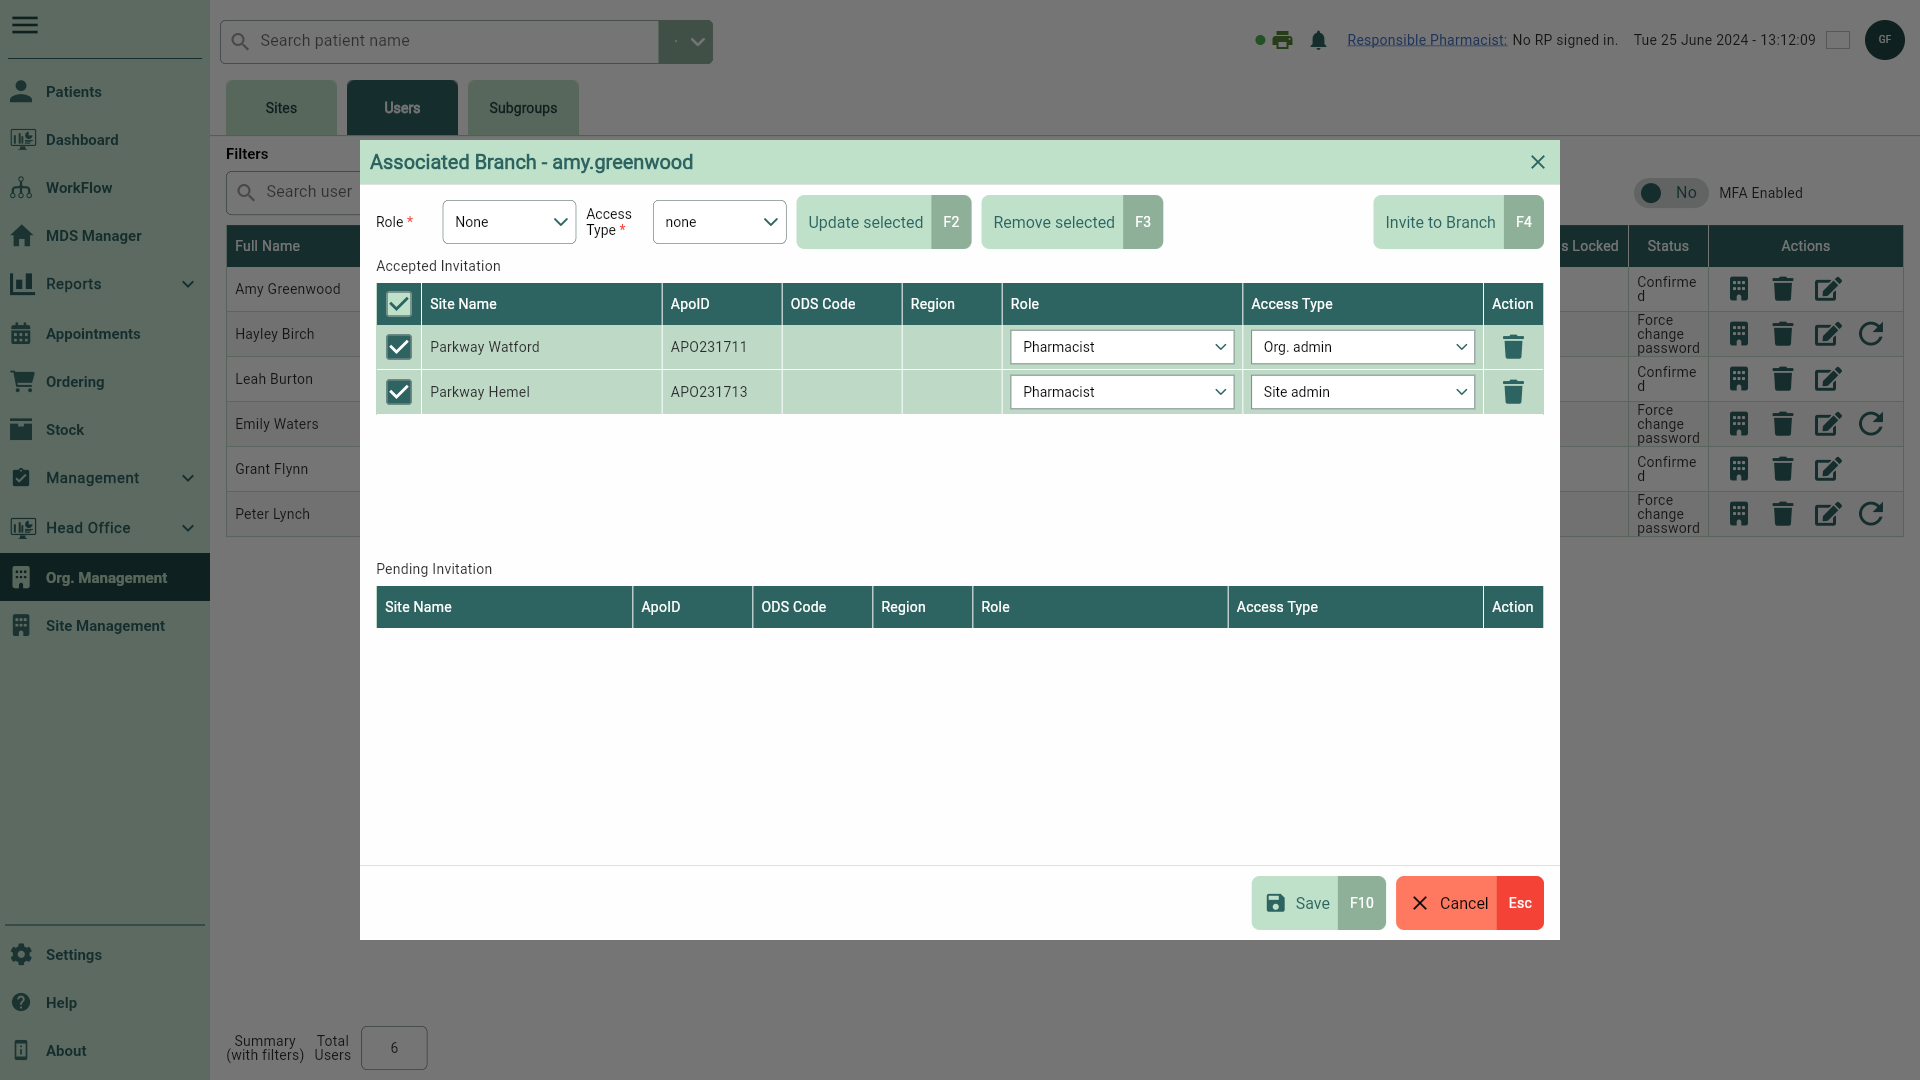
Get to know the Associated Branch window
Manage your users associated branches via the Associated Branch Window. You can individually update or remove branches, or handle them as a batch.
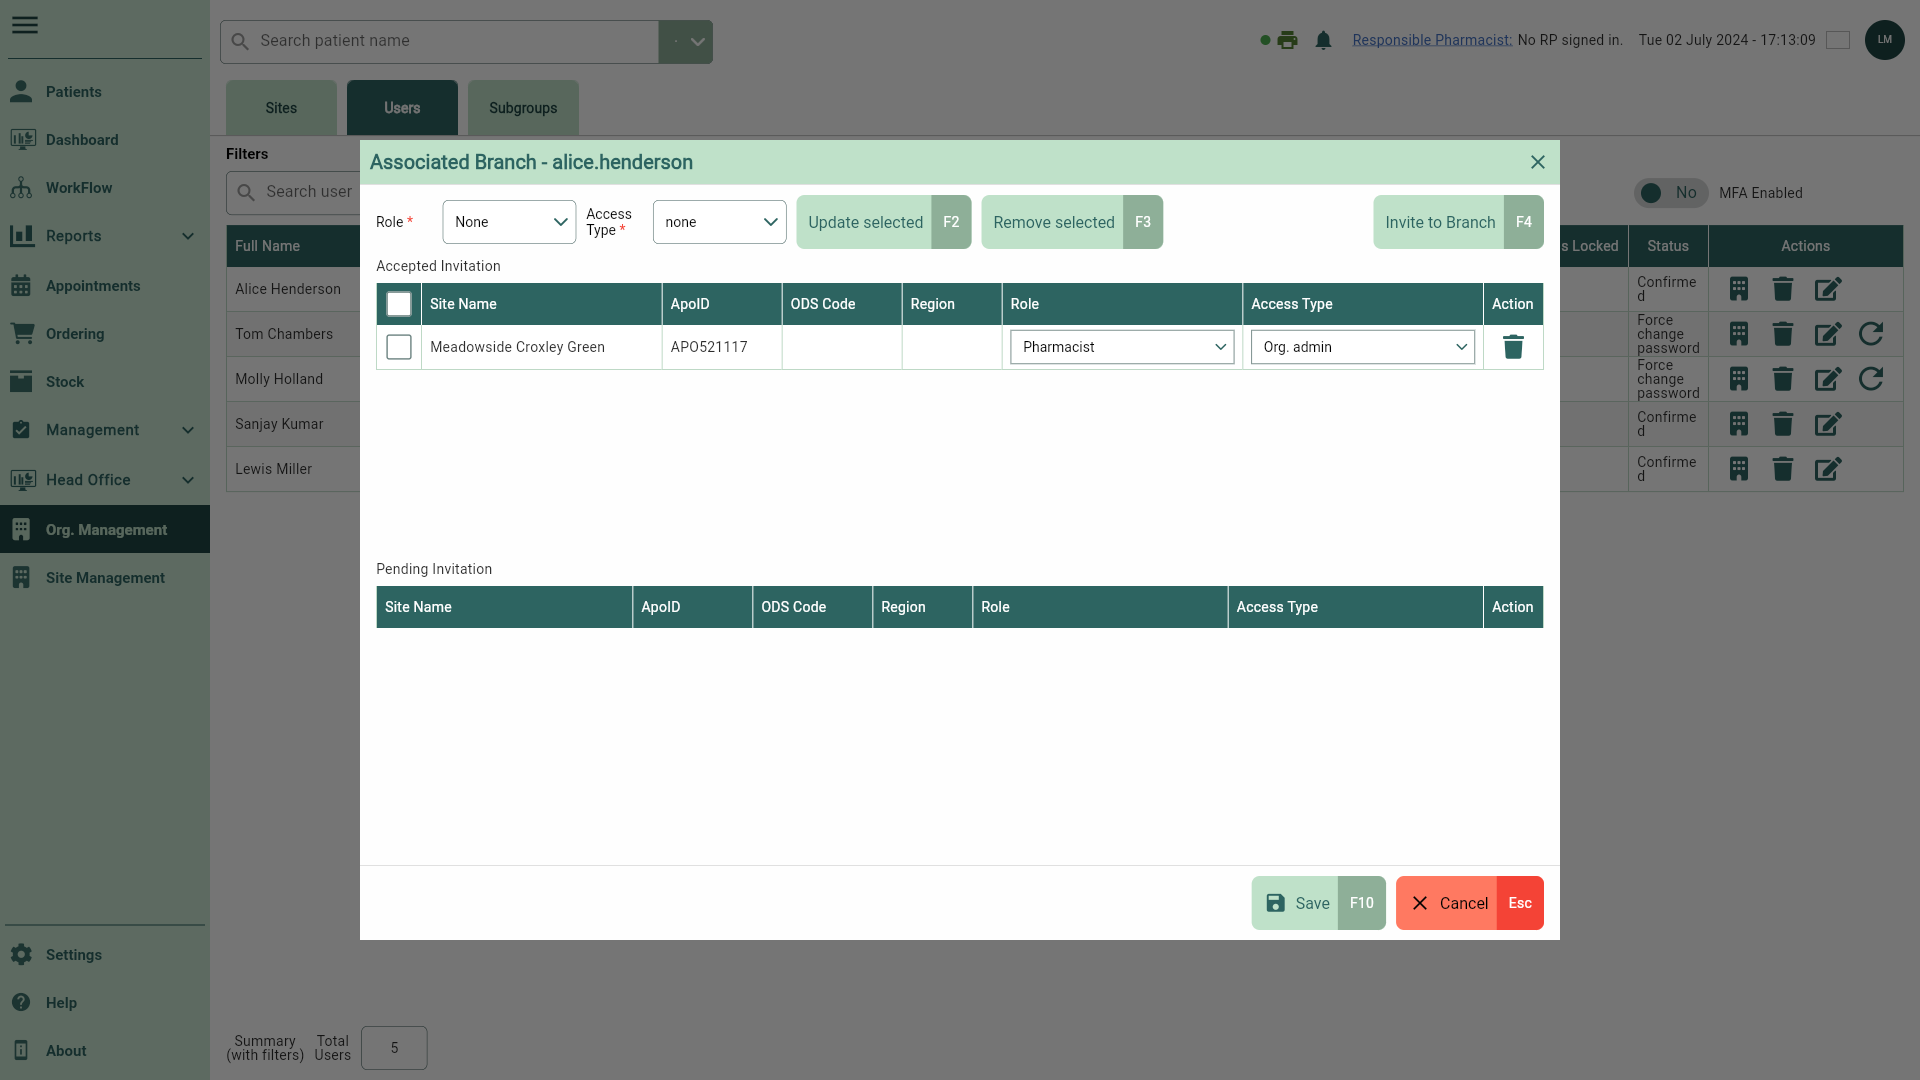
| Field | Action |
|---|---|
| Role dropdown | Select the users Role. |
| Access Type dropdown | Select the users Access Type. |
| [Update Selected - F2] | Once permissions have been selected using the dropdown fields provided, you can update the users Role or Access Type as a batch. |
| [Remove Selected - F3] | Remove the users associated branches as a batch. |
| [Invite to Branch - F4] | Invite the user to associate at an additional branch. |
| Accepted Invitation grid | At a glance, the grid displays the branches currently associated with the user. You can remove them from the branch by selecting the  Delete icon button. You can update the Role and Access type using the dropdown fields. Delete icon button. You can update the Role and Access type using the dropdown fields. |
| Pending Invitation grid | At a glance, the grid displays all pending invitations currently associated with the user. You can remove them from the branch by selecting the Delete icon button. |
Assigning a user to an additional branch
- To begin, open the Users tab in Org. Management by selecting Org. Management from the left-nav and the Users tab.
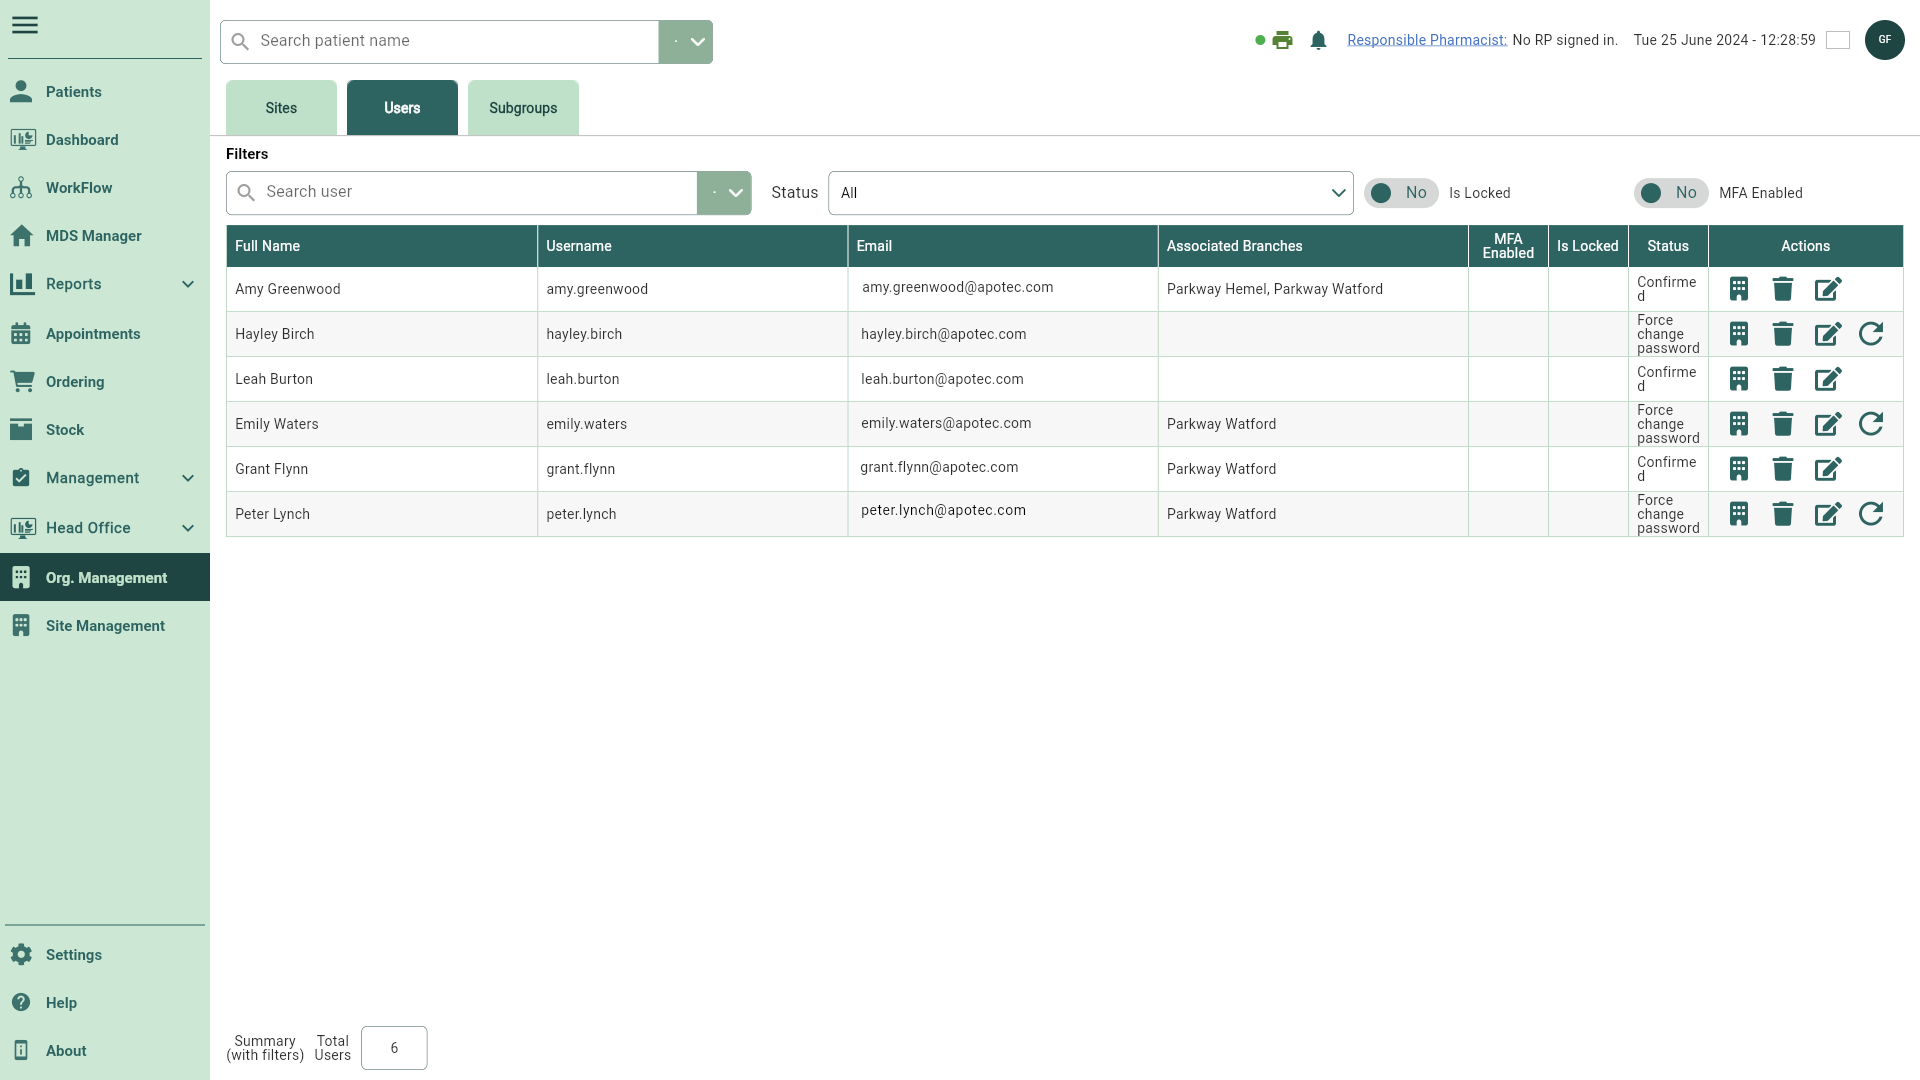
- Locate the required user and select the adjacent
 Branch icon. The Associated Branch window displays. If required, use the available filters to refine the grid.

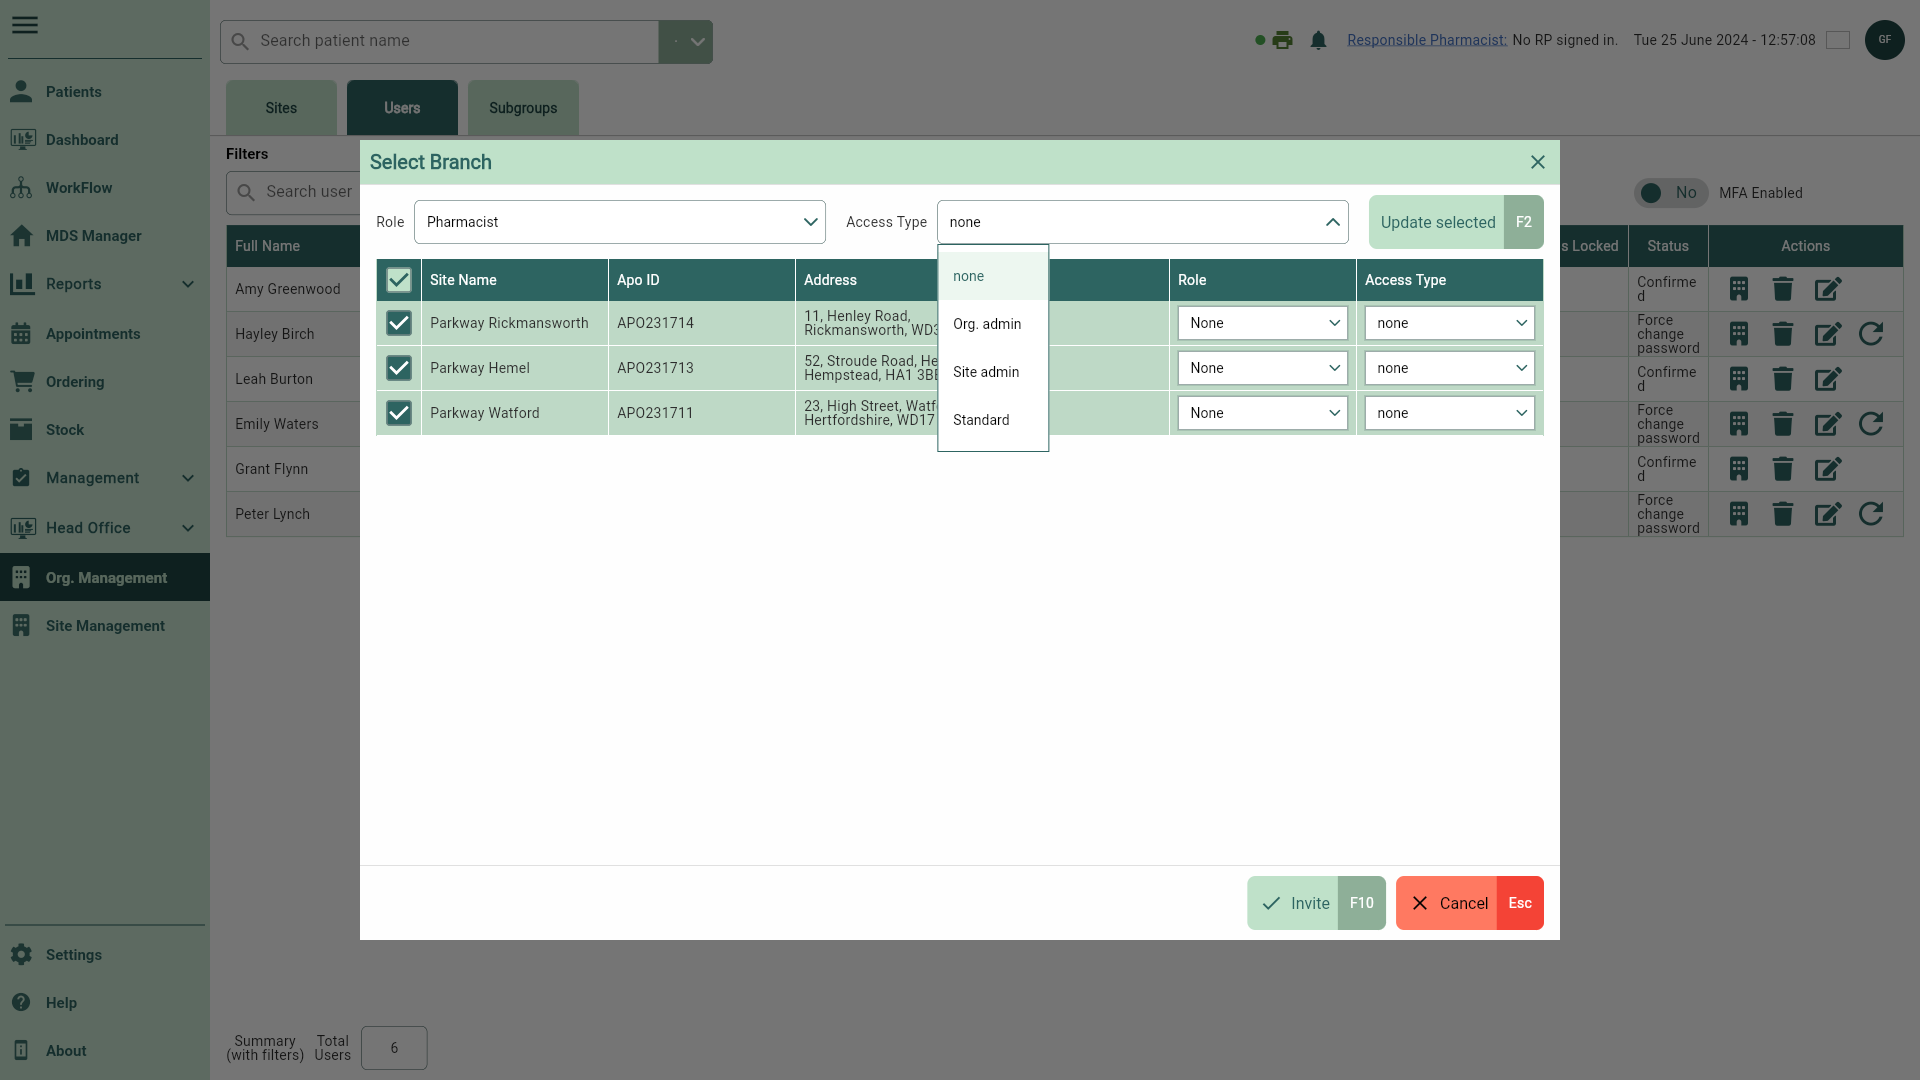
- Select the [Invite to Branch - F4] button. The Select Branch window displays.

- Highlight the required branch, and using the adjacent Role and Access Type dropdown fields, set your users branch permissions.
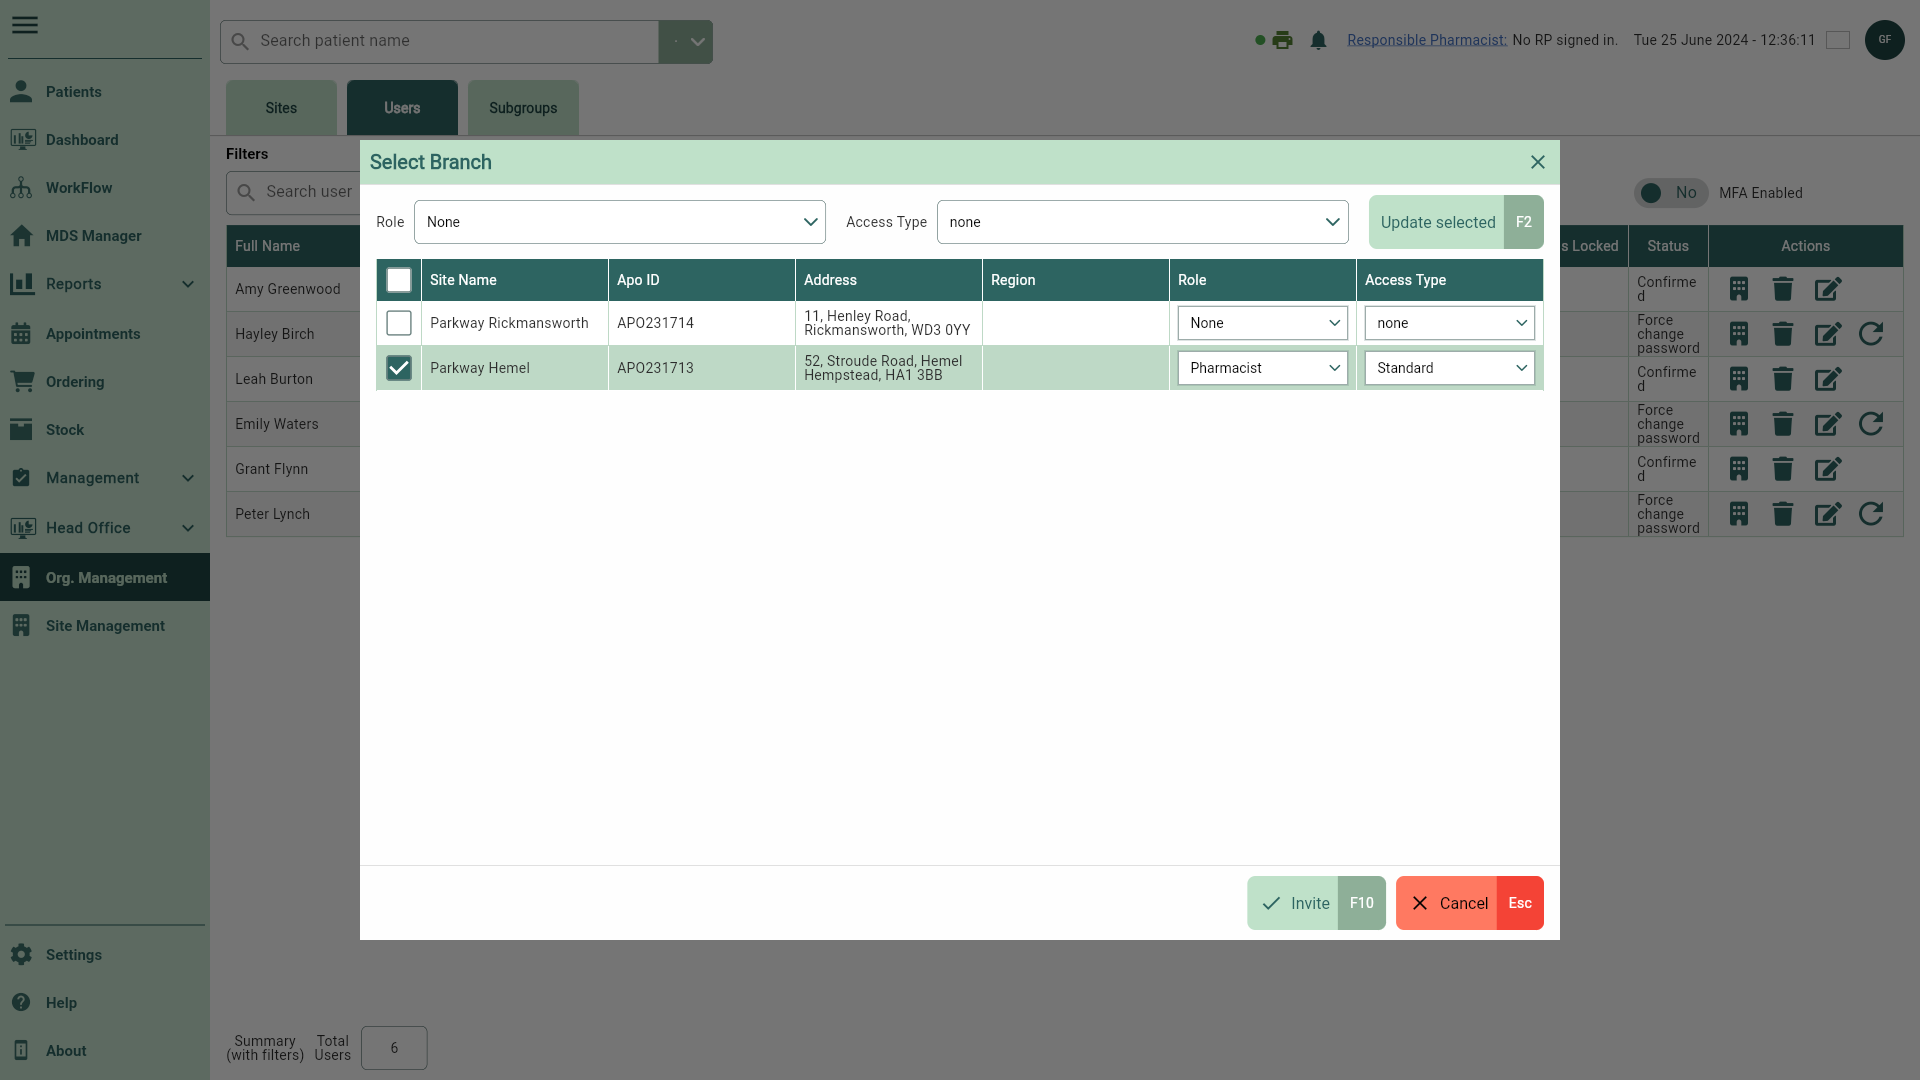
- Select the [Invite - F10] button to send your invite. A snackbar displays confirming your invitation has been sent successfully, and you are returned to the Users tab.
Assigning a user to multiple additional branches
- To begin, open the Users tab in Org. Management by selecting Org. Management from the left-nav and the Users tab.
- Locate the required user, then select the adjacent Branch icon. The Associated Branch window for your selected user displays. If required, use the available filters to refine the grid.

- Select the [Invite to Branch - F4] button. The Select Branch window displays.
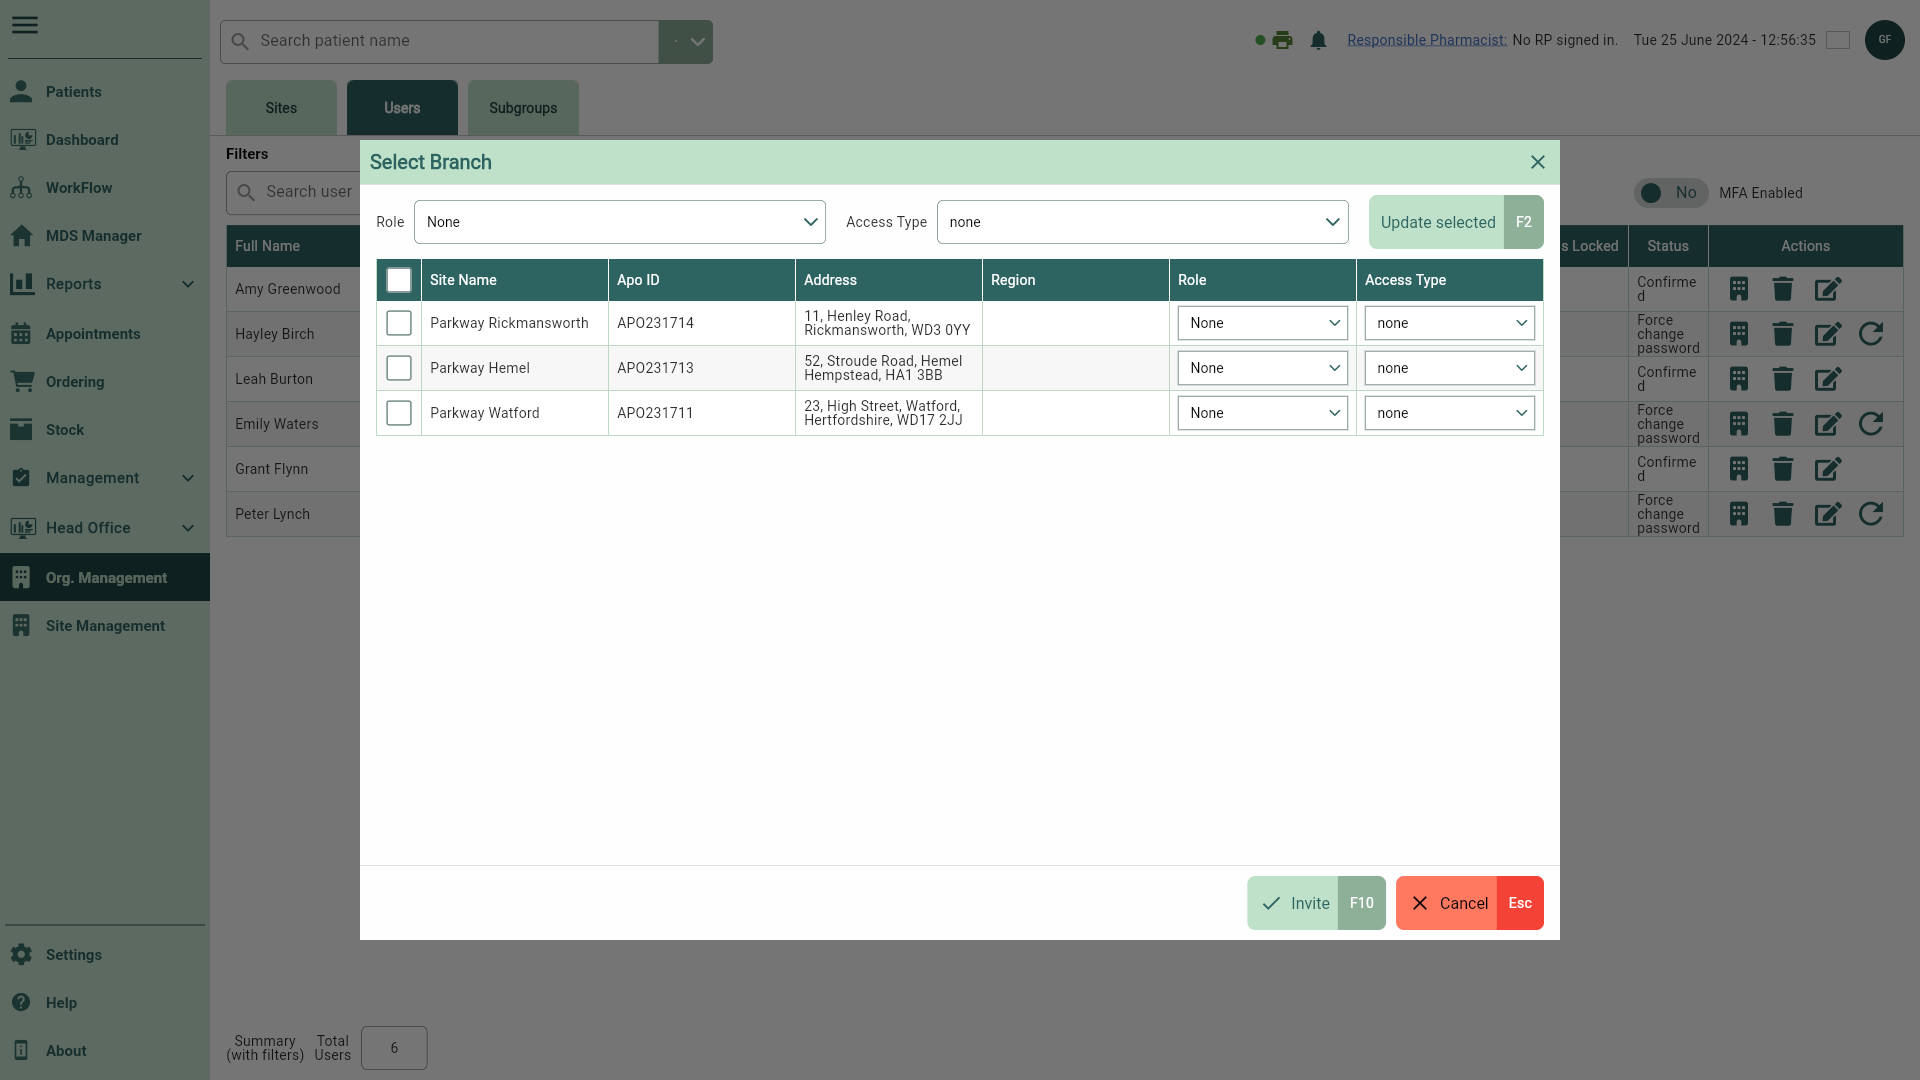
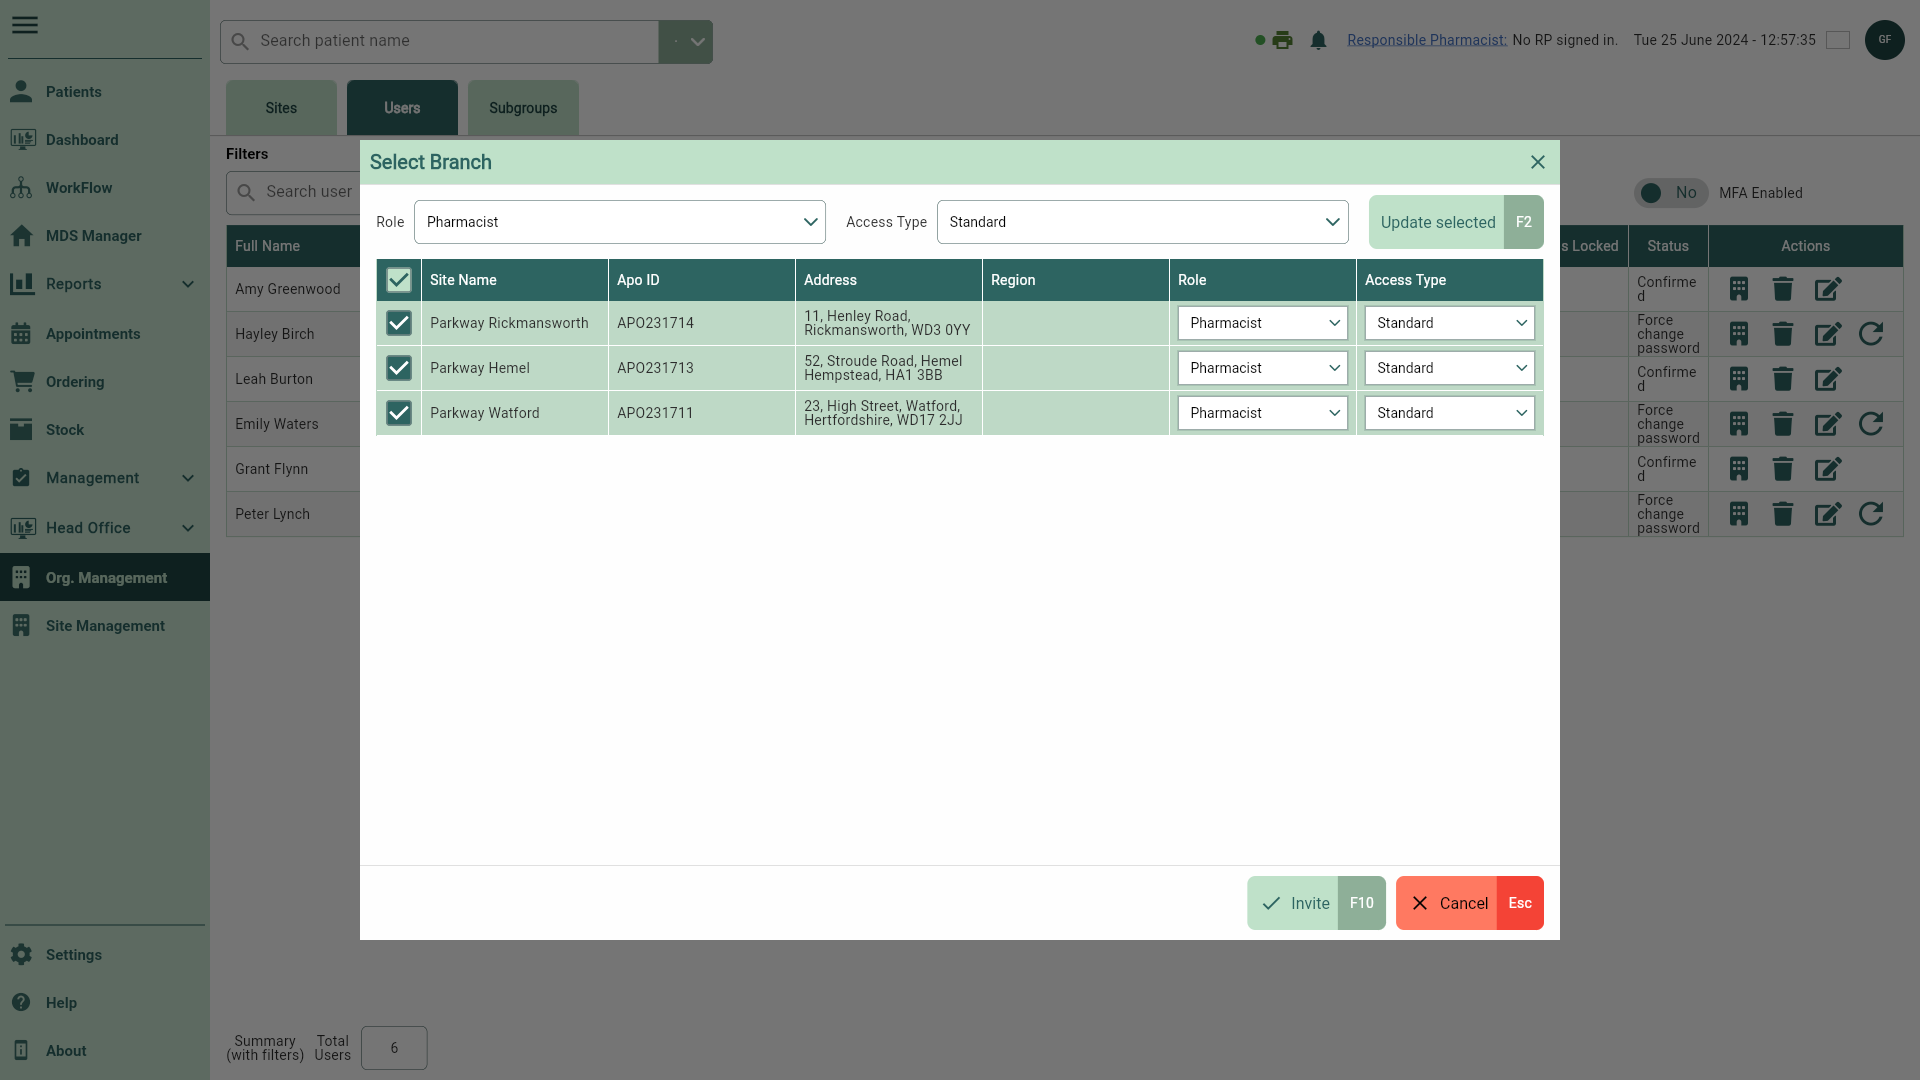
- Highlight the required branches.
Tip
You can select a branch one at a time, or your whole list using the select all box.

- Using the batch Role and Access Type dropdown fields, assign the users permissions for the associated branches.
- Select the [Update Selected - F2] button to apply the update to all selected branches as a batch.
- Select the [Invite - F10] button to send your invite. A snackbar displays confirming your invitation has been sent successfully, and you are returned to Users tab.
Removing a user from an associated branch
If your user is no longer associated at a branch you can remove them.
- To begin, open the Users tab in Org. Management by selecting Org. Management from the left-nav and the Users tab.
- Locate the required user and select the adjacent Branch icon. The Associated Branch window displays. If required, use the available filters to refine the grid.
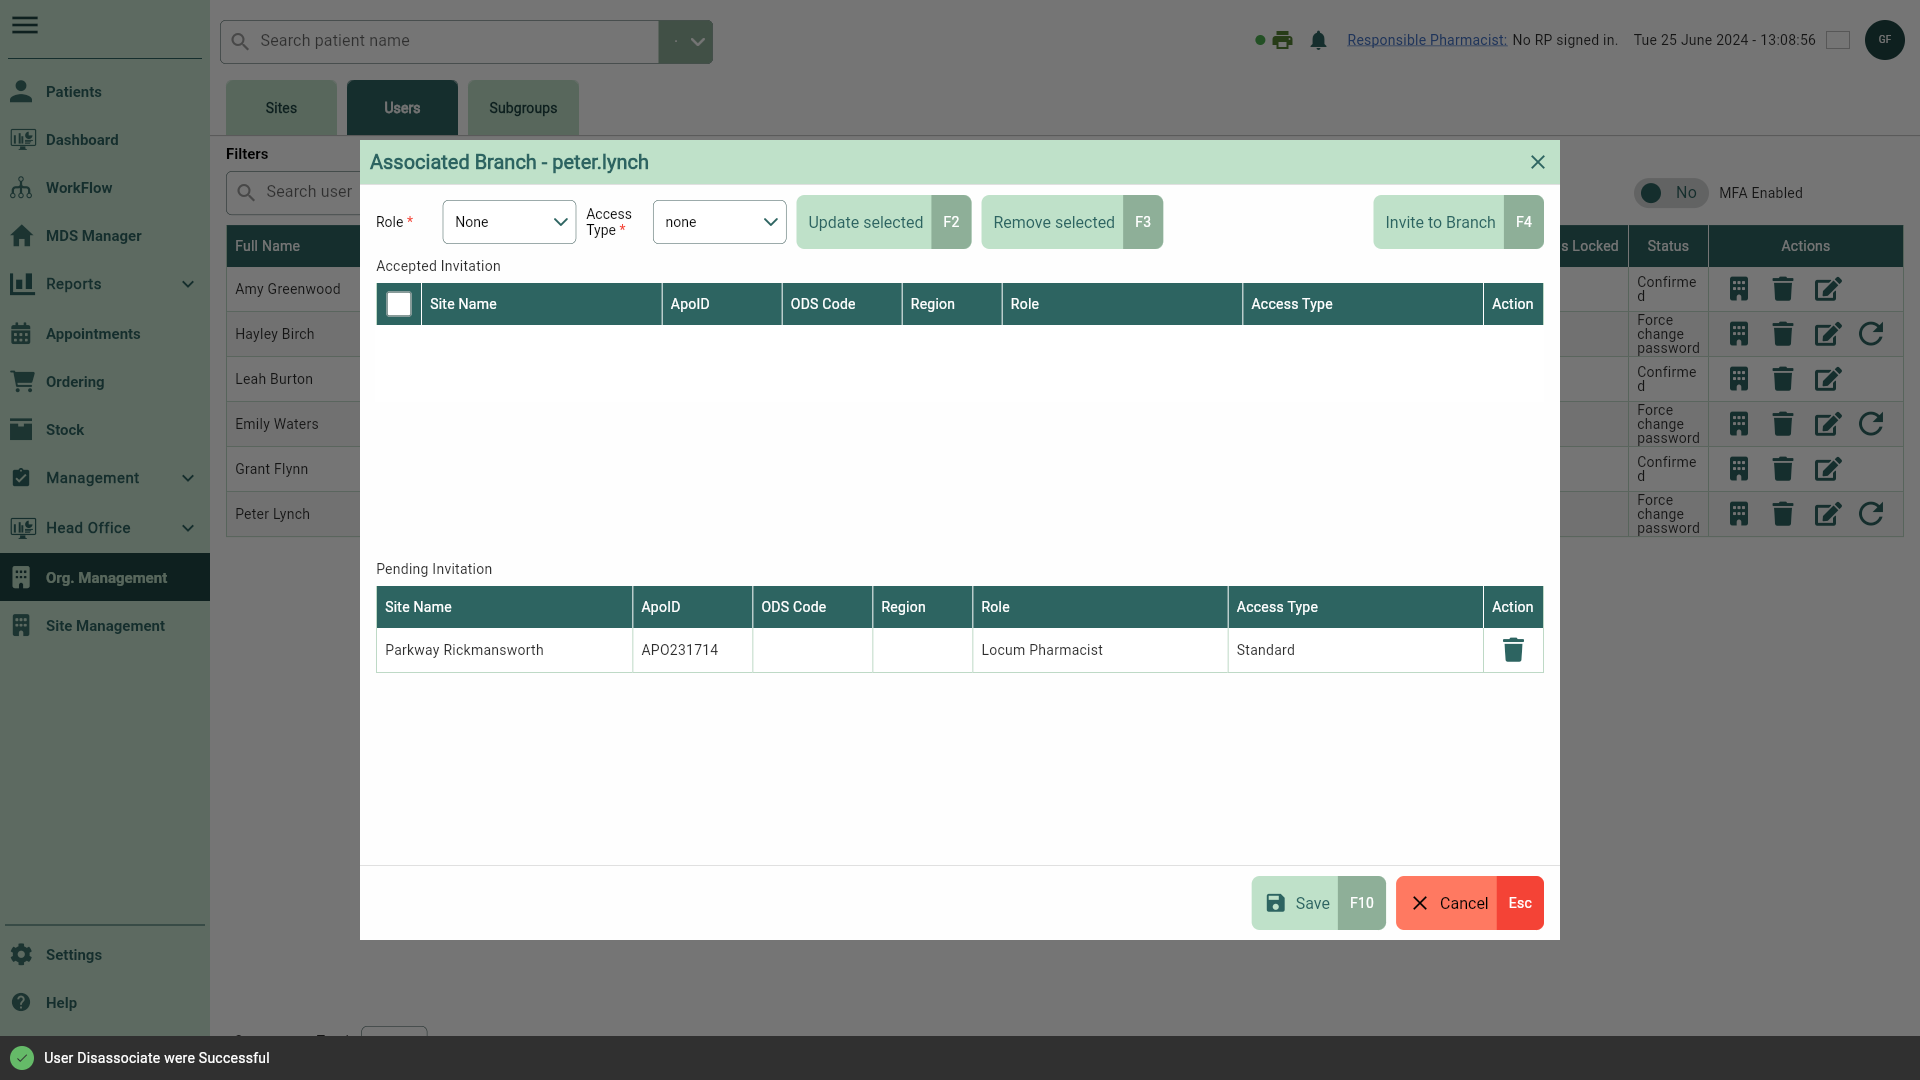
- Locate the branch the user is no longer associated with, and select the adjacent Delete icon button in the Actions column. A snackbar displays confirming your user has been removed from the branch successfully.
- Select the [Save - F10] button to confirm your update and return to the Users tab.
Removing a user from multiple associated branches
- To begin, open the Users tab in Org. Management by selecting Org. Management from the left-nav and the Users tab.
- Locate the required user and select the adjacent Branch icon. The Associated Branch window displays. If required, use the available filters to refine the grid.

- Locate and select the branches the user is no longer associated with.
Tip
You can select a branch one at a time, or your whole list using the select all box.
- Select the [Remove Selected - F3] button to remove all selected branches. A snackbar displays confirming your user has been removed from the branches successfully.
- Select the [Save - F10] button to confirm your update and return to the Users tab.