Get to know Head Office Restrictions
Restrictions determine which products - generics and/or brands - display during dispensing. Using Head Office Restrictions, you can apply restrictions and publish these directly to your branches.
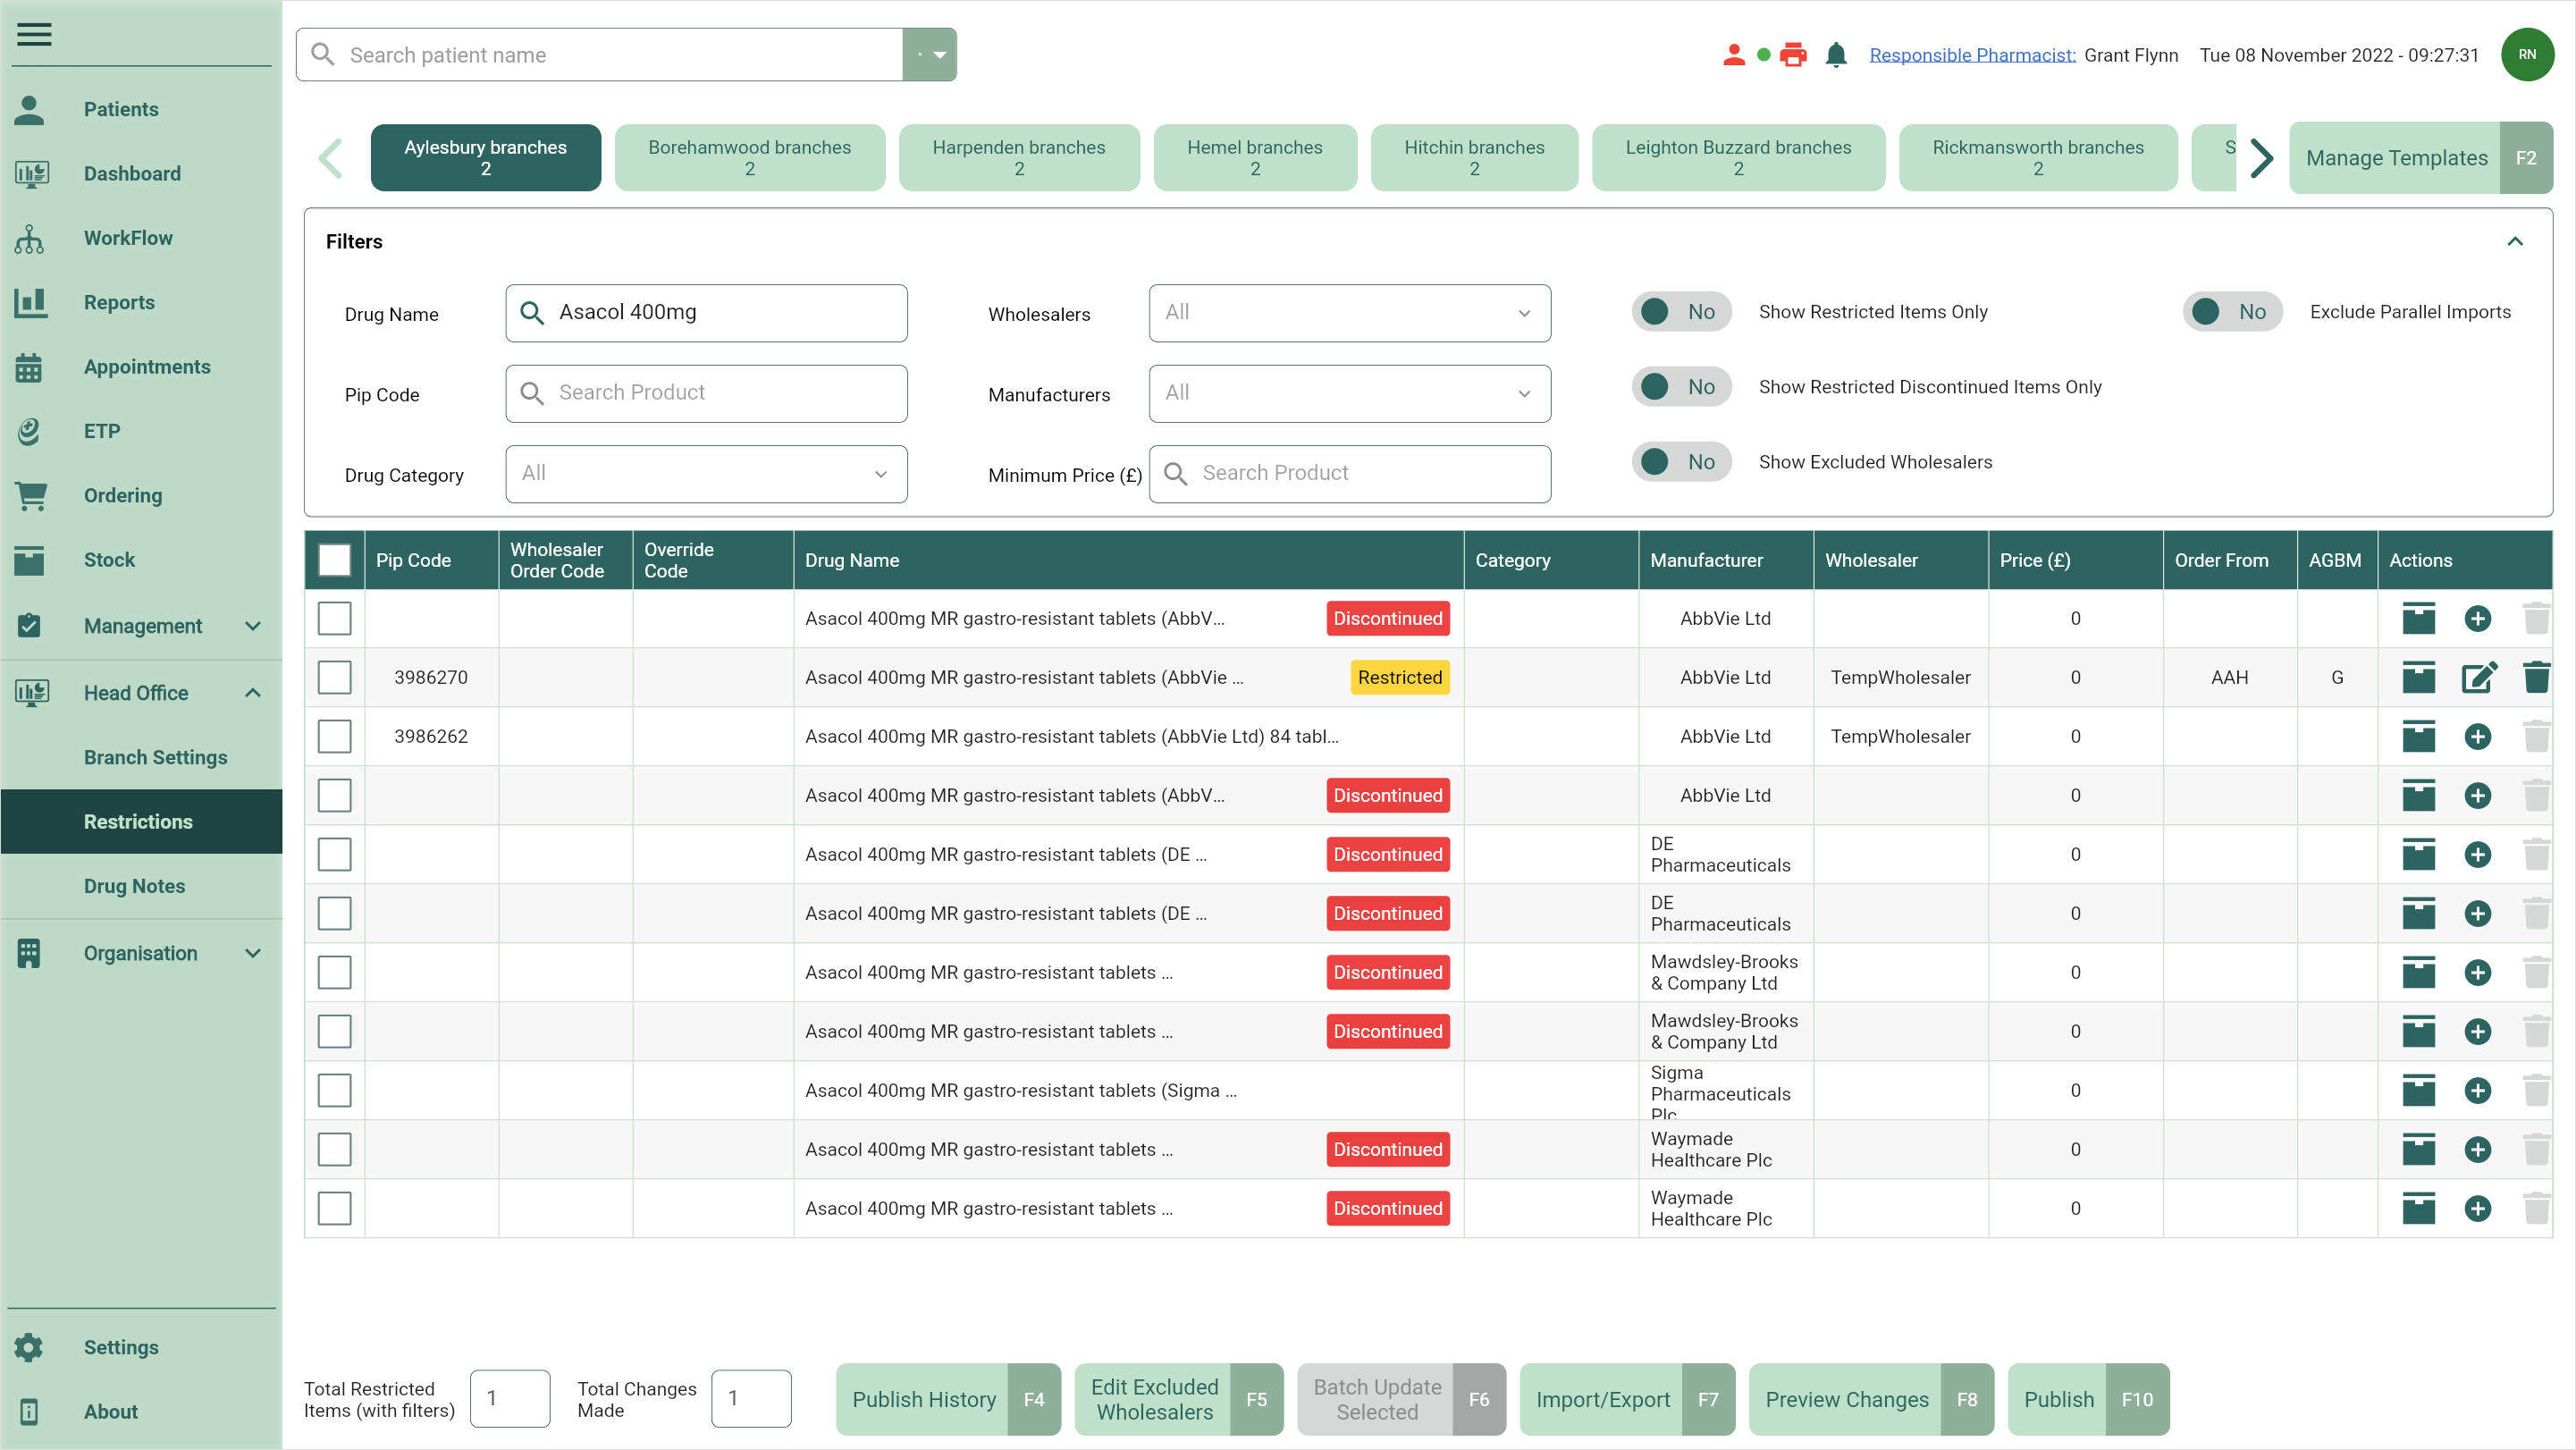
To access Head Office Restrictions, select the Head Office dropdown menu from the left-nav and the Restrictions menu item.
| Field | Description |
|---|---|
| Templates | Sitting directly above the restrictions Filters are all your created templates. Selecting a template tab will display all the saved restrictions in the grid where you can complete updates and publishing tasks. |
| [Manage Templates - F2] | Use the [Manage Templates - F2] button to open the Manage Restrictions Templates window. In this window you can create, edit and delete restriction templates. |
| Filters | Use the Filters to show/hide Restricted Items to begin populating your template. Apply additional filters on Drug Name, Wholesalers and more to help locate the specific items you need. |
| Grid | The grid is populated based on your chosen filters. Within the grid, you'll be able to select multiple items for batch updates, use icons in the Actions column to add, edit and/or delete restrictions on individual lines, and access the item's stock card. Badges will be displayed on Restricted items, Brands and Discontinued lines. |
| Total Restricted Items (with filters) | This field will display a sum of all the restricted items you have displayed in your grid based on your selected filters. |
| Total Changes Made | This field displays a sum for the total number of lines in your template where changes have been applied. Changes must be saved to be recorded in the total. The total includes added, edited and deleted restrictions and the value is only reset to zero once the template has been published. |
| [Publish History - F4] | Open the Publish History window to view the details of all your published templates, including Date Published, Total Restrictions and the publish Status. You can use the filters within this window to refine the grid by Period or a custom date range, and the function keys to republish or restore a template. |
| [Show Excluded Wholesalers - F5] | Selecting this button will open the Edit Excluded Wholesalers window where you can mark Available Wholesalers as excluded. |
| [Batch Update Selected - F6] | Selecting one or more items in the grid will enable the [Batch Update Selected - F6] button. This button will open the Batch Update window, where you can select the Restriction type, Wholesaler and Priority to update across all your selected items. |
| [Import/Export - F7] | Use the [Import/Export - F7] button to import or export restrictions. |
| [Preview Changes - F8] | Before publishing your changes, use the [Preview Changes - F8] button to view an itemised list of all your old and new deleted, added and edited restriction values within the Preview Changes window. |
| [Publish - F10] | Once you're happy with your restrictions, use the [Publish - F10] button to publish your restrictions locally, to test branch(es) or to all branch(es). Additionally, you can set a future date and time to publish your changes when selecting the Publish to All Branch(es) option. |