Marking items as Not Dispensed
Where you decide not to dispense an item, for instance a cancelled item or if the patient decides to purchase over the counter (OTC), you will need to mark it as Not Dispensed (ND).
Marking items as Not Dispensed in the Dispensing Wizard
You can mark items as Not Dispensed during the Picking step of the Dispensing Wizard.
The Dispensing Wizard will automatically mark items as ND for selected prescriptions such as blacklisted, cancelled, expired, or disallowed by prescribers. An alert will be shown for each affected item.
- Begin the Picking step of the Dispensing Wizard by highlighting a prescribed item on the picking list, then select the [Mark as ND - Alt-N] button.
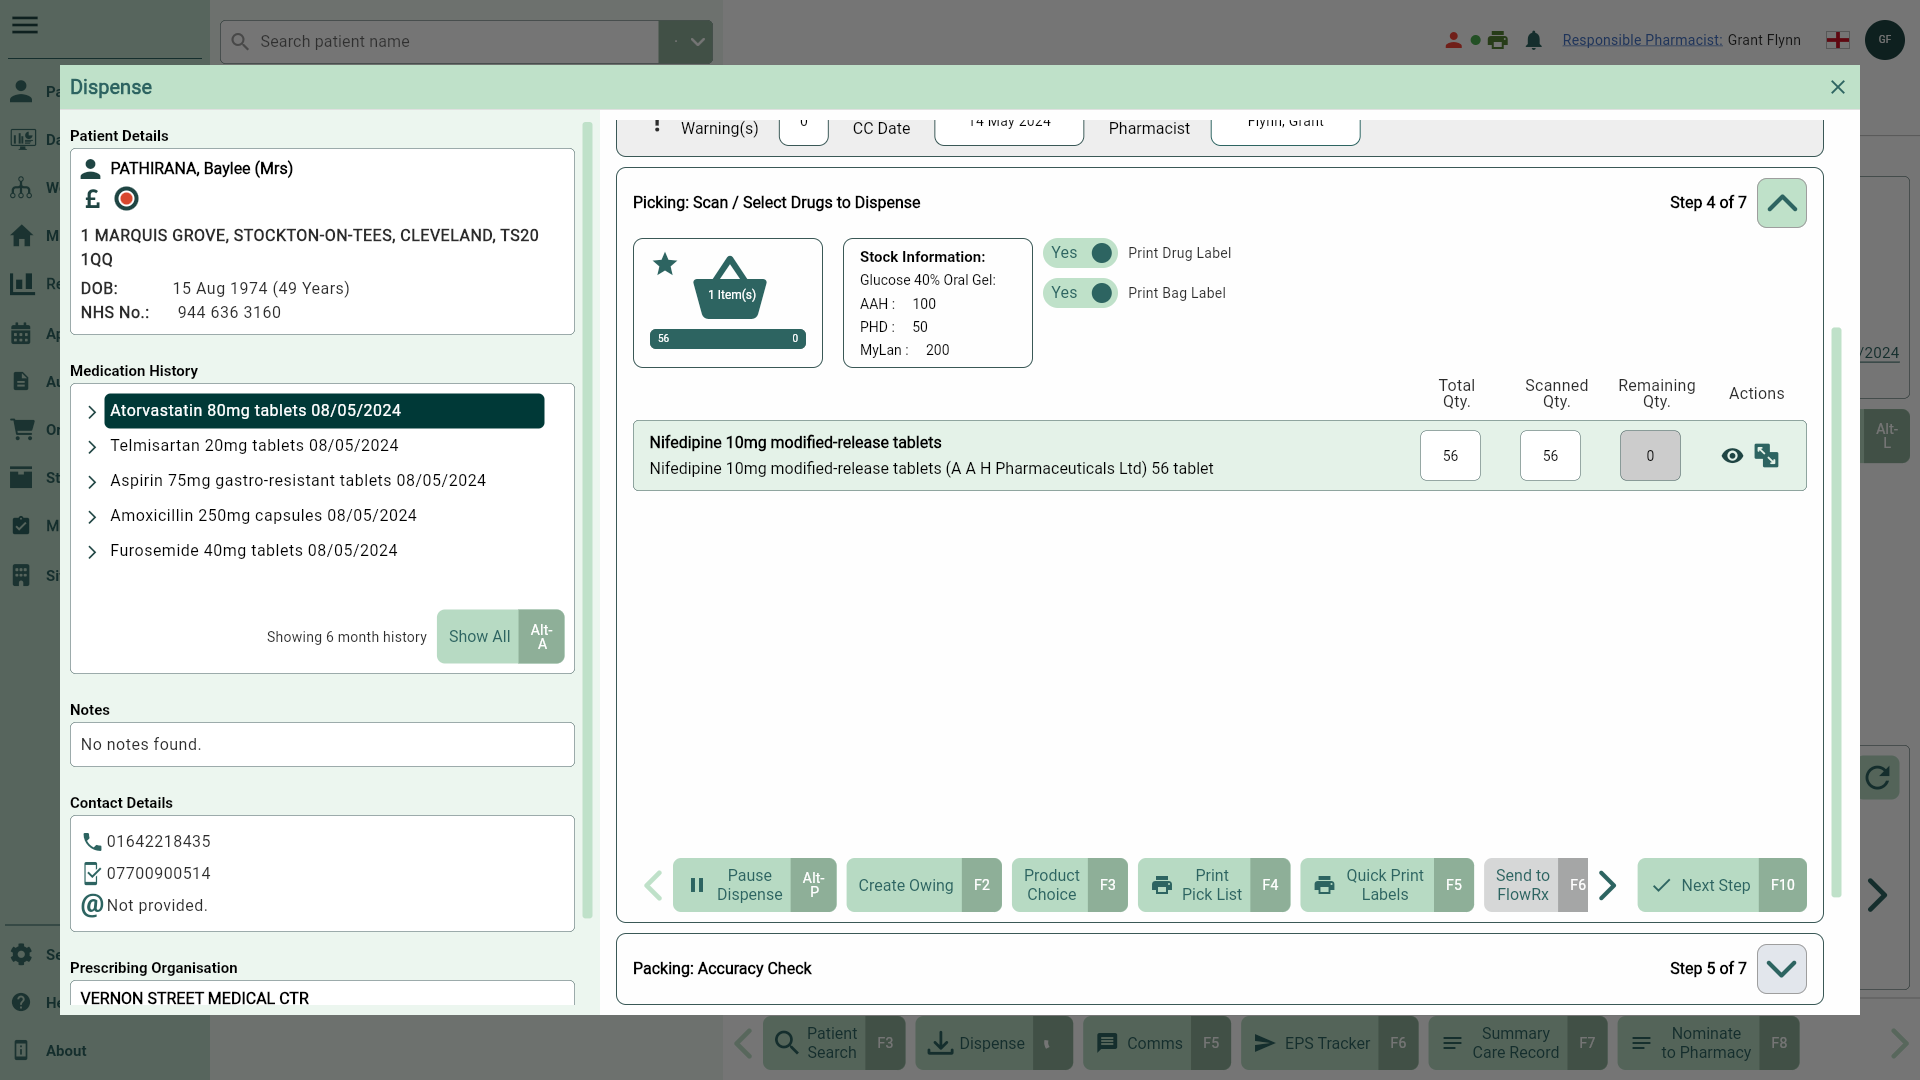
- The Mark as ND window displays. Select a not dispensed reason for the item(s) you're marking as Not Dispensed from the ND Reason dropdown menu.
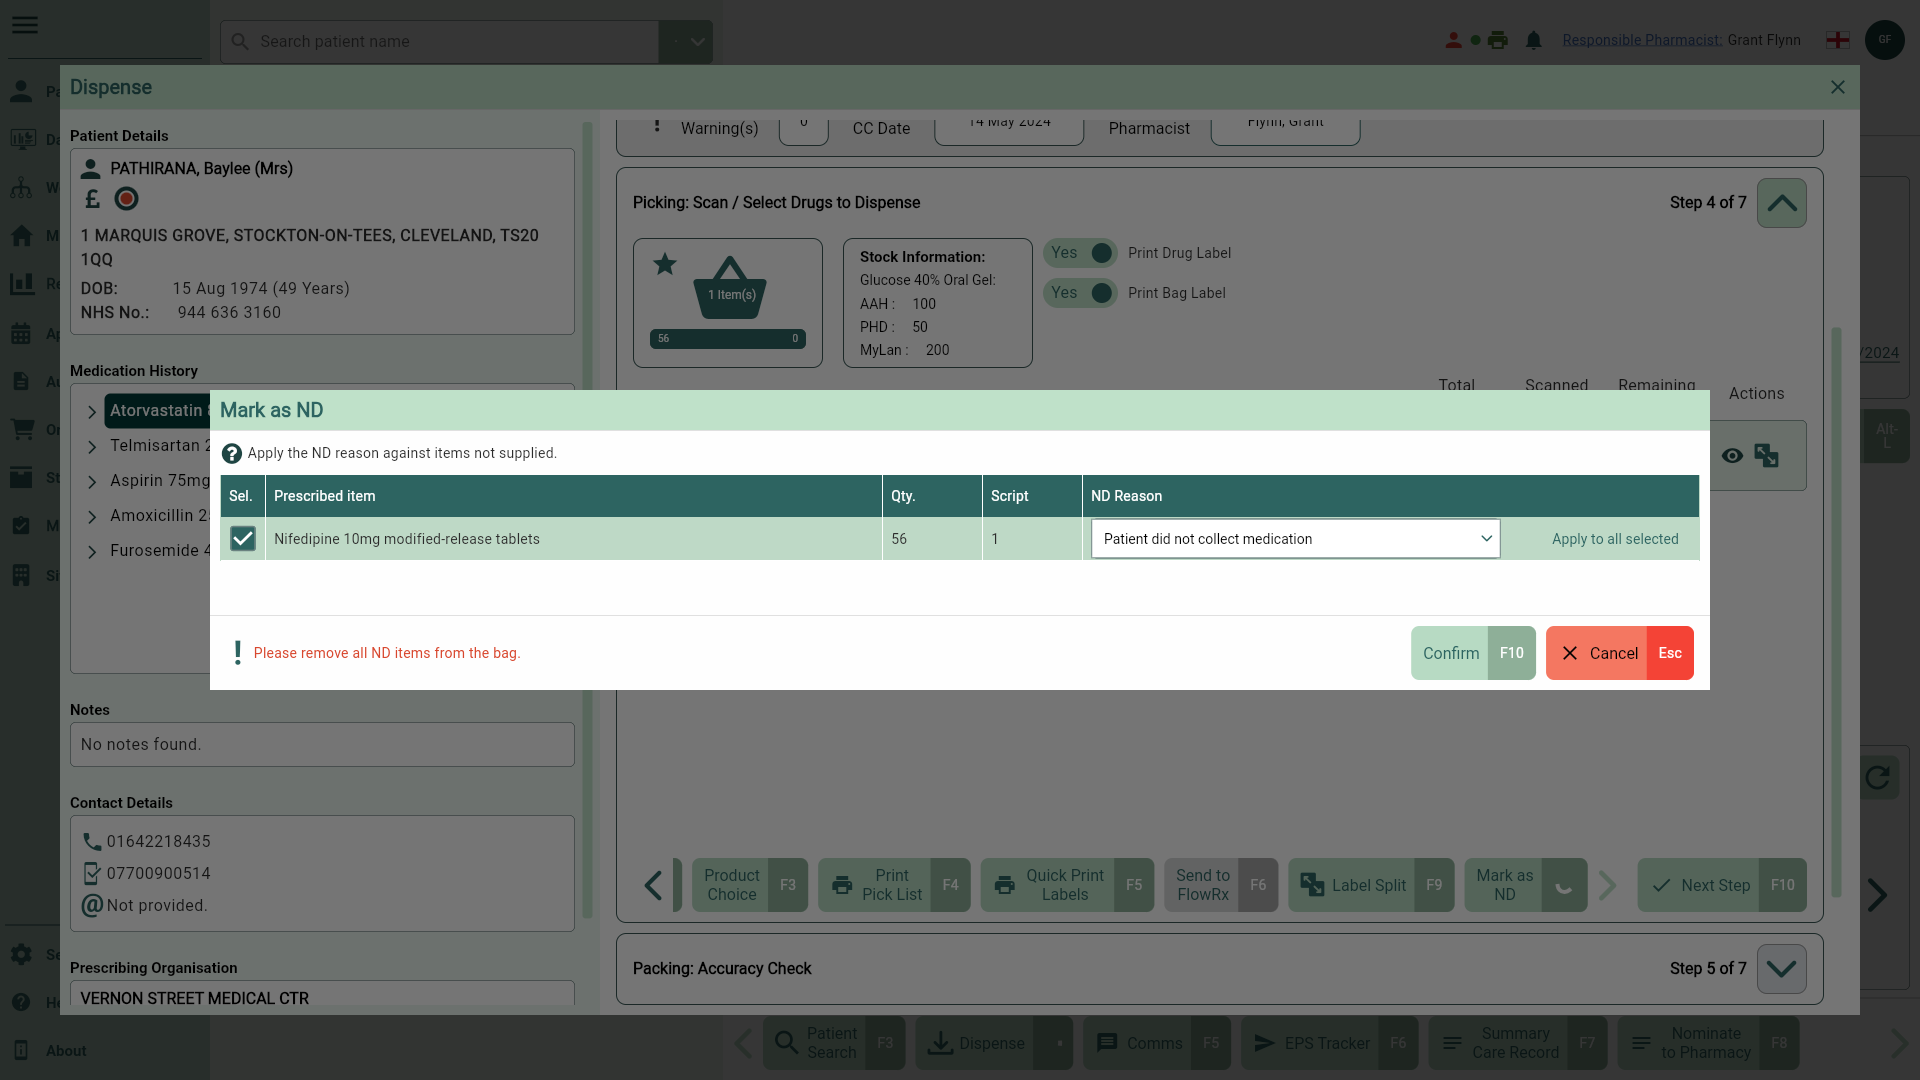
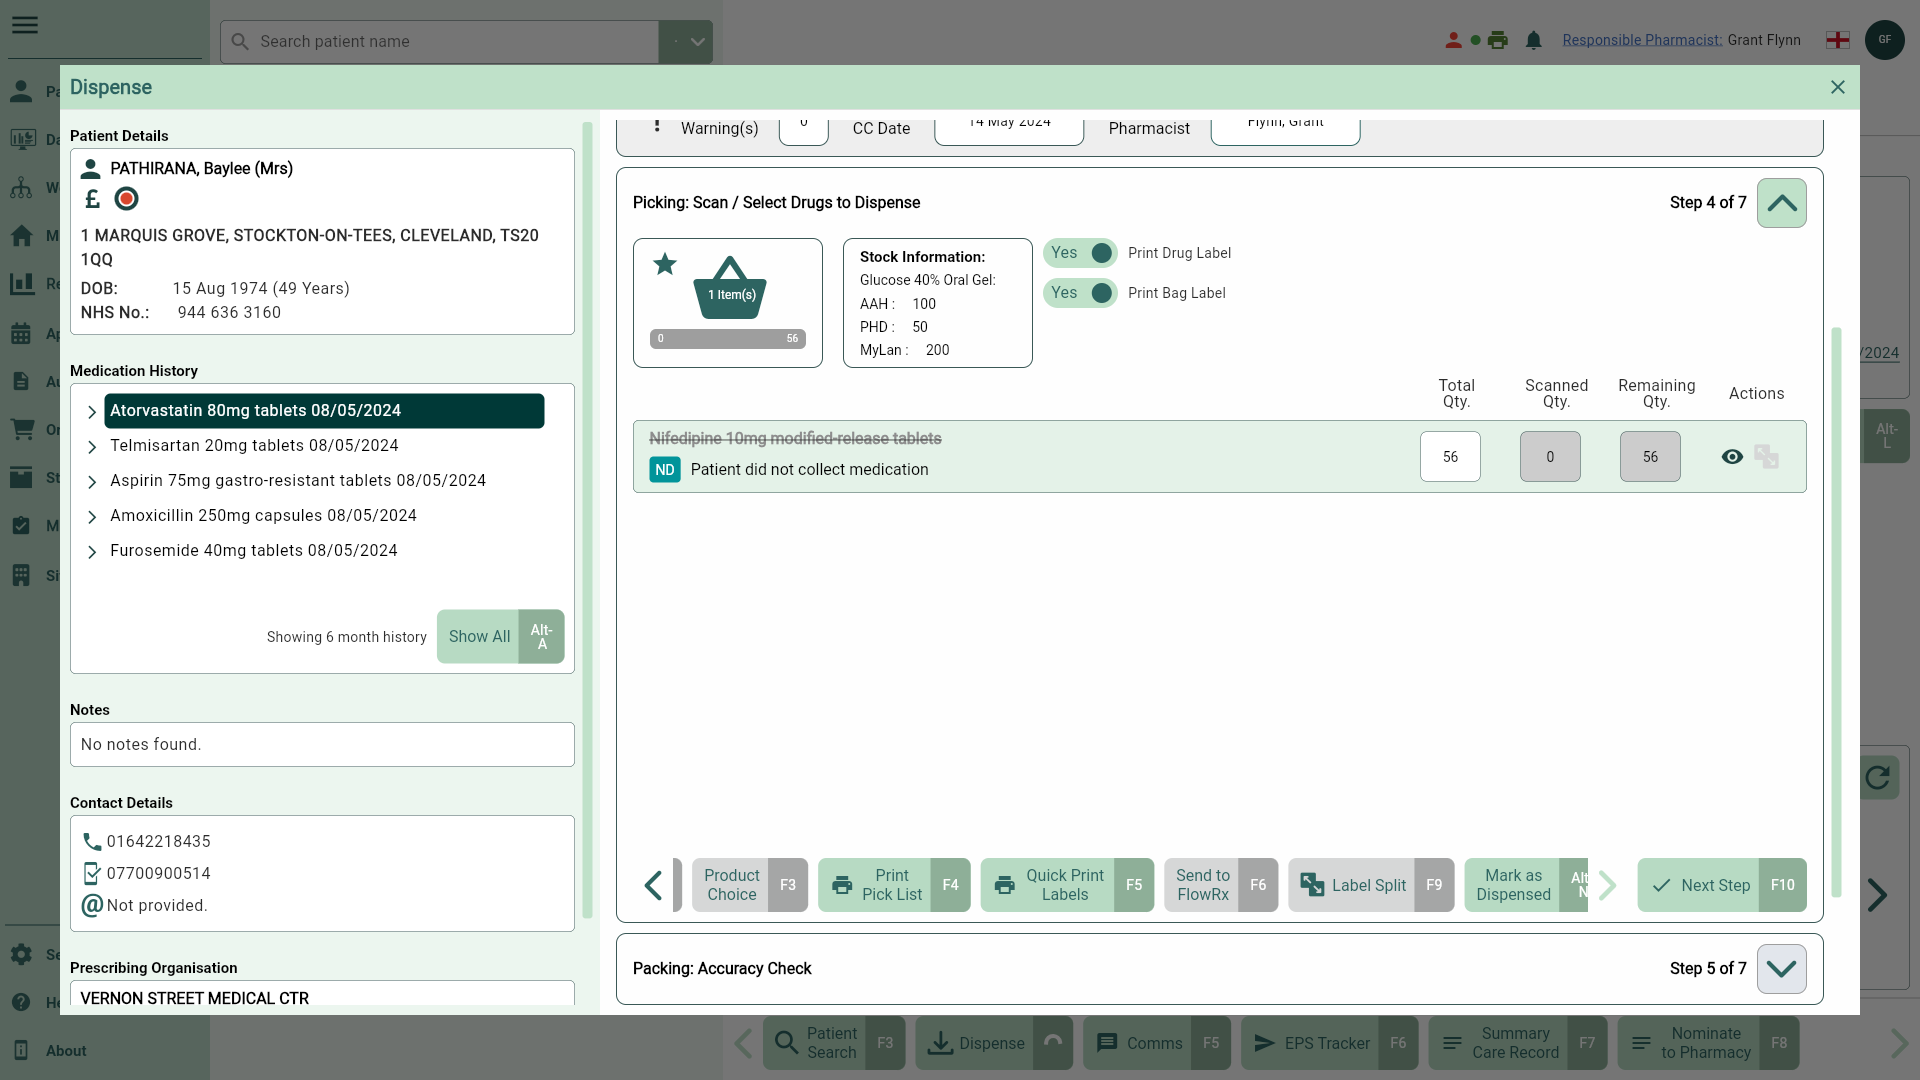
- Select the [Confirm - F10] button. You're returned to the Picking step of the Dispensing Wizard where the Remaining Quantity and Scanned Quantity are disabled. The item(s) you have marked as ND on your prescription will be struckthrough with an ND badge alongside the ND Reason provided.
Marking items as Not Dispensed from Edit Script
You are able to mark items as Not Dispensed (ND) from the Edit Scripts window after your prescriptions have been processed/saved. You can access the Edit Scripts window from several tabs in the Workflow module. They are;
- Requires Attention
- To be Claimed
- Awaiting Collection
- Awaiting Delivery
- Completed
You can also edit a script via the Medication History grid within the Patient CRM.
Automated & configurable Edit Script behaviour
To maximise the automated and configurable behaviour detailed in the table below, you will be required to authenticate a valid NHS smartcard to edit certain fields in the Edit Script window if your prescription is in one of the following statuses:
- DN Success
- DN Withdraw Rejection
- Claim Success (reclaim in claim period)
- Claim Spine Rejection
| Status | Behaviour |
|---|---|
| DN Success or DN Withdraw Rejection | Apotec CRM will automatically withdraw and resend (queue) the Dispense Notification (DN) for any edited prescriptions where the DN has already been sent. |
| Claim Success (reclaim in claim period) or Claim Spine Rejection | The Reclaim After Edit application setting determines if a claimed EPS prescription is automatically reclaimed (queued) after an edit has been saved.
|
- To begin, access the Edit Script screen via Workflow or the Patient CRM.
You can only edit one prescription at a time.
| Module/Area | Access |
|---|---|
| Workflow |
|
| Medication History in the Patient's CRM |
|
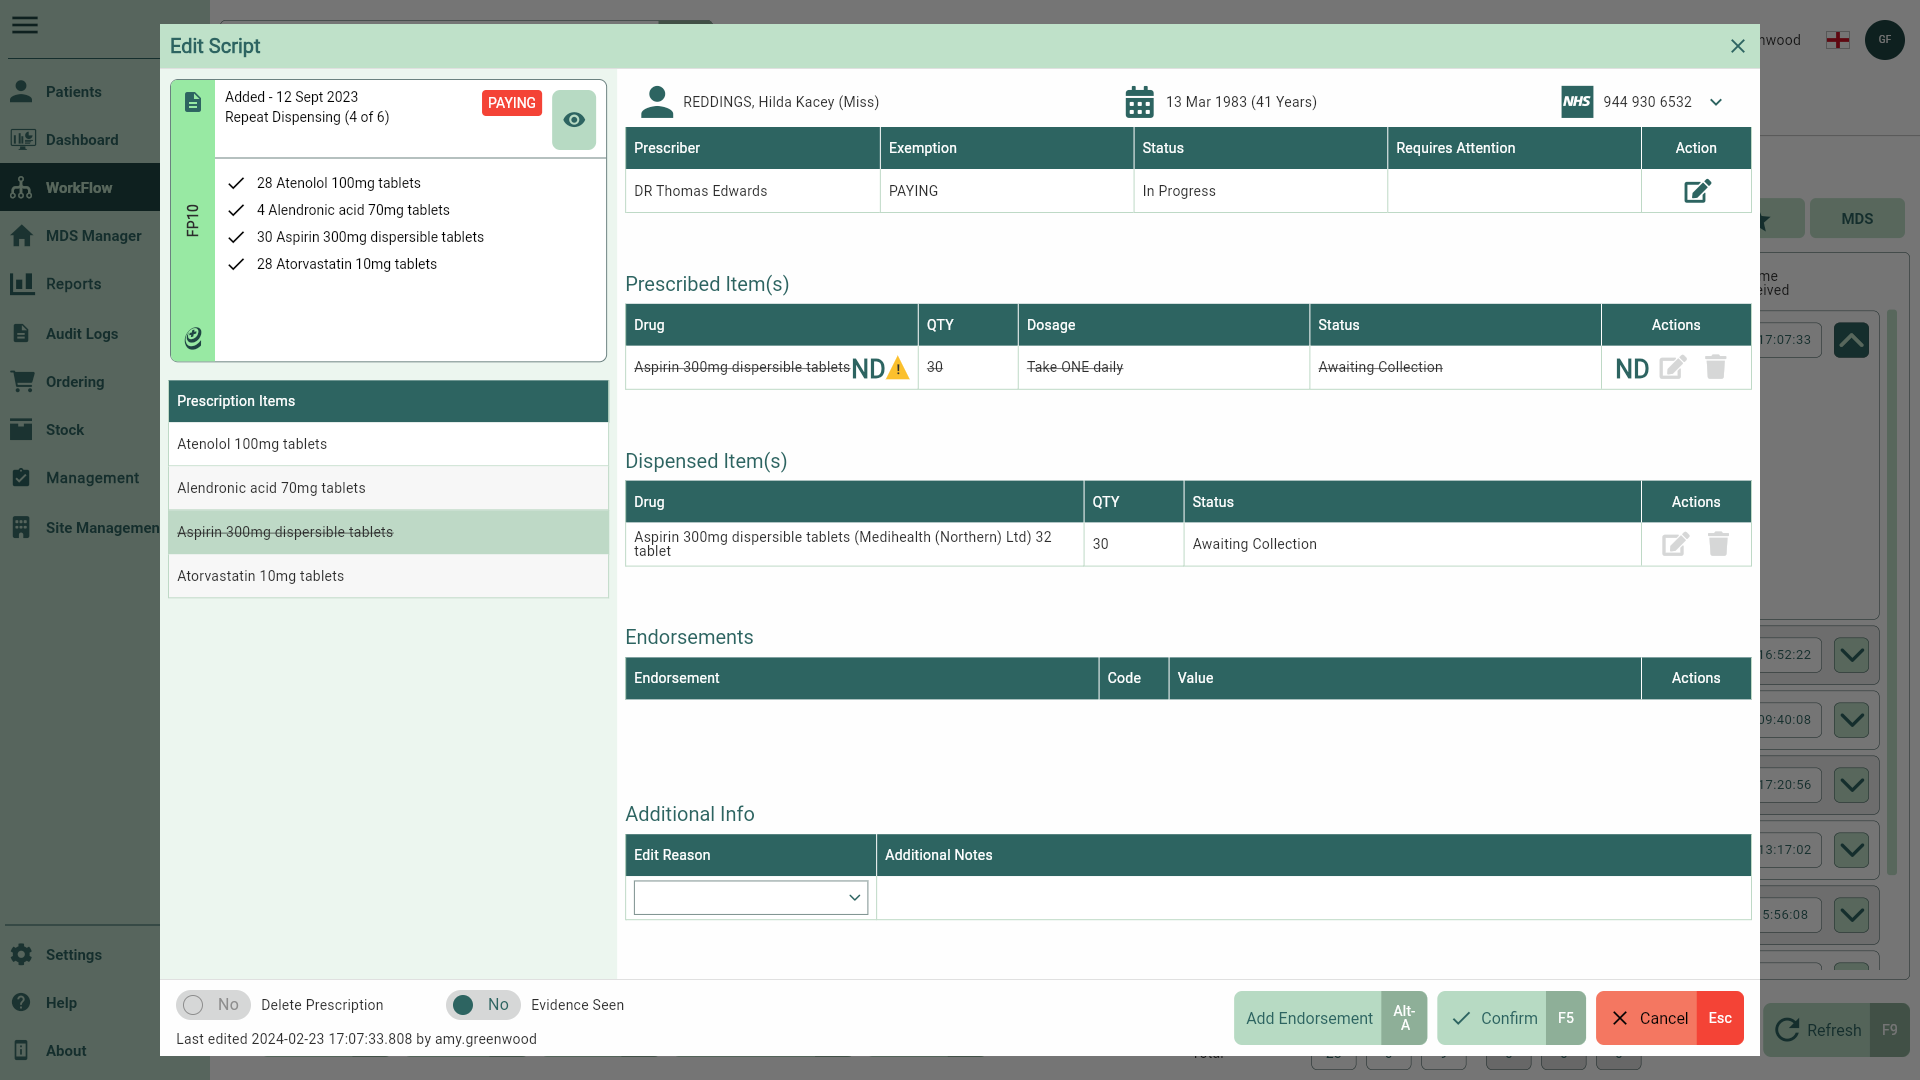
 Edit icon to open the Edit Script window.
- Select the ND icon in the Prescribed Item(s) Actions column. The Mark as ND window displays.
- Select a not dispensed reason for the item(s) you're marking as Not Dispensed from the ND Reason dropdown menu.
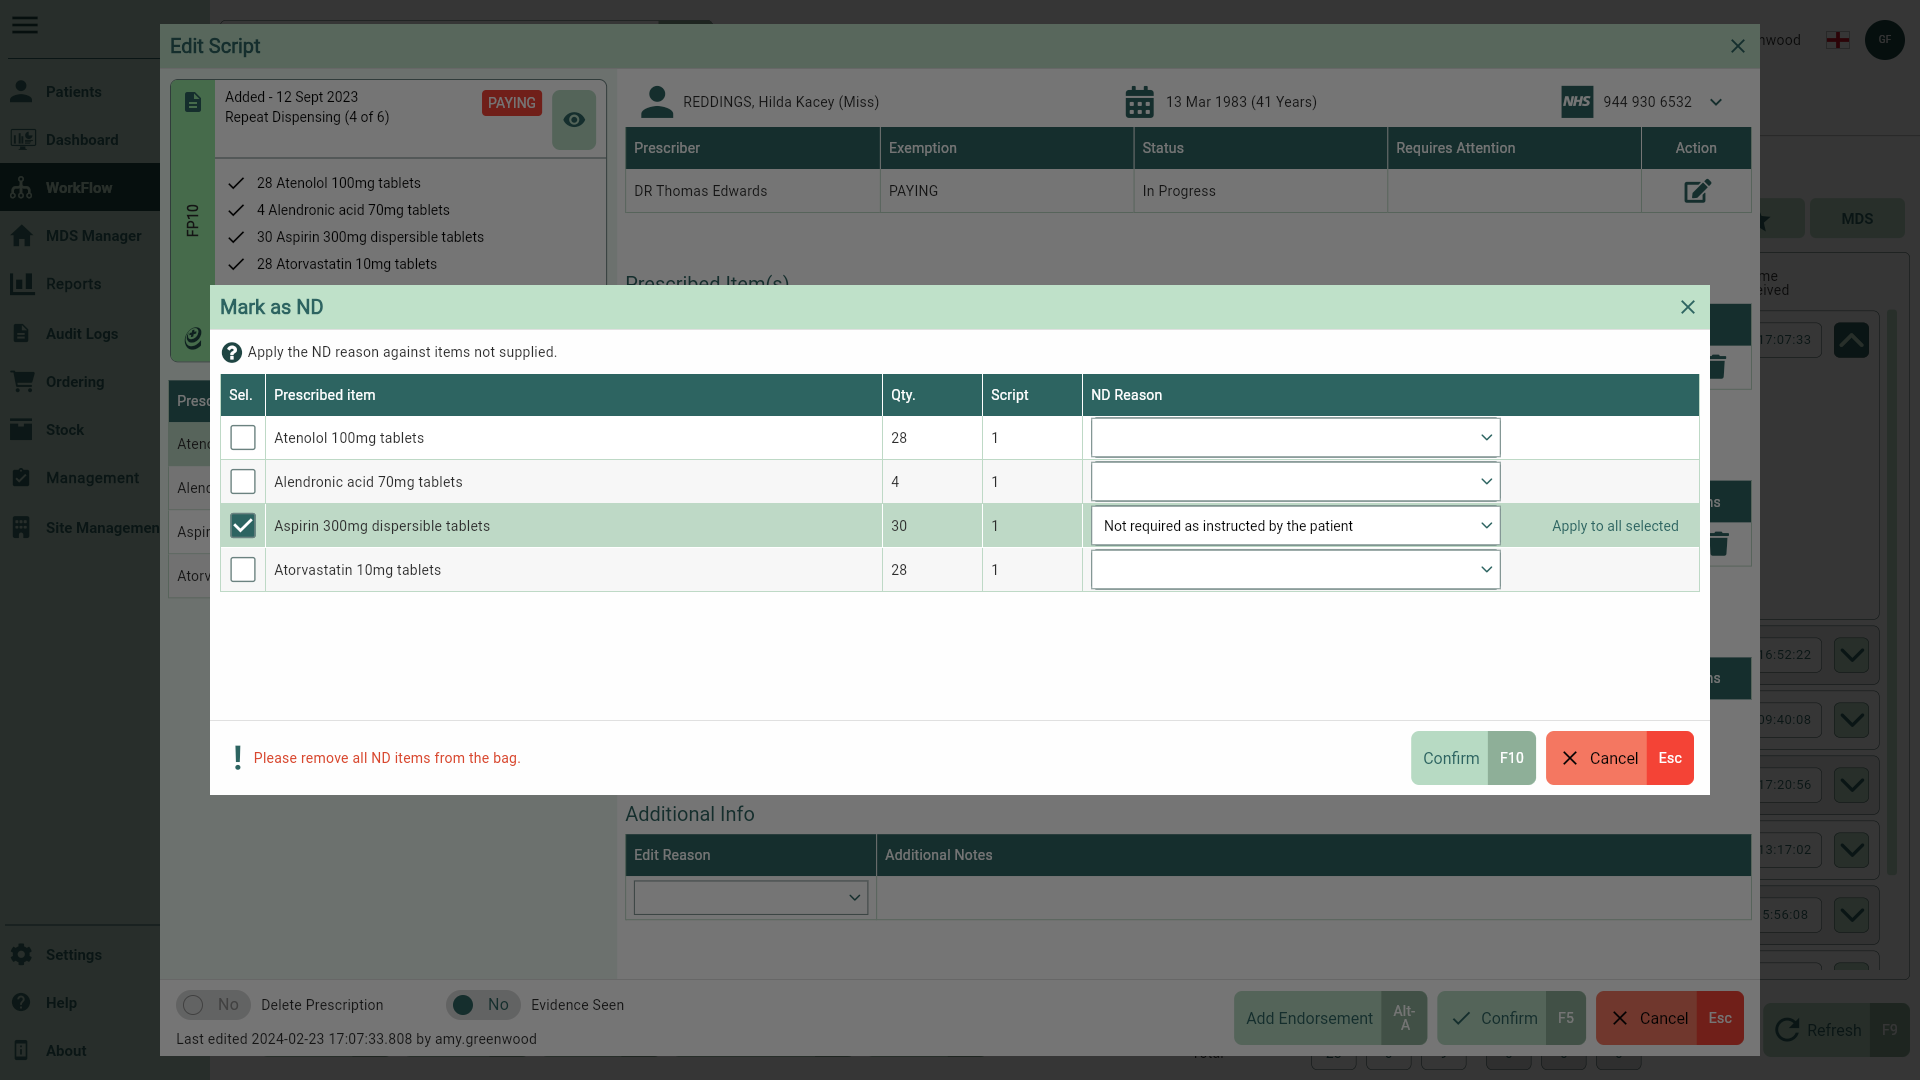
- Select the [Confirm - F10] button. You're returned to the Edit Script window where the item(s) you have marked as ND are now struckthrough.
- Select the [Confirm – F5] button.