Printing tokens
Learn how to print your EPS tokens. You can print EPS tokens from the View Scripts window, which is accessible from any prescription widget within the application.
Note
You will be prompted to select a printer if you do not have printers configured in your application settings. Learn how to configure printers by following our Configuring printers and label reports article.
Printing tokens from the Dispensing Wizard
- To begin, with the Dispensing Wizard open, locate the prescription widget for the token you wish to print.

- Select the
 View icon button. The View Script window displays.
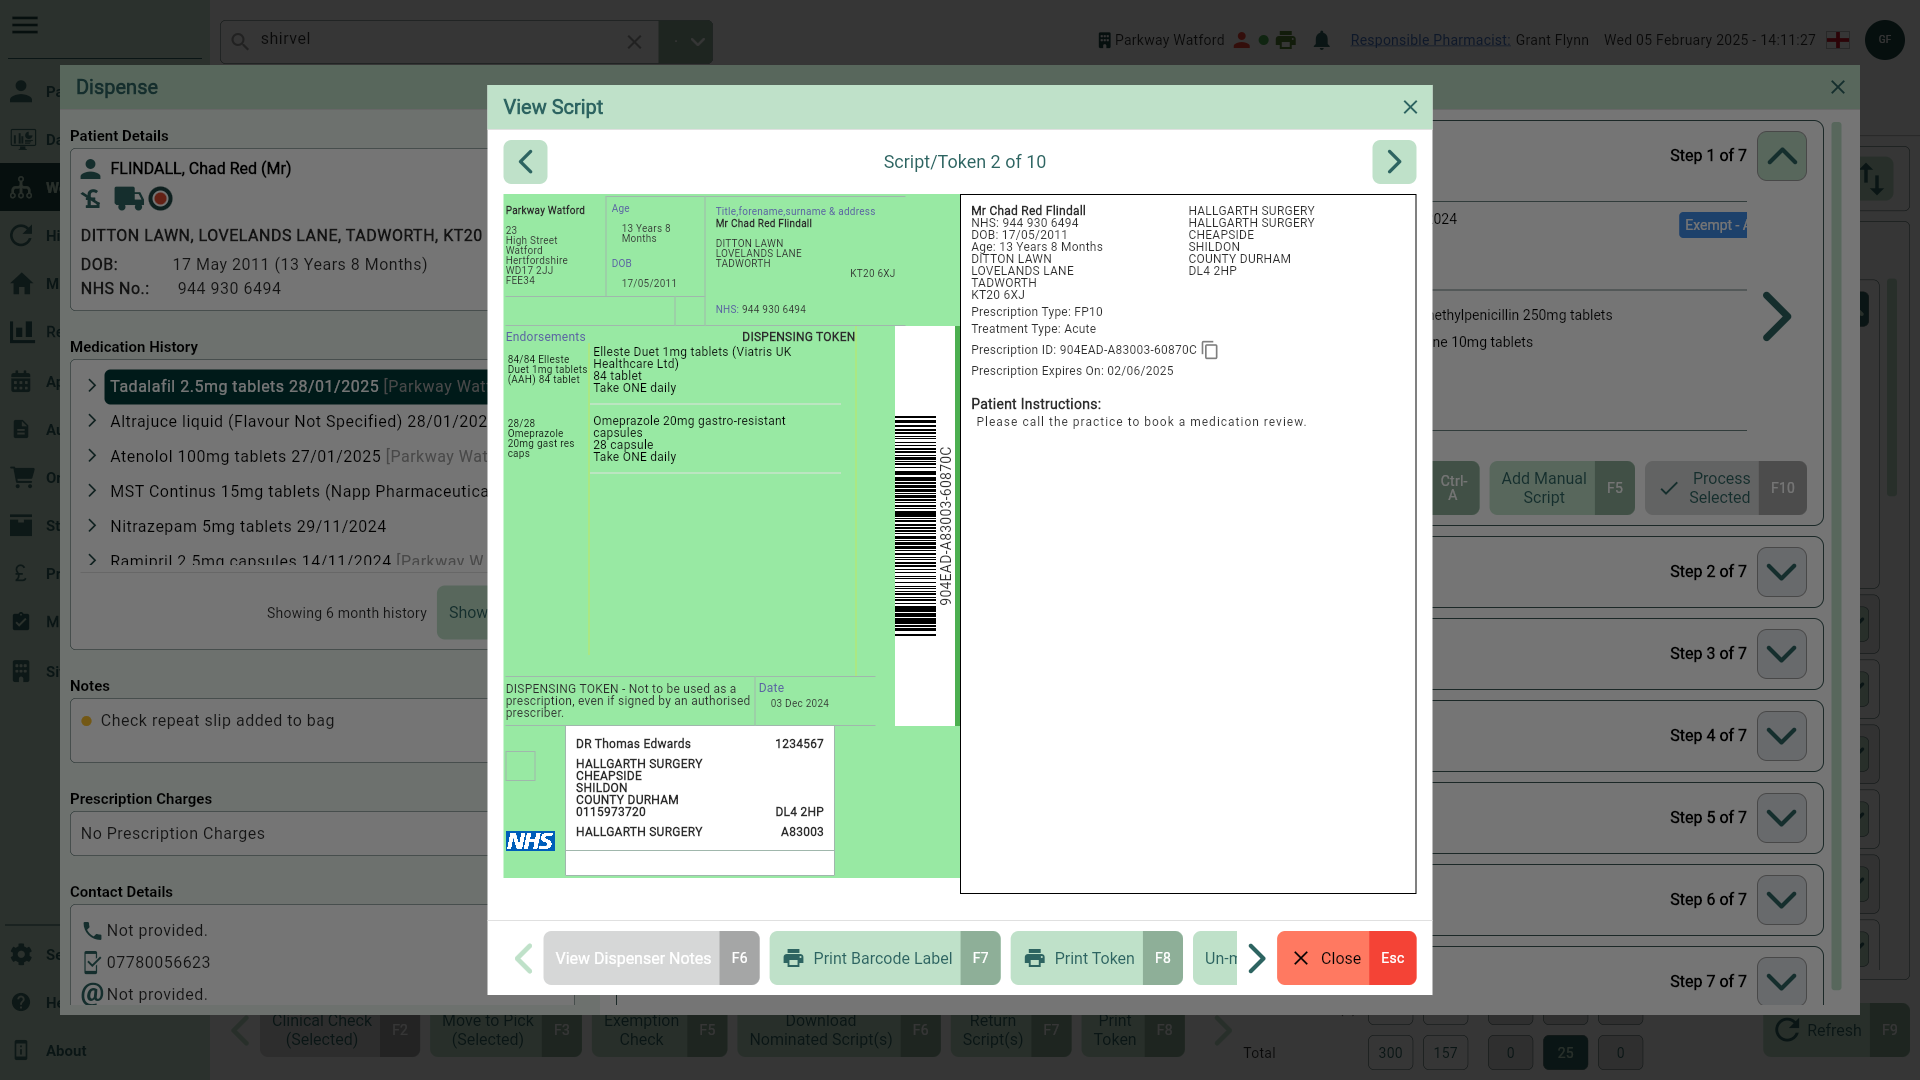
- Select the [Print Token - F8] button. Your token is sent to the printer.
Printing tokens from Workflow
You can print EPS tokens from various tabs within Workflow. Print individual tokens, multiple tokens, or your entire list by using the select all box.
Access the [Print token - F8] button from the following tabs in Workflow:
- New Rx
- To Pick
- Awaiting Collection
- Awaiting Delivery
- To begin, open Workflow by selecting Workflow from the left-nav and navigate to the required Workflow tab depending on the status of the prescription.
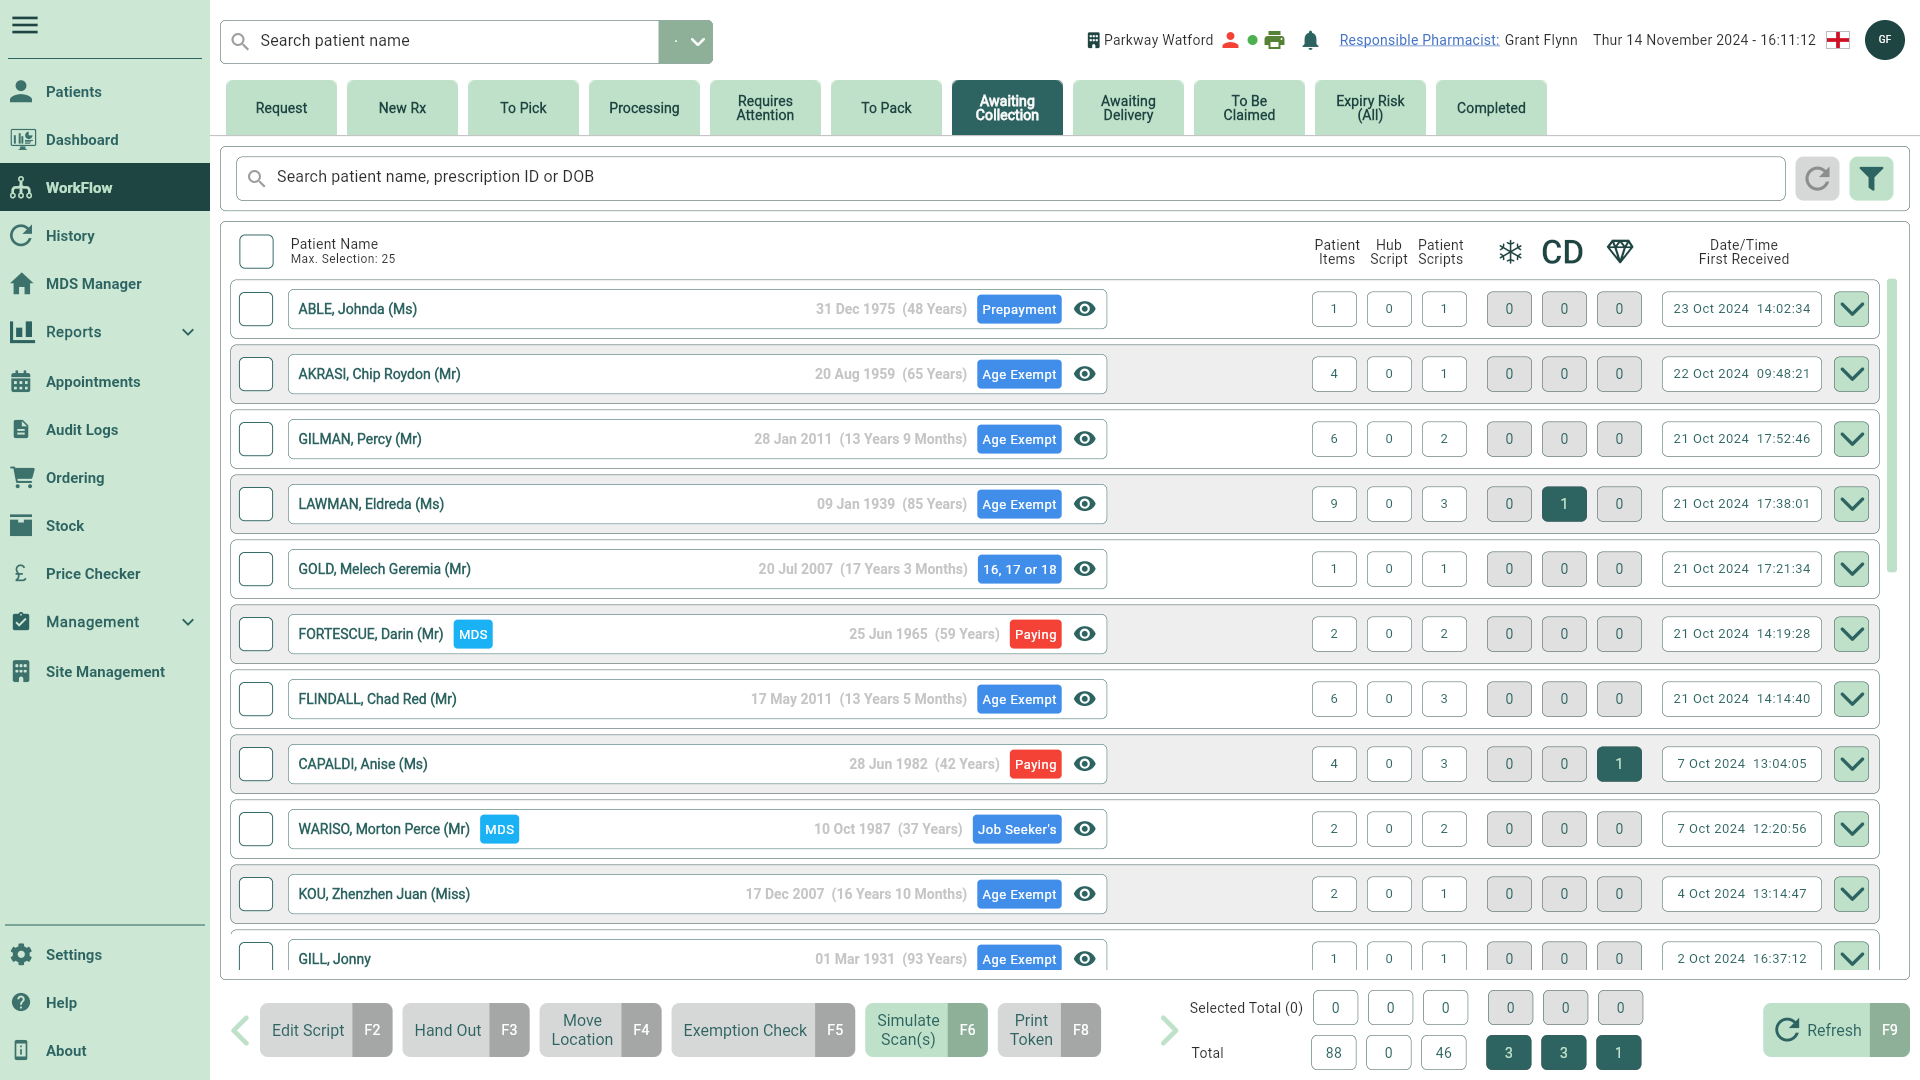
- Locate and select the required patient(s) and token(s) you wish to print, if required you can use the filters to refine the grid.
Tip
Select the [Refresh - F9] button to update the prescription grid to see any recently added scripts.

- Select the [Print Token - F8] button to print your token(s).