Moving prescriptions To Pick
During move to pick, Apotec CRM systematically reviews your selected patients and their prescriptions, flagging any issues that need attention before picking. In the Item Validation window you can mark items as Stopped or amend quantities and dosages as needed.
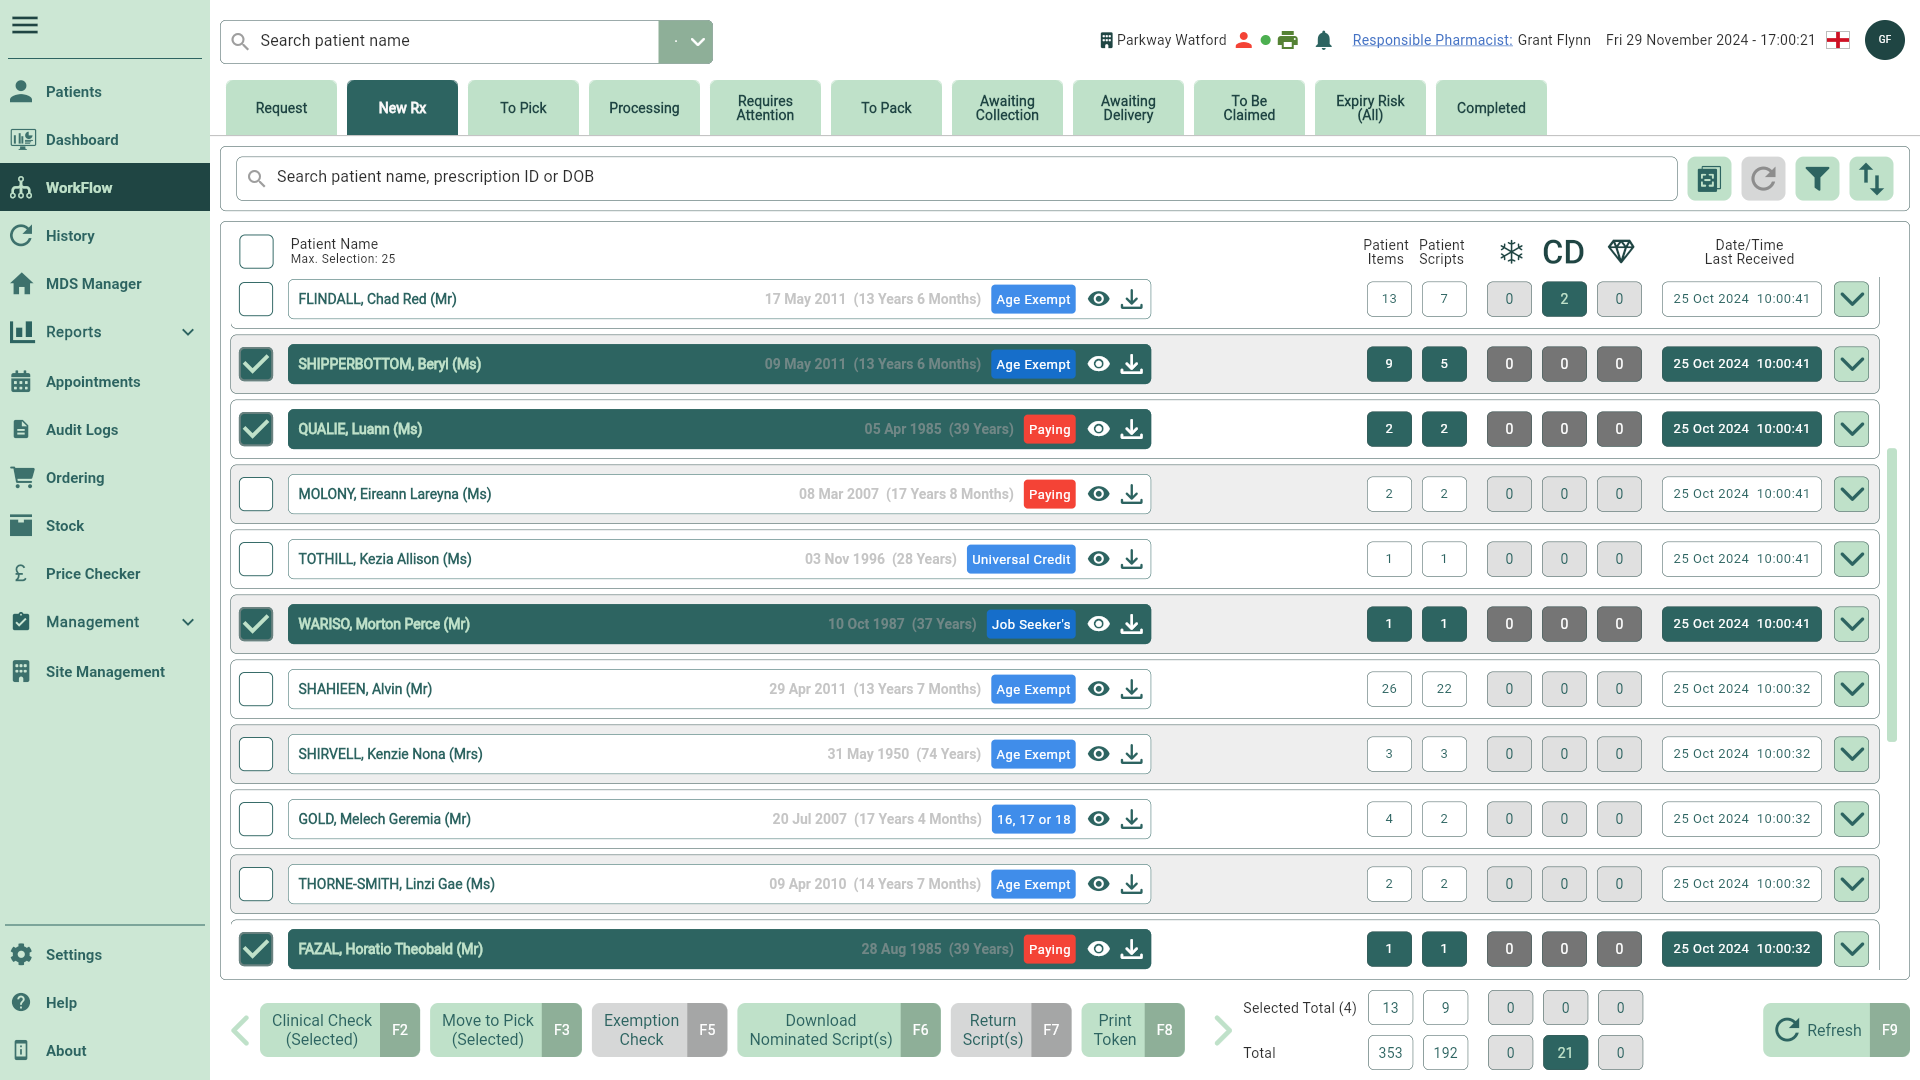
- To begin, open the New Rx tab in Workflow by selecting Workflow from the left-nav. The New Rx tab is selected by default.
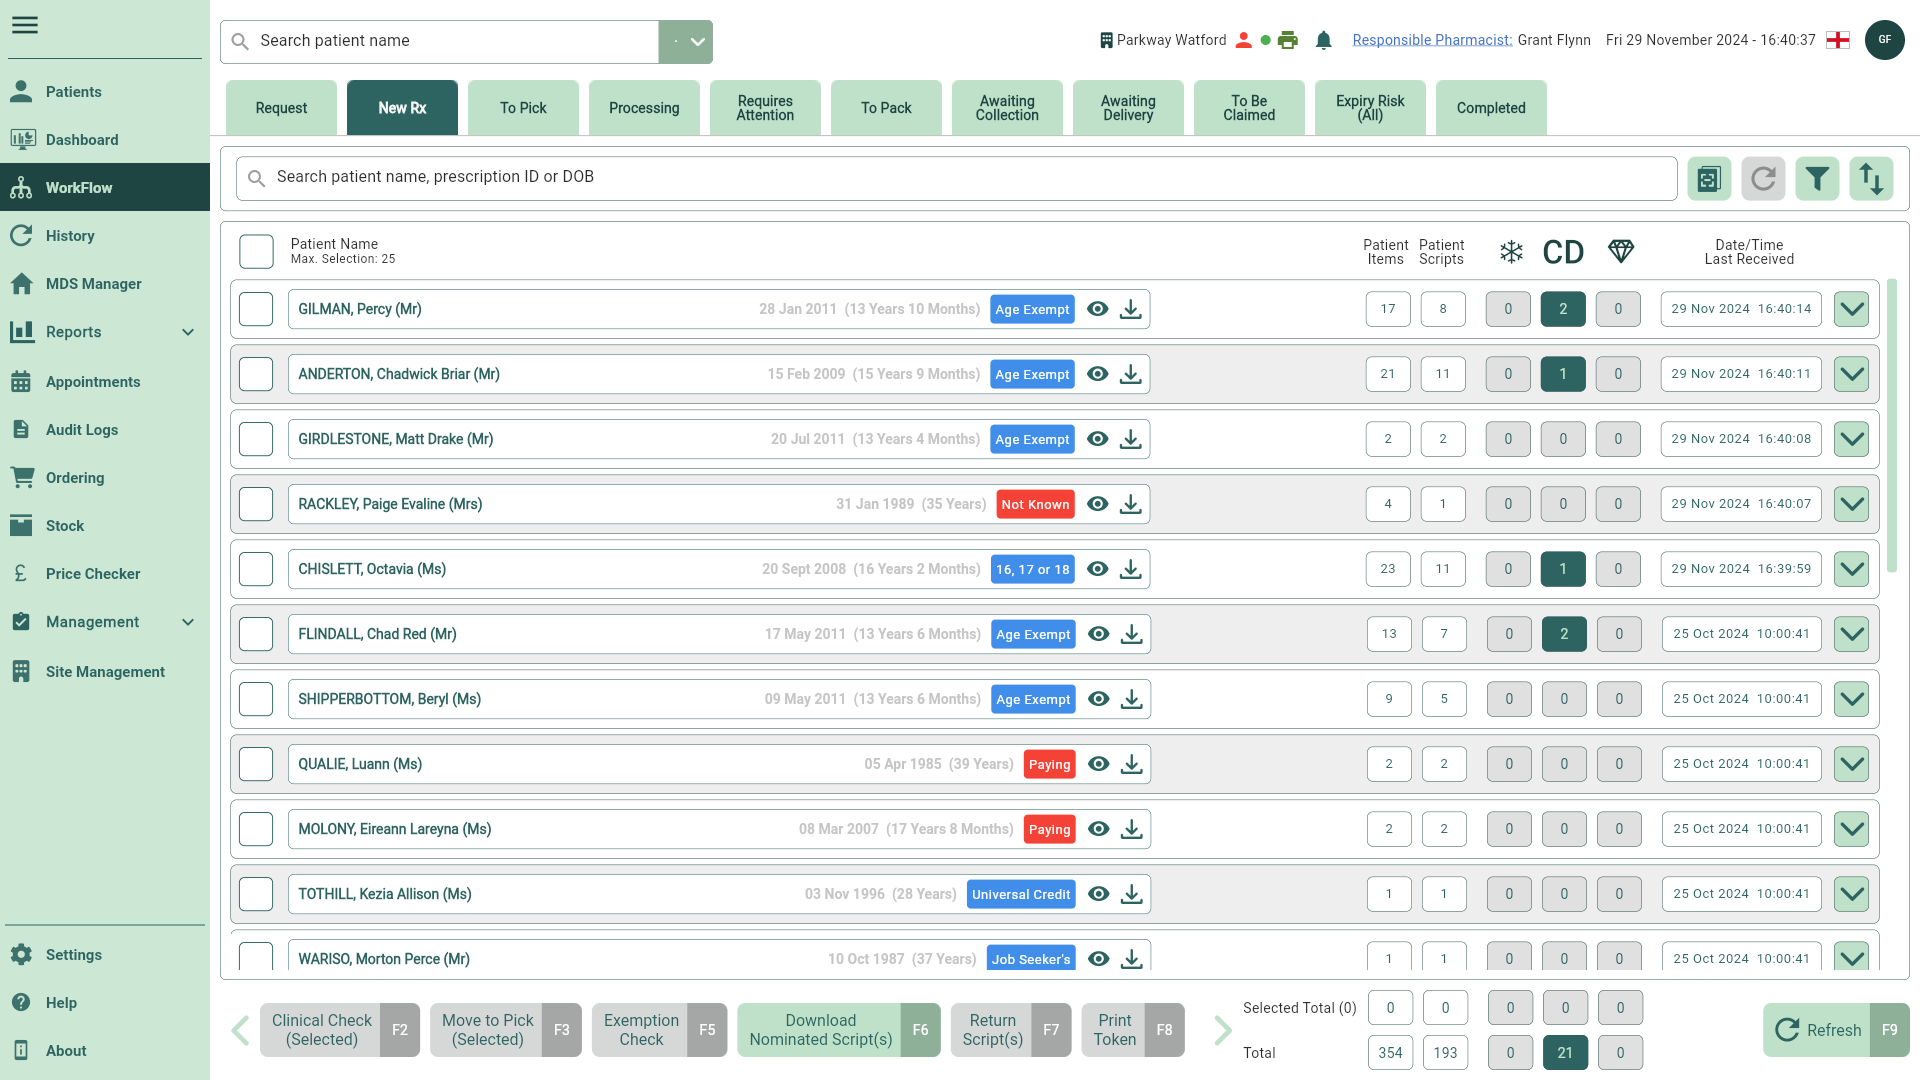
- Select your patient(s) and prescription(s) to be processed, if required you can use the filters to refine the grid.
You can process prescriptions by selecting one patient at a time or by using the select all checkbox. If the number of selected patients exceeds the configured limit (max 25 by default), the function buttons will be disabled until enough patients have been deselected. Learn more about Workflow settings using our Get to know Workflow article.
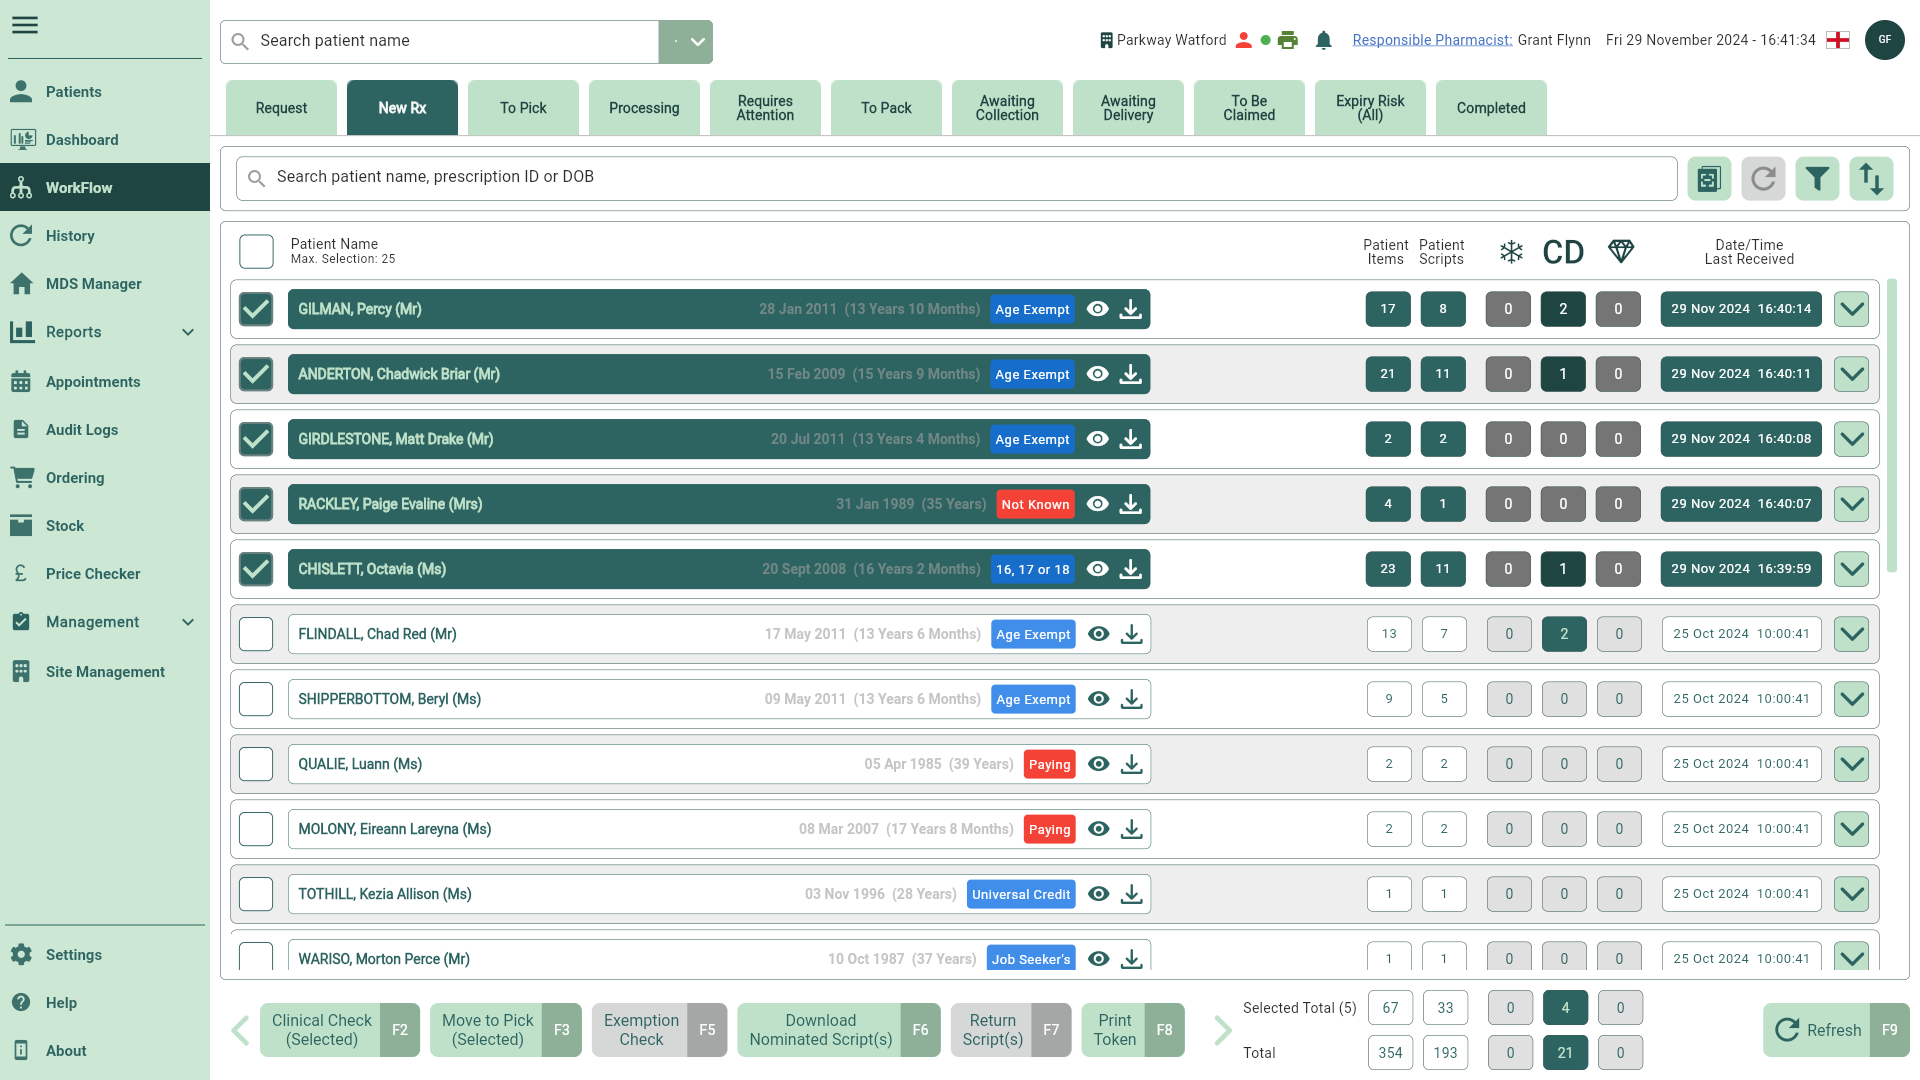
- Select the [Move to Pick (Selected) - F3] button. The Item Validation window displays.
If all items on a prescription are marked as ND, the script will not move to the To Pick tab and will automatically move to the following tab depending on the script type:
- Manual scripts are marked as ‘completed’ and moved to the Completed tab,
- EPS scripts are moved to the To Be Claimed tab for a DN to be sent.
If not all items on the script are marked as ND, the prescription will move through Workflow as usual, but the ND items will not be displayed in the pick list.
When selecting patients and prescriptions to move To Pick, you may encounter several prompts or alerts requiring action. These will display for:
- Patient(s) and or scripts that cannot be accurately linked to a record in your CRM database. These will display with a Patient Not Matched badge, and you will be prompted to match them using our Patient Match tool.
- Selected prescriptions that contain mismatched items.
- Any item that triggers an Allergy Alert based on the patient’s recorded allergies. The item will automatically be marked as ND (Not Dispensed) and flagged as Clinically Unsuitable. This alert will be triggered irrespective of whether the Clinical Check has been completed or the user is a pharmacist.
- Prescriptions that contain any outstanding RMS items that require reconciliation.
- Any Emergency Supply prescriptions that require reconciliation.
Learn how to add patients using Patient Match in Workflow
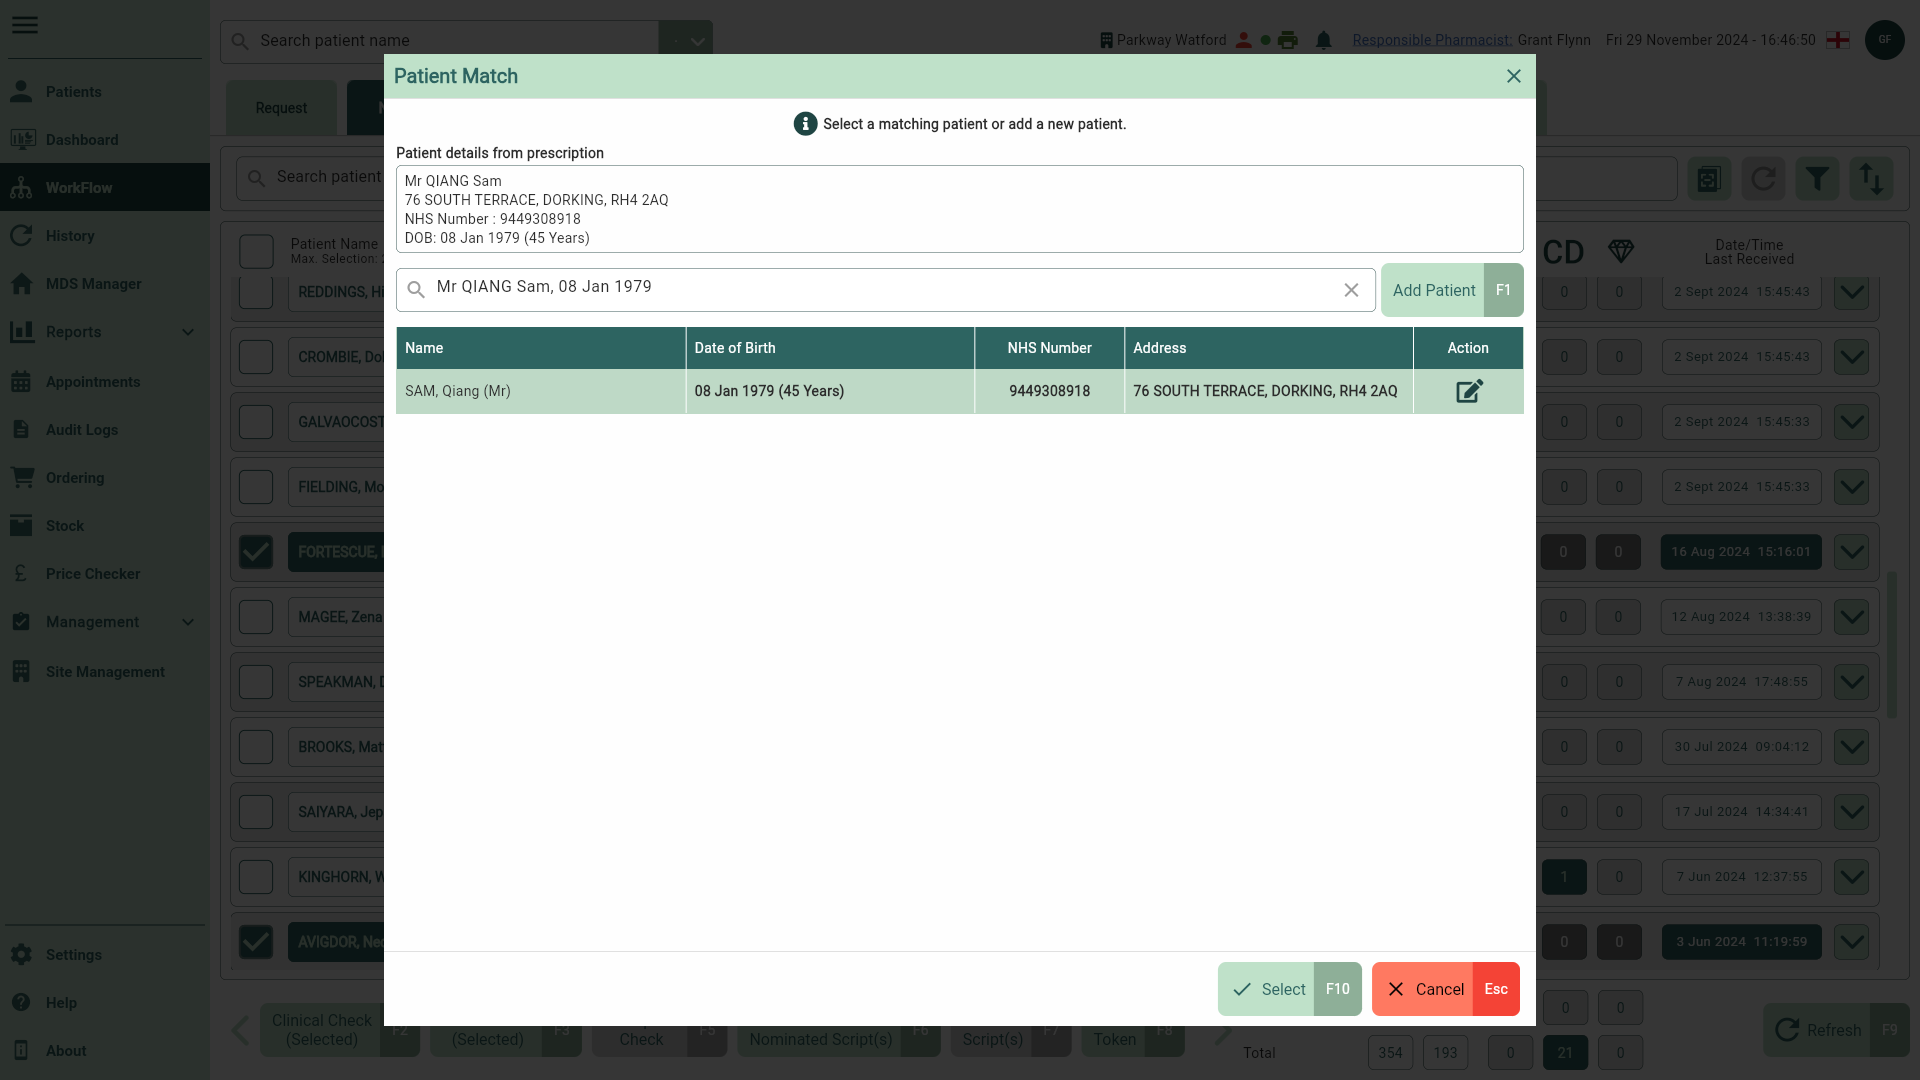
Any patient/prescription downloaded that cannot be accurately linked to a record in your CRM database will display on the New Rx tab within Workflow with a Patient Not Matched badge. They will need to be linked to a record on your database before you can process their prescriptions. When selected as part of a batch and selecting the [Move to Pick (Selected) – F3] button, you will be prompted to match them using our Patient Match tool.
The patient search may return the correct patient if they already exist in your CRM database. In which case, they'll just need to be linked to the record in Workflow. To do this, select the correct patient in the grid and skip to step 5.
- Select your patient(s) and prescription(s) to be processed and then select the [Move to Pick (Selected) – F3] button. The Patient Match Window displays for any unmatched patients.

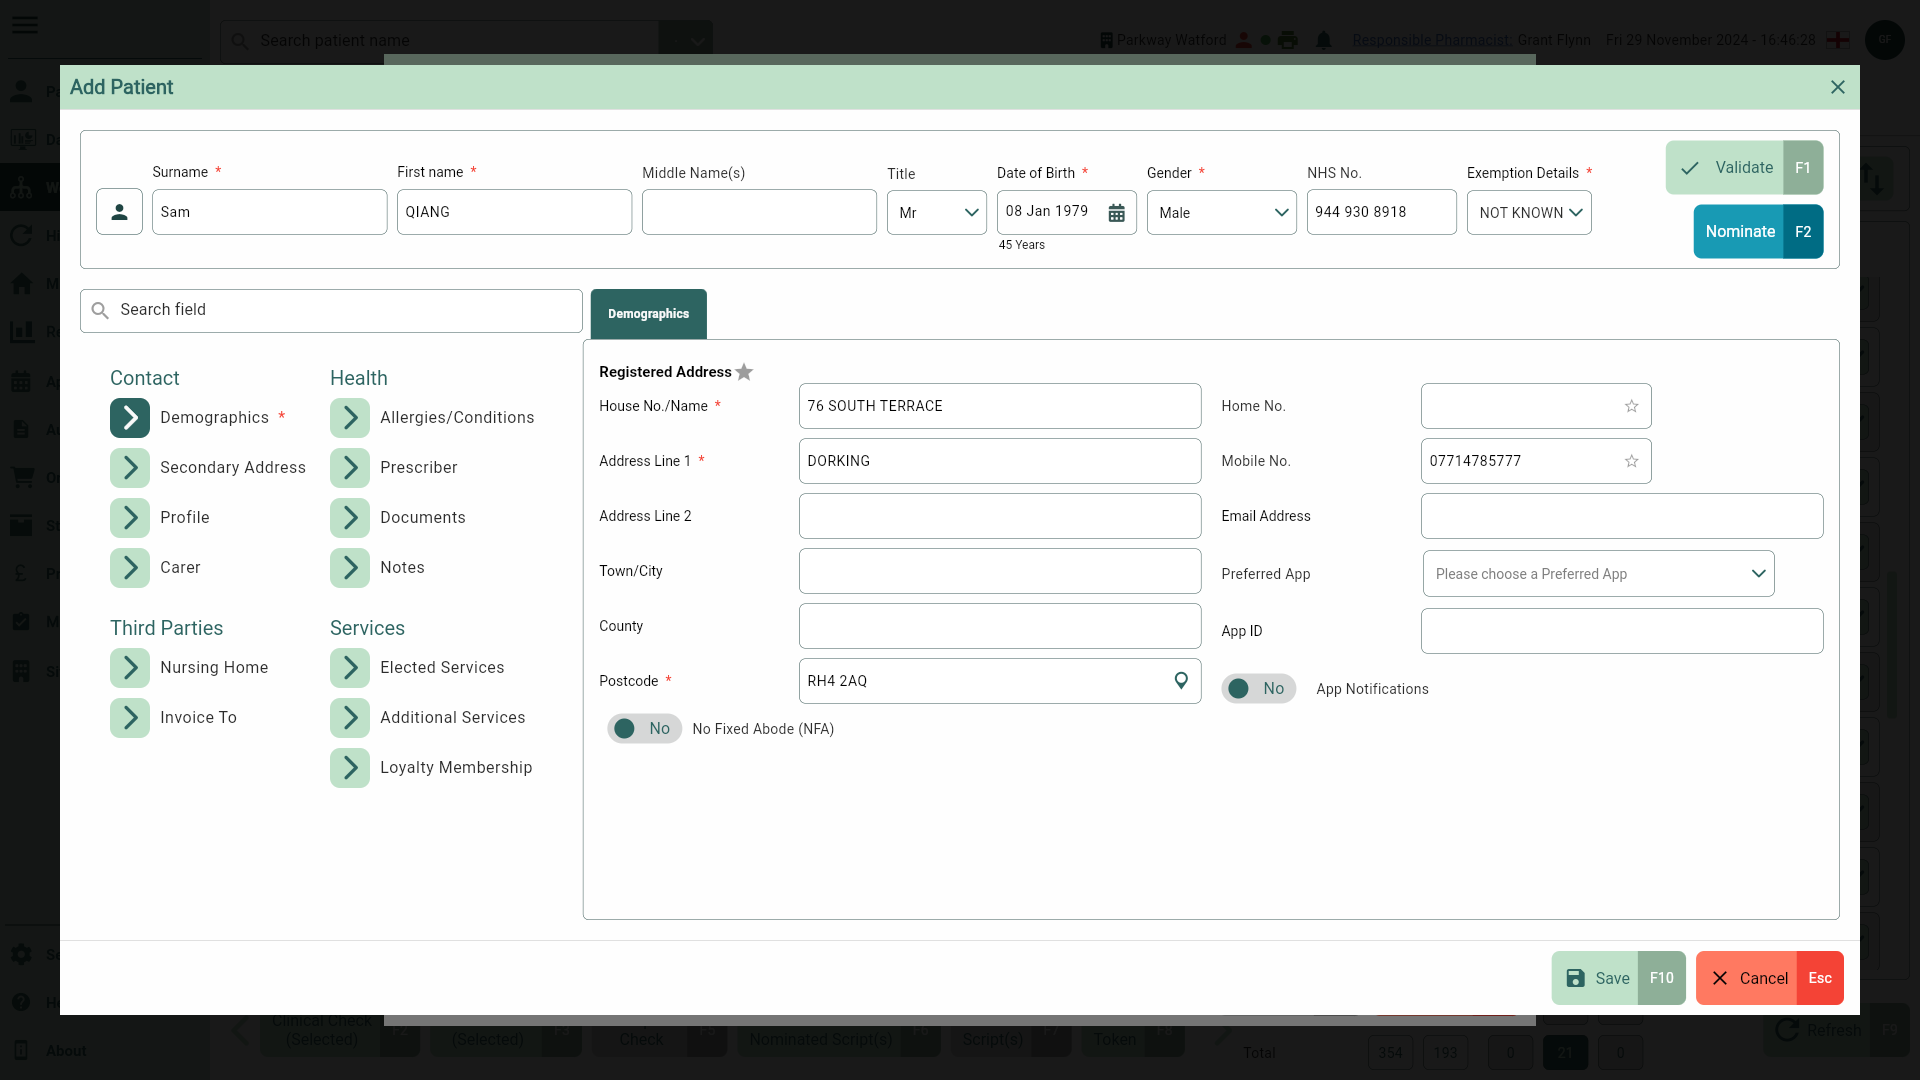
- If a patient does not already exist in your CRM database, select the [Add Patient - F1] button. The Add Patient window displays, populated with all the available data from the incoming prescription.

- Review the patient's details and make any adjustments or additions where required. Select the [Save - F10] button to add the patient.
- You're returned to the Patient Match window where your newly added patient displays in the grid. Highlight the correct patient in the grid.
- Select the [Select - F10] button. The Update Patient Details window displays.
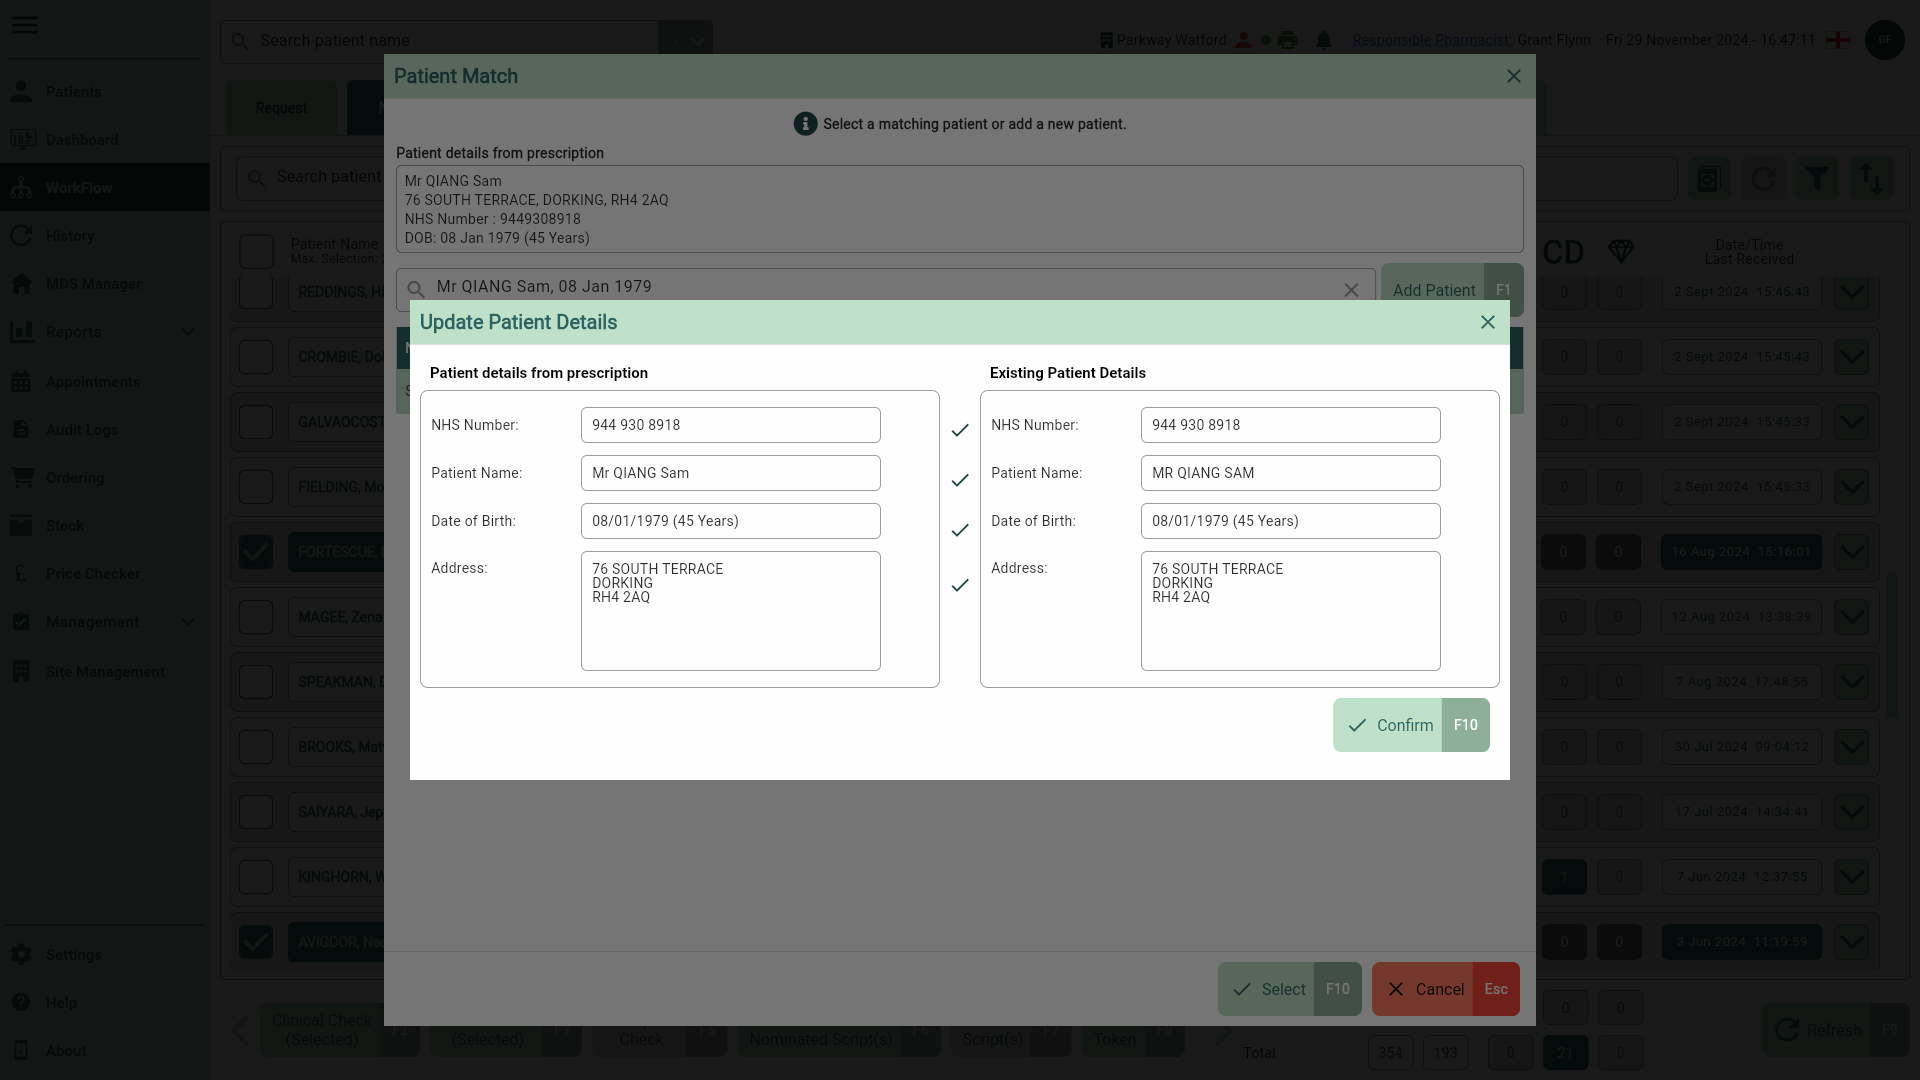
- Review the details and select the [Confirm - F10] button to close the prompt. Your patient has been linked, and you will automatically progress to the next unmatched patient if flagged.
Learn how to match unmatched items in Workflow
Most prescribed items on the incoming prescription will display with a  Tick icon to indicate they have been matched to a dispensable item in our database. If any scripts selected contain unmatched items, a
  Cross icon will display. You will be prompted to match them manually when selecting the [Move to Pick (Selected) - F3] button.
- Select your patient(s) and prescription(s) to be processed.
- Select the [Move to Pick (Selected) - F3] button. Any patient(s) with unmatched items that you want to dispense from the grid will prompt the Drugs Matching window to display. Your unmatched item is automatically used as the search term and any results are displayed. You can adjust the search term if required.
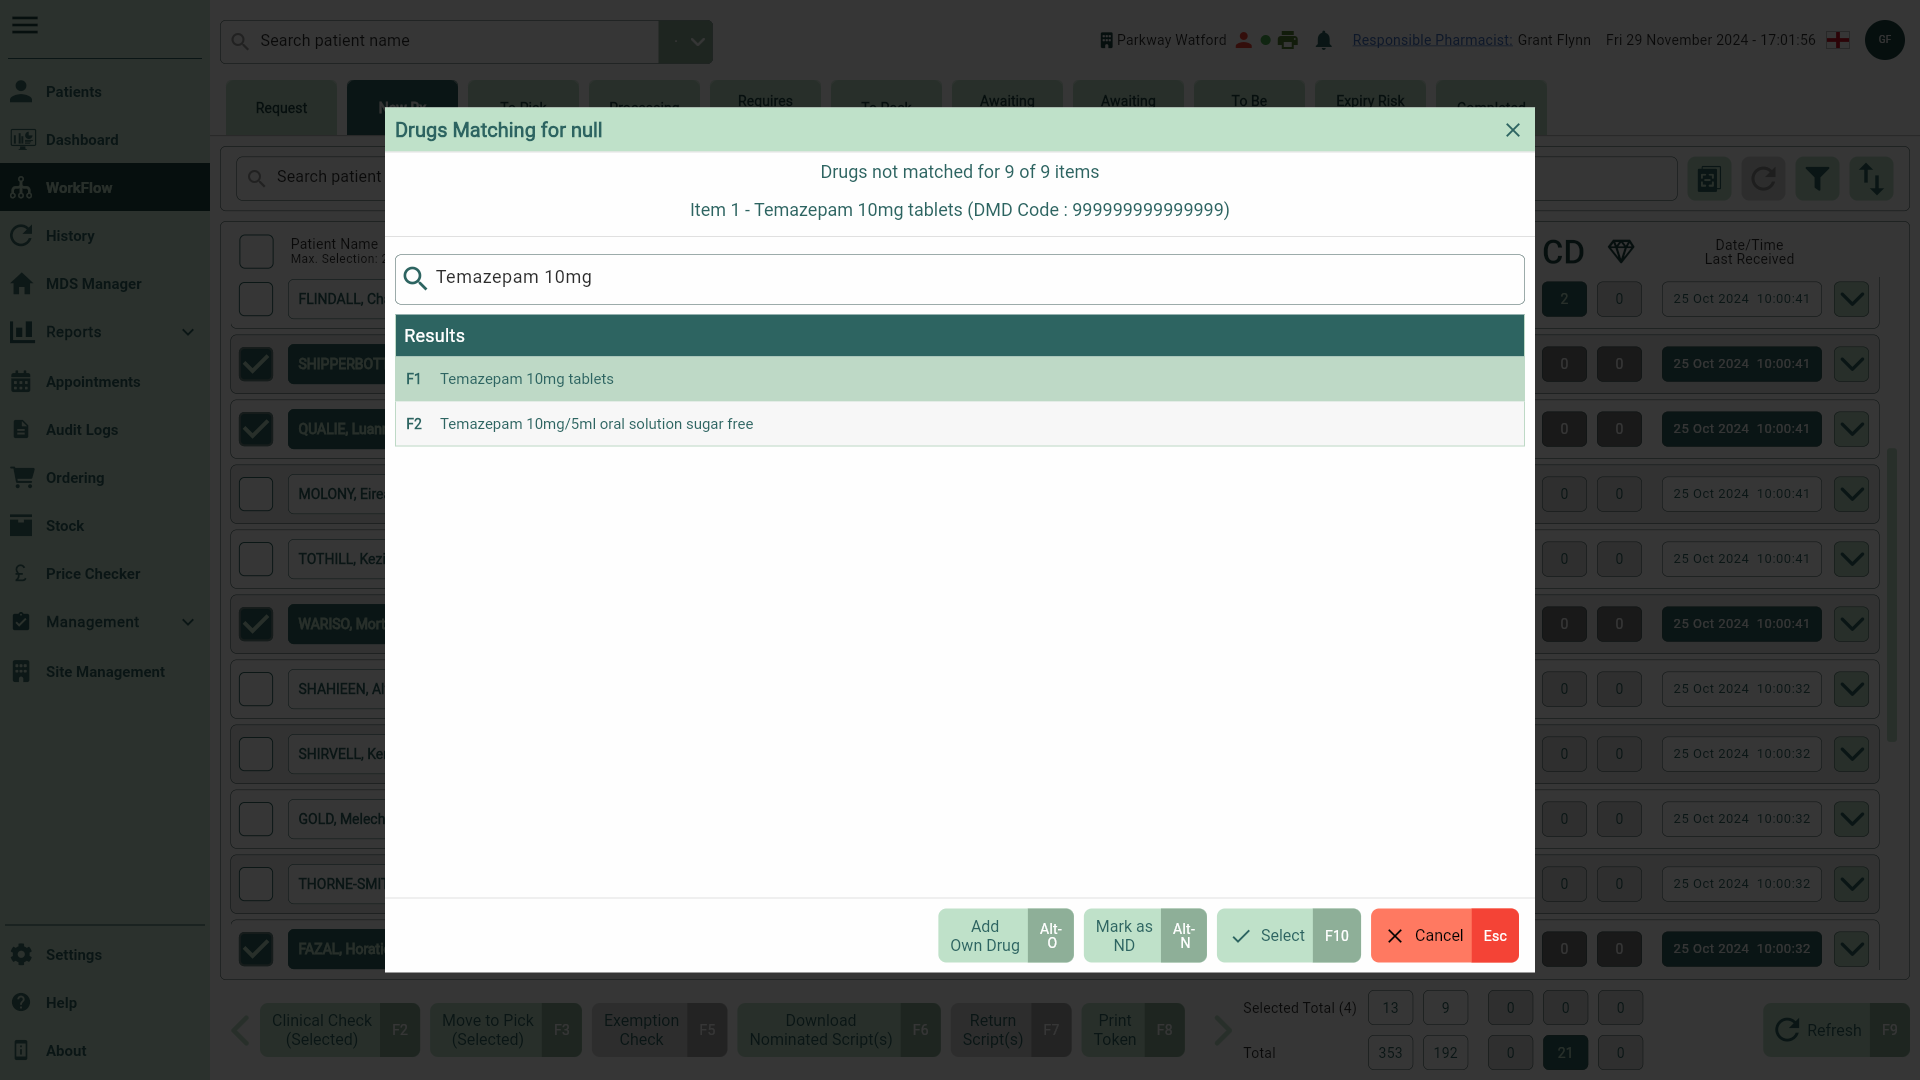
- Select the correct item from the results and select the [Select - F10] button. Complete this window for all unmatched items. You will automatically progress to the next patient/script once all items have been matched.
Learn how to reconcile RMS items in Workflow.
If any RMS items are flagged, the Item(s) Reconciliation window displays. Apotec CRM will automatically select the item(s) available for reconciliation.
- Confirm/adjust this selection as required.
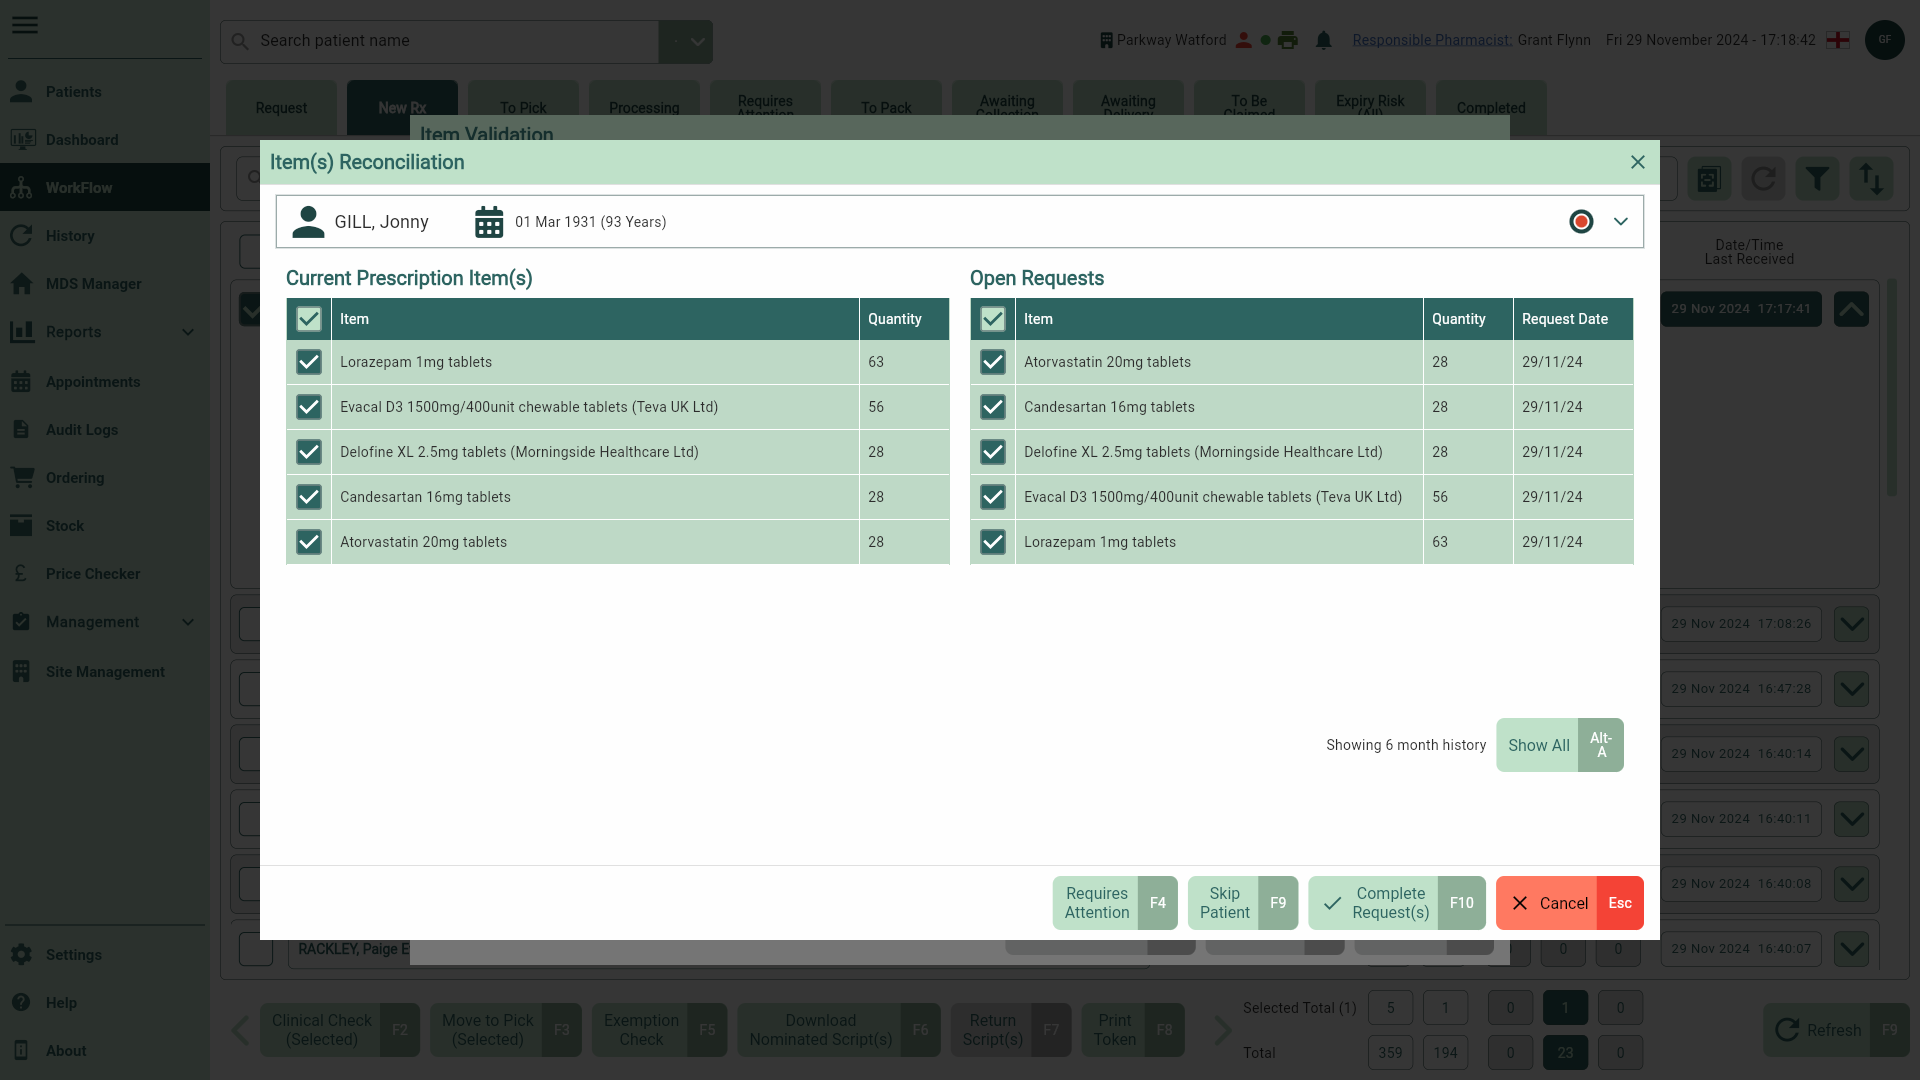
From here, you can:
Select the [Show All - Alt-A] button to view all requests made in the last 6 months.
Mark the request for attention by selecting the [Requires Attention – F4] button. You will be prompted to provide a reason from the dropdown. Prescriptions requiring attention are managed on the Requires Attention tab in Workflow.
Select the [Skip Patient – F9] button to skip to the next patient.
Select the [Complete Request(s) – F10] button to reconcile the request.
Select the [Cancel – Esc] button to cancel the item reconciliation. This will close the window and you will be returned to the Item Validation window.
- On completing the request you are returned to the Item Validation window. Requests will be marked as Completed once all items have been reconciled. Items dispensed on a partially reconciled request will be greyed out.
Learn how to redeem Emergency Supply scripts in Workflow
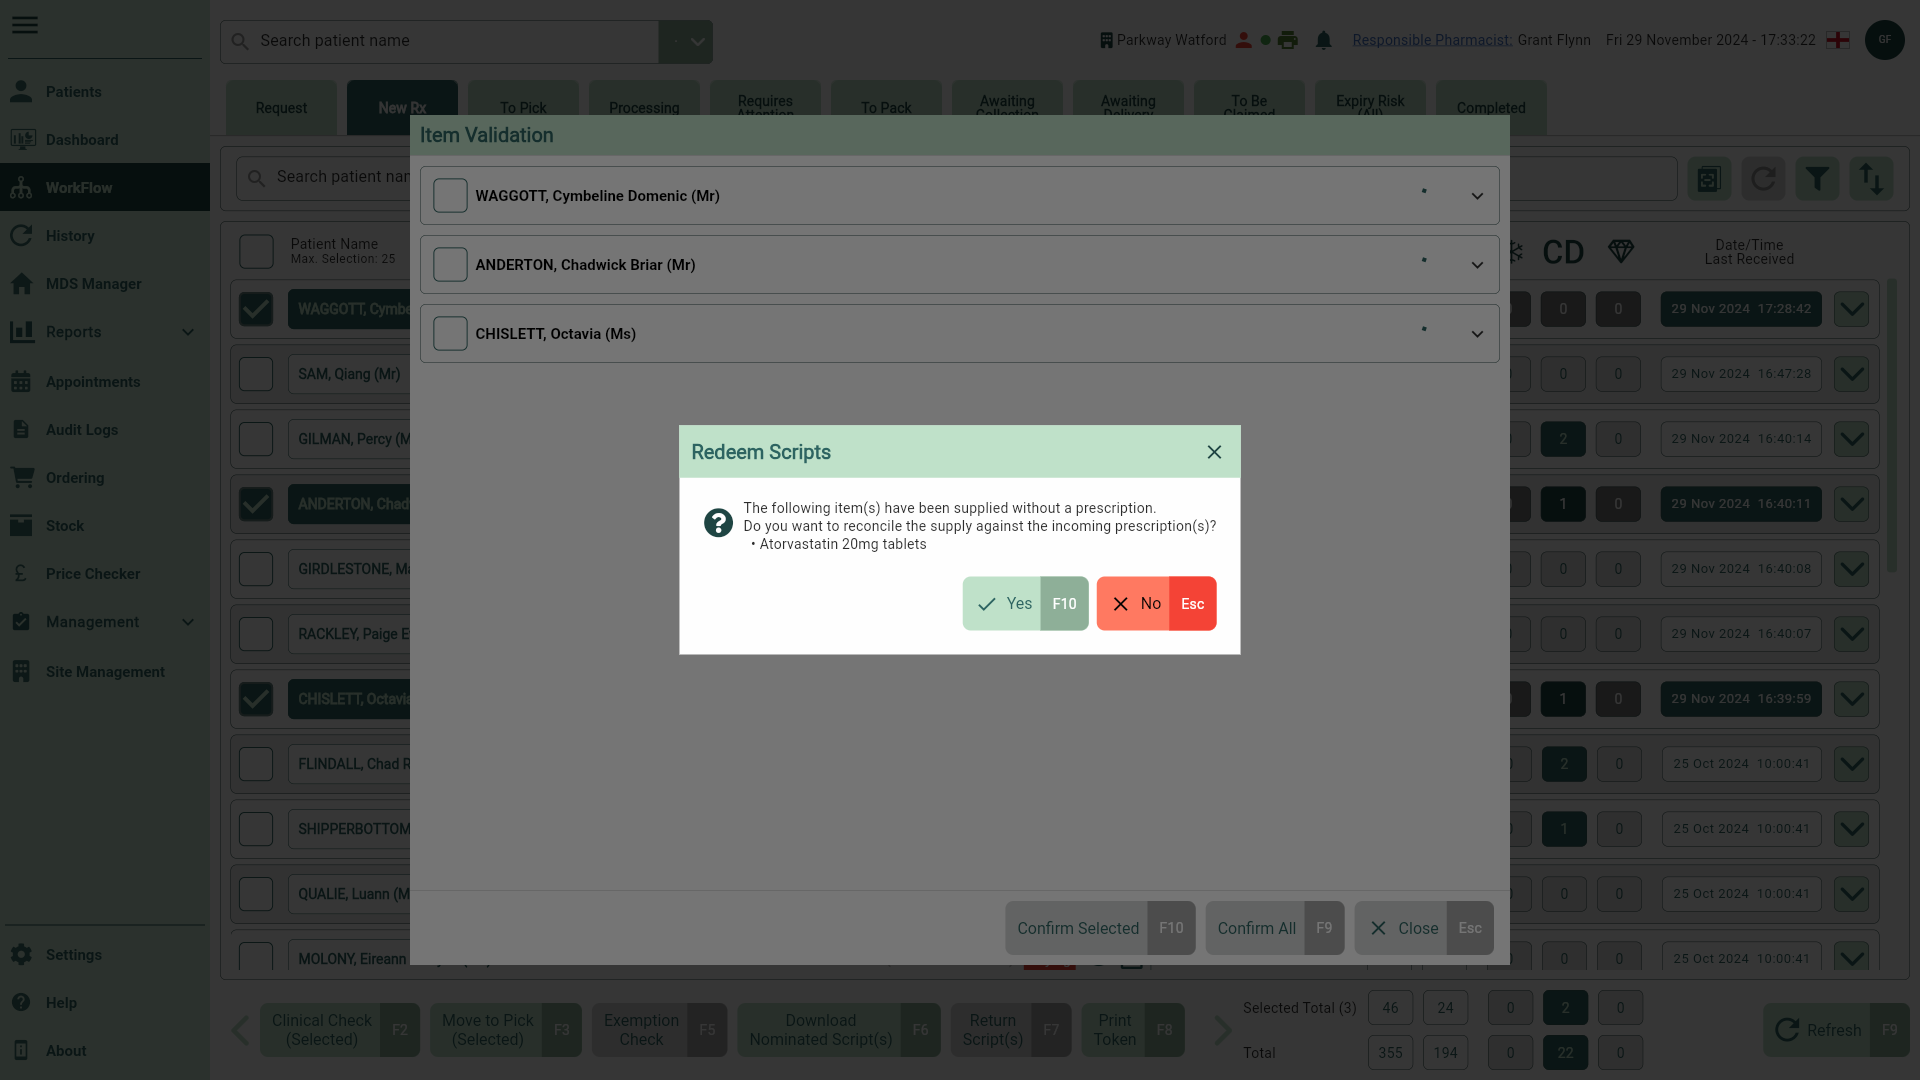
The Redeem Scripts prompt displays for any item(s) that have been supplied without a prescription.
- To begin, select the [Yes - F10] button to reconcile your Emergency Supplies script.
Apotec CRM will automatically deduct the ES quantity. The Remaining Quantity which will display during the picking stage will be calculated depending on the original supply and incoming prescribed quantity. The table below provides some ES redemption examples:
| Emergency Supply Quantity | Incoming Prescribed Quantity | Running Balance (for label) | Owing Created | Owing Balance | Remaining ES Quantity | ES Redemption Status |
|---|---|---|---|---|---|---|
| 28 | 28 | 0 | No | 0 | 0 | Completed |
| 7 | 56 | 49 | No | 0 | 0 | Completed |
| 5 | 100 | 95 | Yes - 15 | 80 | 0 | Completed |
| 5 | 100 | 95 | Yes - Full | 95 | 0 | Completed |
| 28 | 14 | 0 | No | 0 | 14 | Partially redeemed |
- Complete the Item Validation.
- If the item has been fully redeemed the ES script will be moved to the Completed tab. For partially redeemed items, scripts will remain in the Requires Attention tab until fully redeemed, and you will be informed that an outstanding balance is remaining.

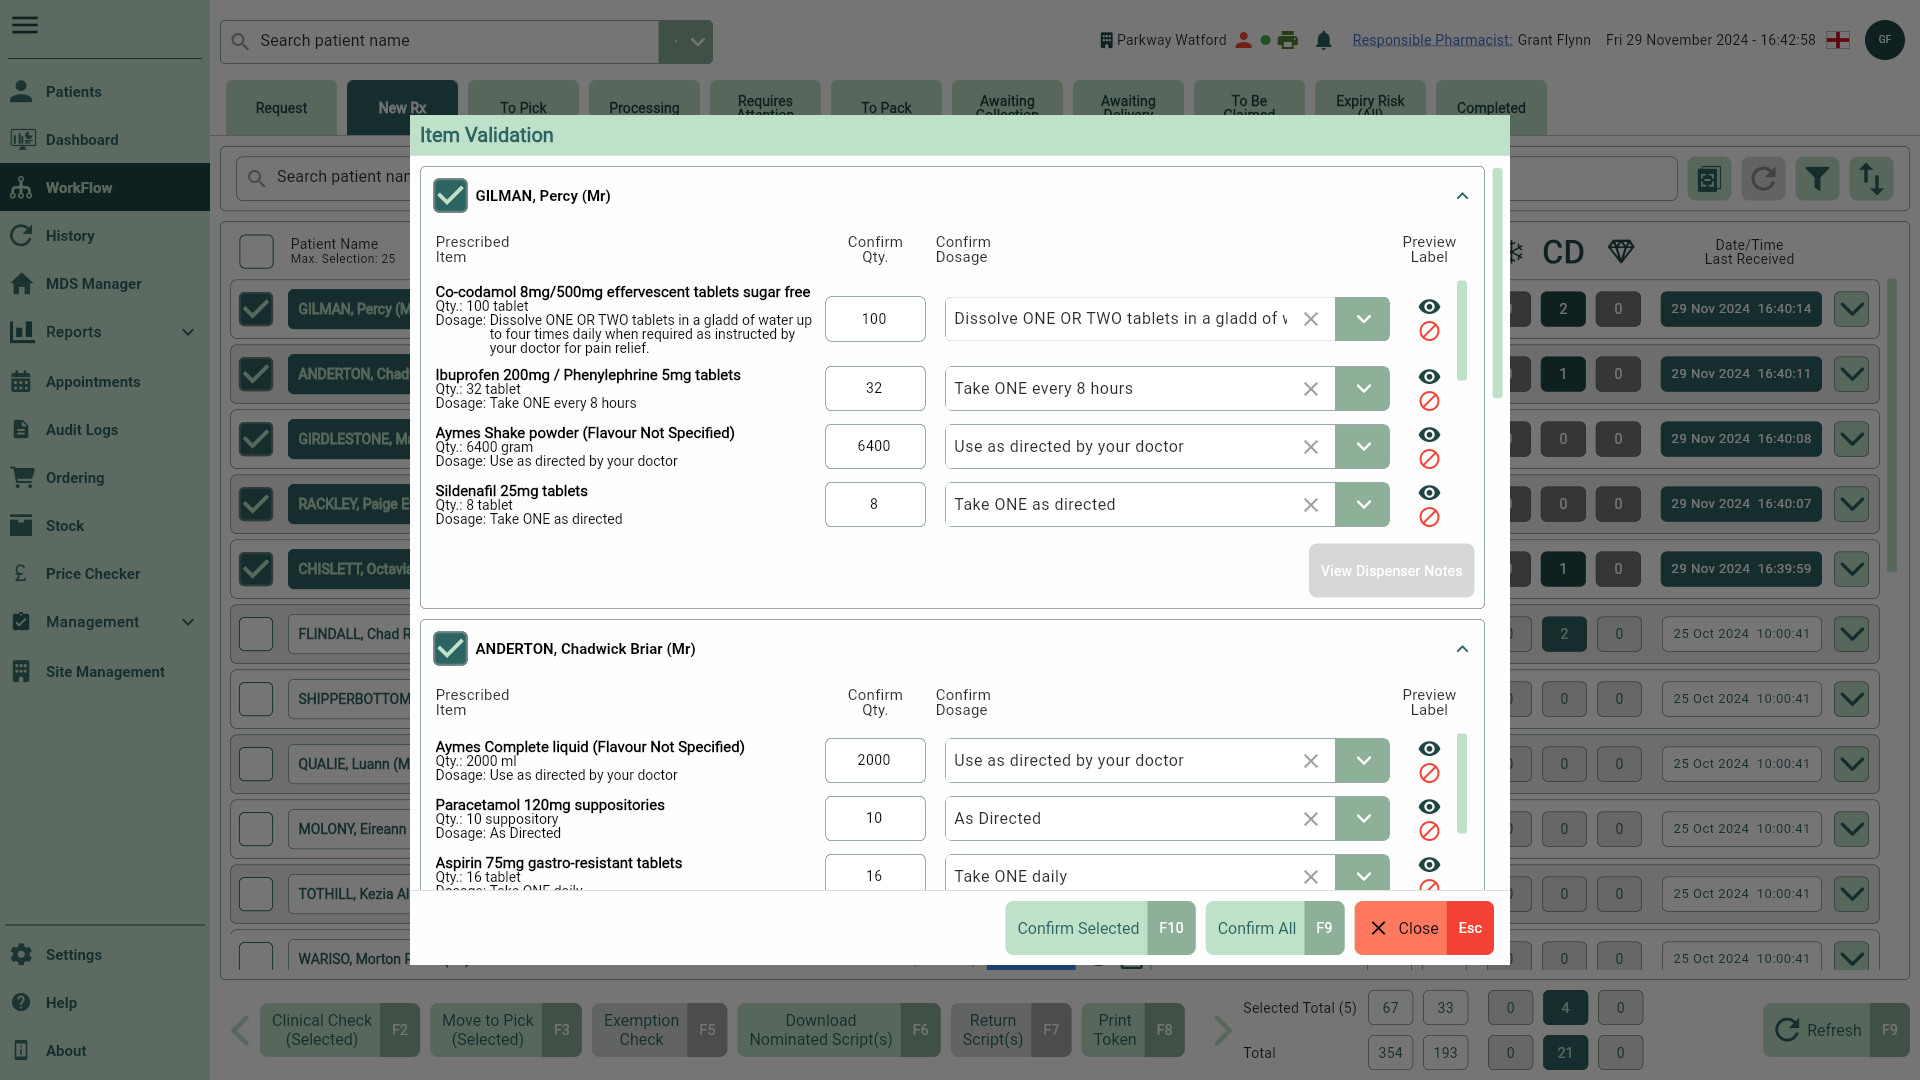
- Validate the prescribed item(s), quantities and dosages for your selected script(s) and make any amendments if necessary, including marking items as Stopped. From here you are able to perform the following actions using the fields below:
If a Clinical Check (CC) has already been performed and a prescription edit, such as changes to the dosage or quantity, is made during the Item Validation, a repeat CC will be required for the edited script. If the CC is not completed, the script will be marked as Clinical Check not completed and moved to the next stage of Workflow. All scripts marked as Clinical Check not completed can be actioned in the Requires Attention tab on Workflow.
| Field | Description |
|---|---|
| MDS Item switch | By default, the Auto Select MDS Item application setting will configure the MDS Item switch on the Item Validation step of the Dispensing Wizard to automatically be set to Yes for all items when you are dispensing prescriptions for MDS patients. If required, you are able to change this by toggling the switch to No. Once you have manually set an item to No, this will be stored for all future dispensing of this item. When printing labels, if the MDS Item switch is set to No, labels will print as usual when dispensing. If the MDS Item switch is set to Yes, labels will only print if you manually select the [Quick Print labels – F5] button or if the item is marked as a separate container or topical item. |
| Confirm Qty | In this box you can alter the item quantity. It's important to keep in mind that when making amendments, you cannot increase the amount beyond what is prescribed, but you do have the option to decrease the amount. |
| Confirm Dosage dropdown | The dosage will be pre-populated based on the electronic message. If the dosage detected on the EPS script differs from the one in the PMR, it will be highlighted in yellow. If required, you can use the Confirm Dosage dropdown to select a different dosage. |
 View icon (Label) View icon (Label) | To preview how your label will look, select the View icon in the Preview Label column. Your label will display information such as patient demographics, item quantity, dosage and any advisory warnings. |
 Stopped icon Stopped icon | Select the Stopped icon to mark the item(s) as Stopped. Marking items as Stopped will mark the item as Not Dispensed and prompt you to provide a Not Dispensed reason. Stopped items will display with a STOPPED badge in the patient's Medication History. |
| [View Dispenser Notes] | Any notes included from the prescriber will be visible by selecting the [View Dispenser Notes] button. This is only applicable for EPS scripts and does not apply to manual scripts. |
| [Confirm Selected - F10] | Select to complete the Item Validation and move your valid selected patients/scripts to the To Pick tab. After each patient/script has been validated, it will be marked with a Prescription items flagged to pick badge. |
| [Confirm All - F9] | Select to move all valid patients/scripts to the To Pick tab. After each patient/script has been validated, it will be marked with a Prescription items flagged to pick badge. |
- Once the Item Validation stage is complete select the [Close - Esc] button. You are returned to the New Rx tab, and your selected patients/scripts have moved to the To Pick tab.
On completion of the Item Validation, Pharmacist level users will be prompted to perform a clinical check for any patients and prescription items confirmed to move to the To Pick tab.
Learn how to perform a clinical check in Workflow.
Once the Item Validation steps are complete, the Perform Clinical Check prompt displays.
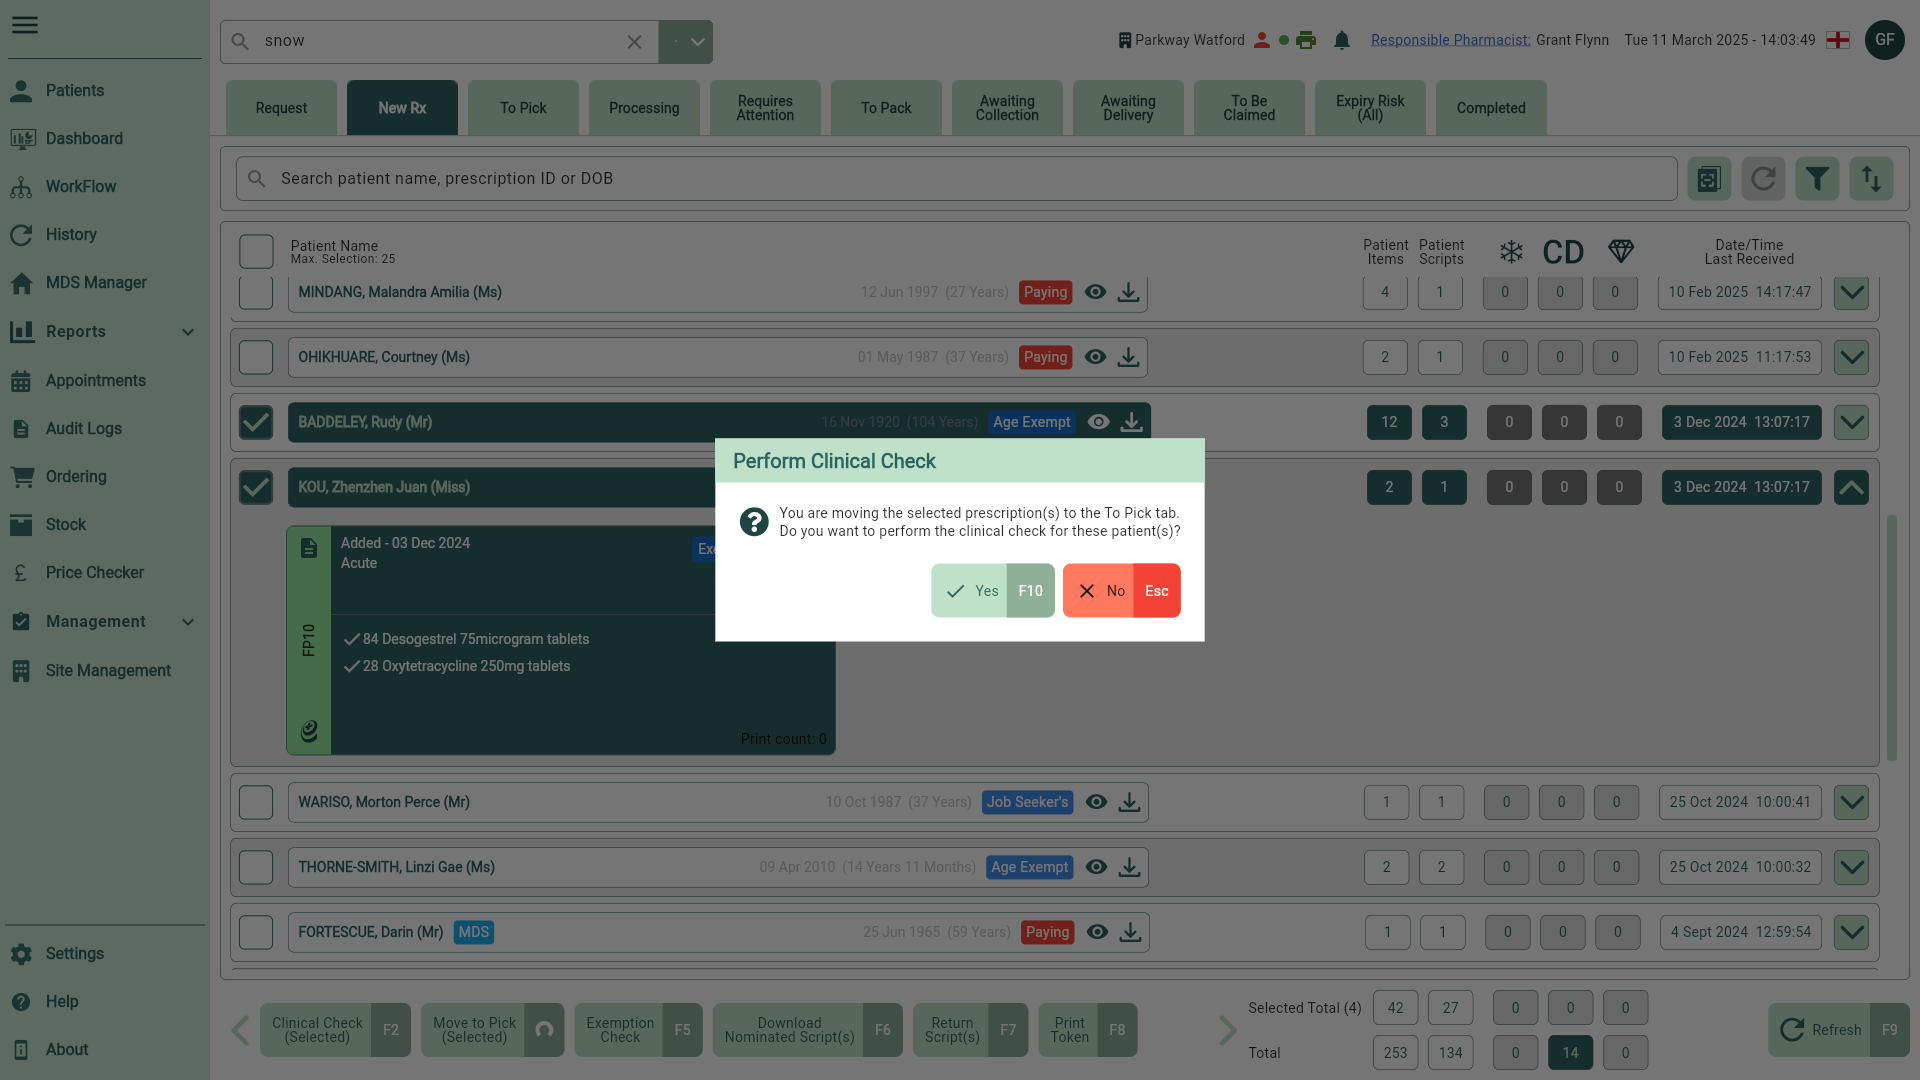
- Select the [Yes - F10] button to open the Clinical Check window.
- If you are satisfied all checks are complete, or no alerts have been displayed, select the [Mark as CC - F10] button to complete the clinical check for your patient. A CC Completed badge will be applied and you will automatically be moved to the next patient.
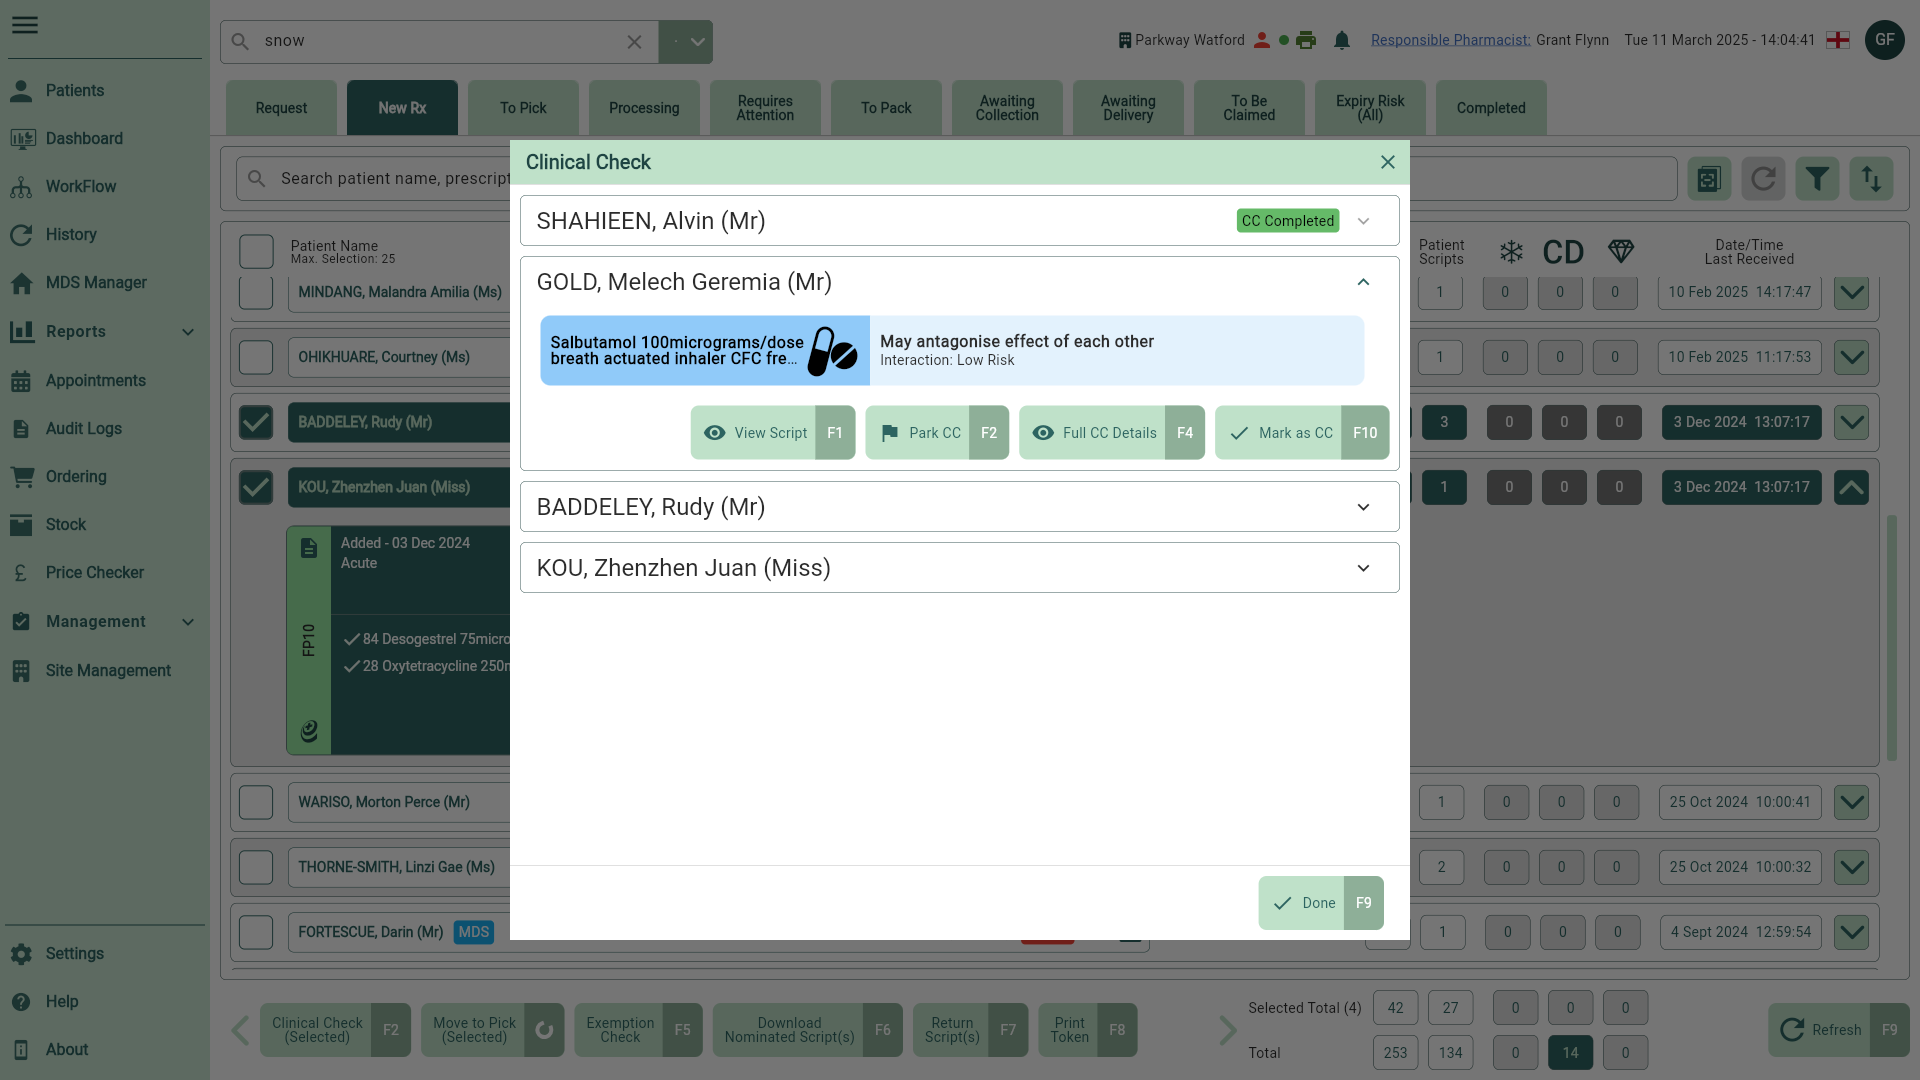
In the Clinical Check window, you can select the [Full CC Details – F4] button for more information to support your clinical decision, or you can park the Clinical Check by selecting the [Park CC – F2] button to flag the script as Clinical check not complete. Additionally, you can view the script in full by selecting the [View Script - F1] button.
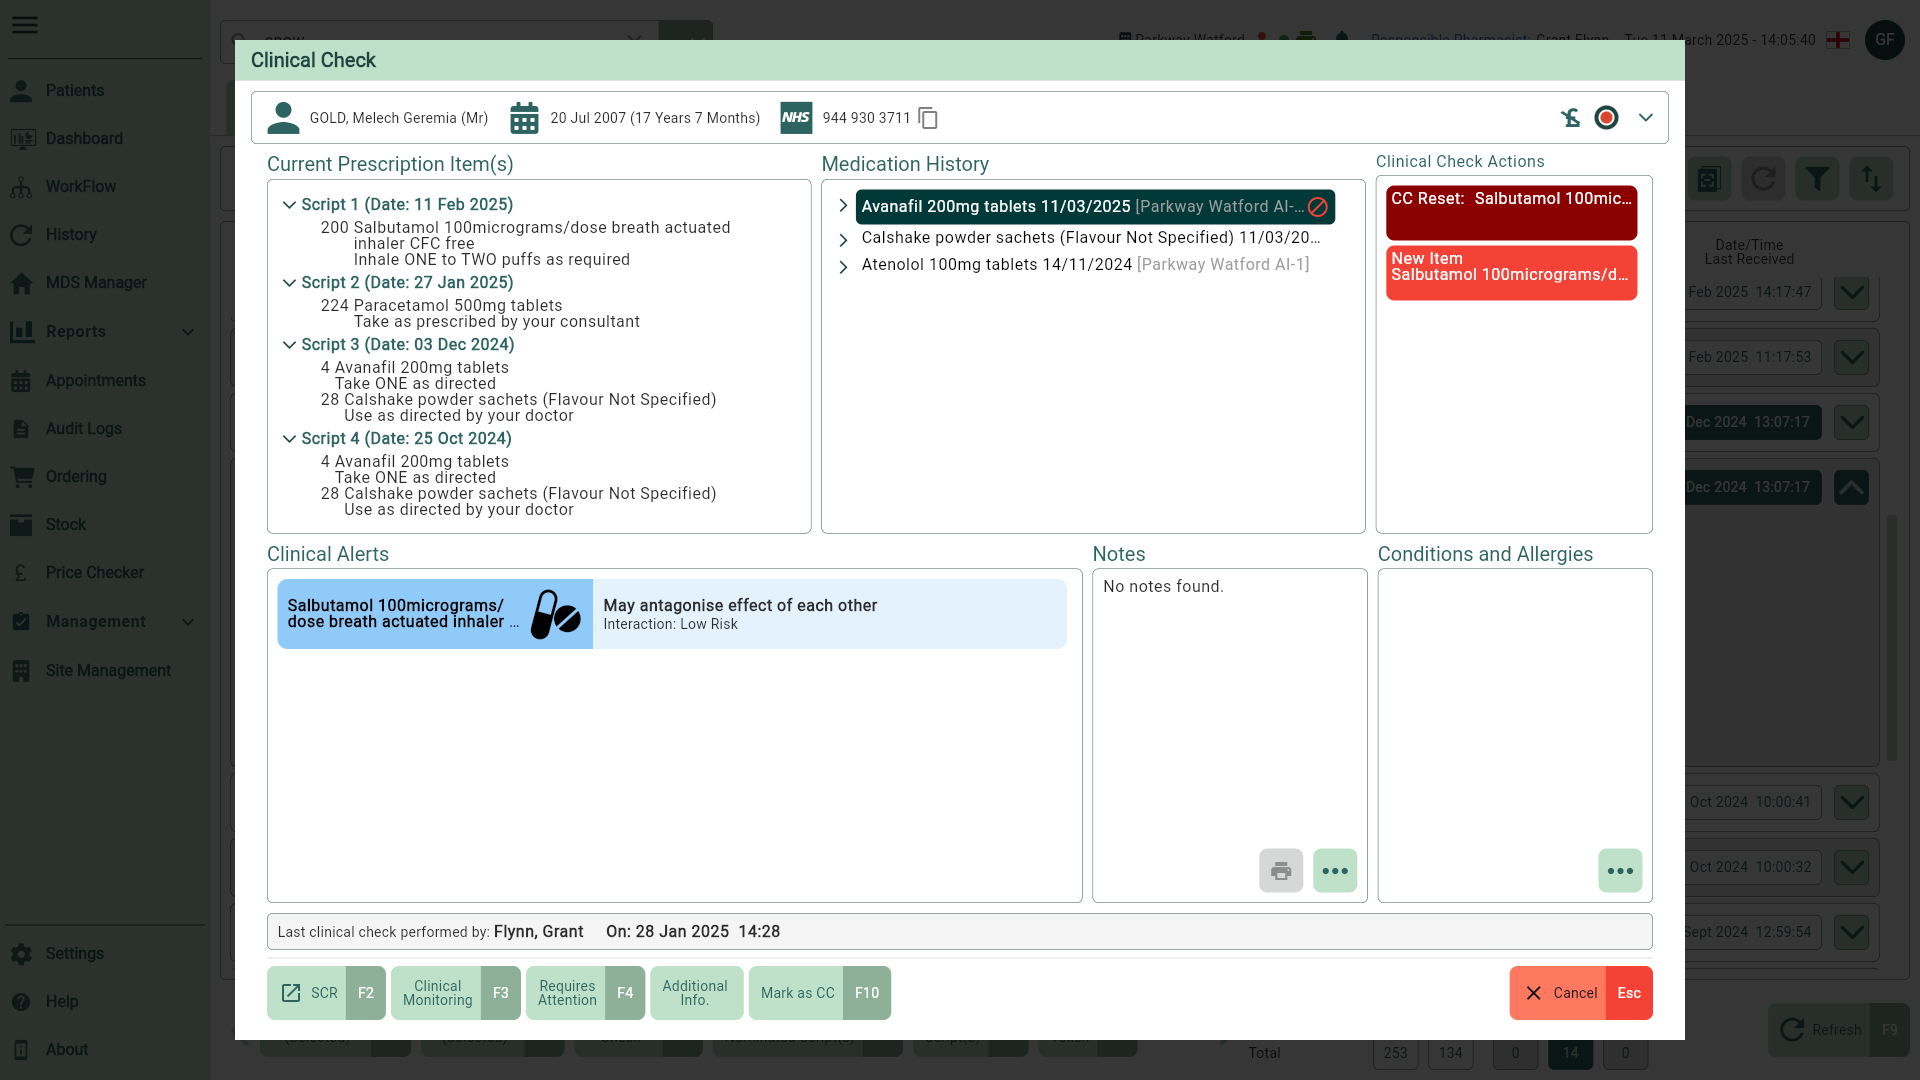
Our Clinical Check details window has been designed to give you all the information you need to make an informed clinical decision during dispensing. The overview displayed allows you to take a deeper look at the patient's details, Medication History, Conditions and Allergies, Clinical Alerts and Clinical Check Actions.
Note: Hover your cursor over the CC Reset action to see the action details in full as a tooltip.
- Once all clinical checks are complete, select the [Done - F9] button to close the Clinical Check window and return to the New Rx tab.
