Creating and printing pick lists
To assist with product selection, you can create pick lists and print them.
You will be prompted to select a printer if you do not have printers configured in your application settings. Learn how to configure printers by following our Configuring printers and label reports article.
- To begin, select the To Pick tab in Workflow by selecting Workflow from the left-nav and the To Pick tab.
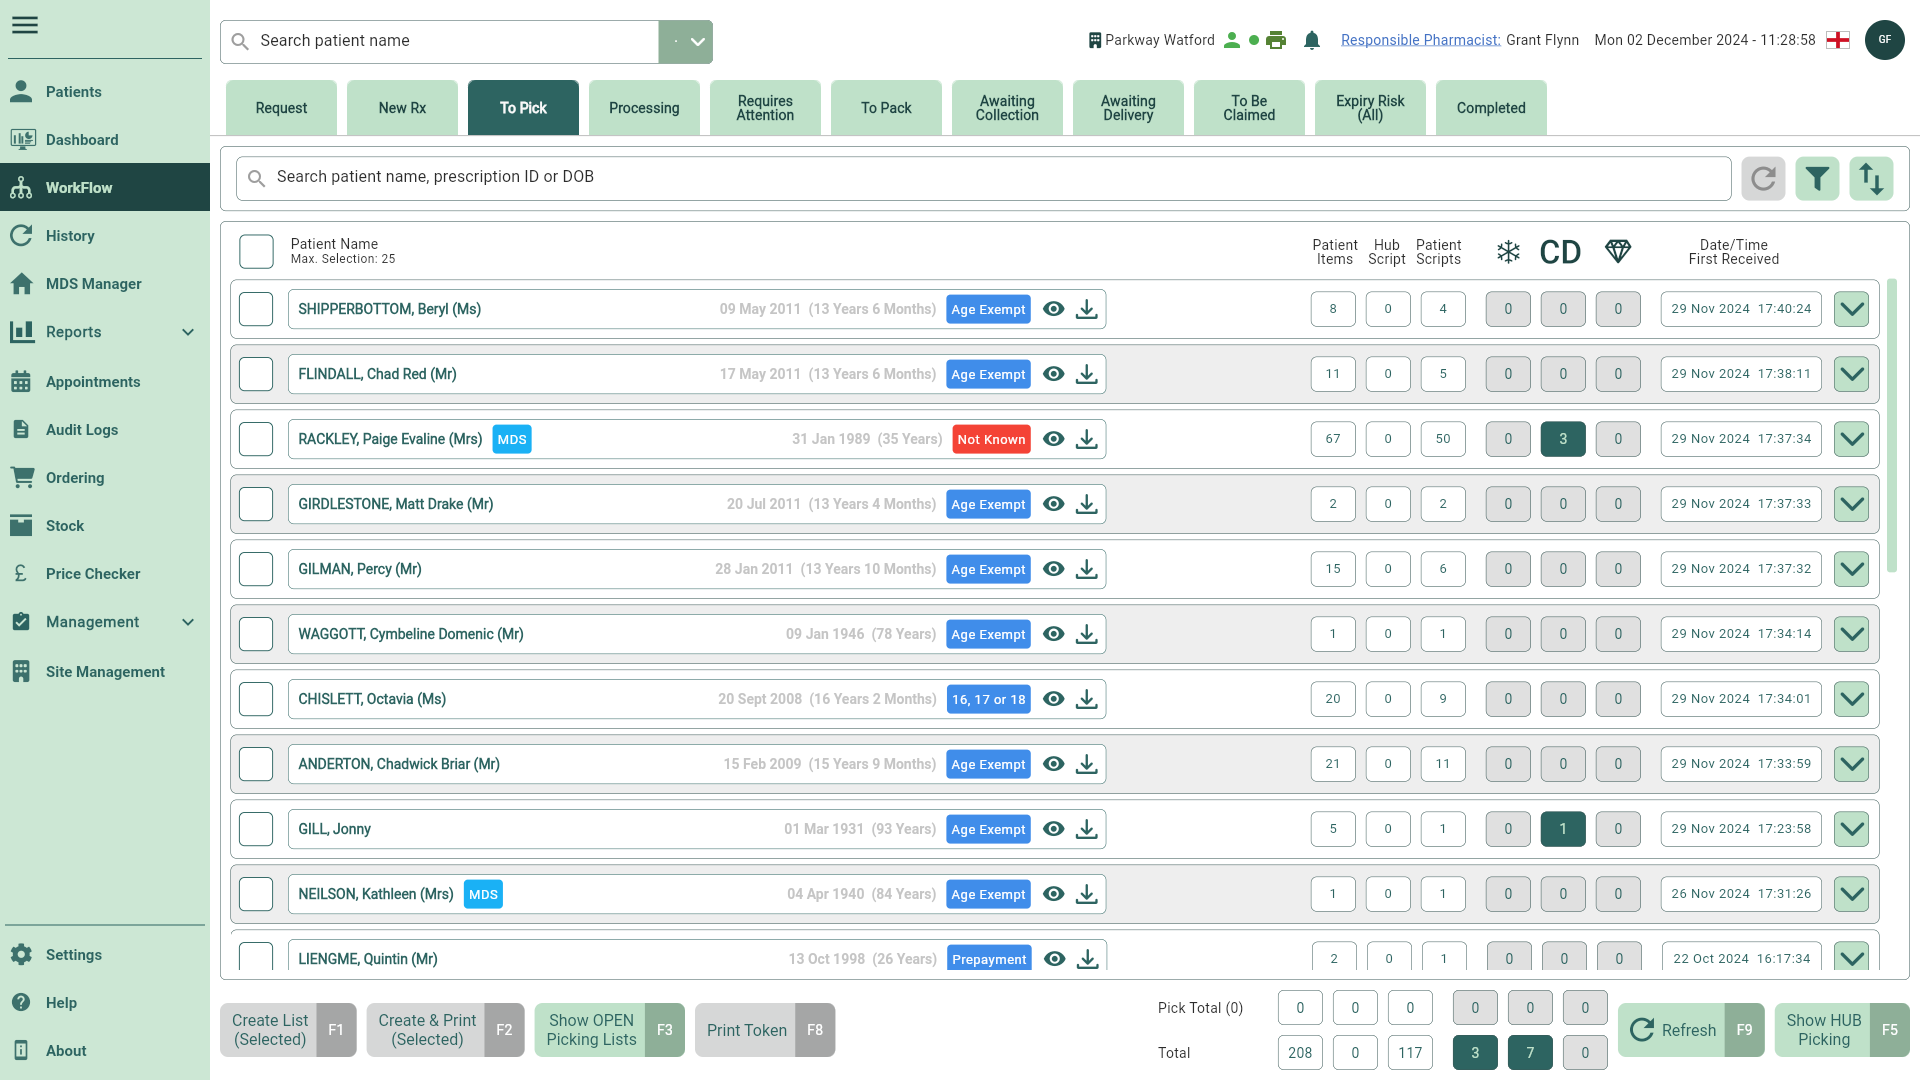
- Select your patient(s) and prescription(s) to create a pick list, if required you can use the filters to refine the grid.
You may need to select the [Refresh - F9] button on the To Pick Workflow tab to see any recent updates.
You can process prescriptions by selecting one patient at a time or by using the select all checkbox. If the number of selected patients exceeds the configured limit (max 25 by default), the function buttons will be disabled until enough patients have been deselected. Learn more about Workflow settings using our Get to know Workflow article.

- Select the [Create & Print (Selected) - F2] button. The Create Pick List prompt displays.
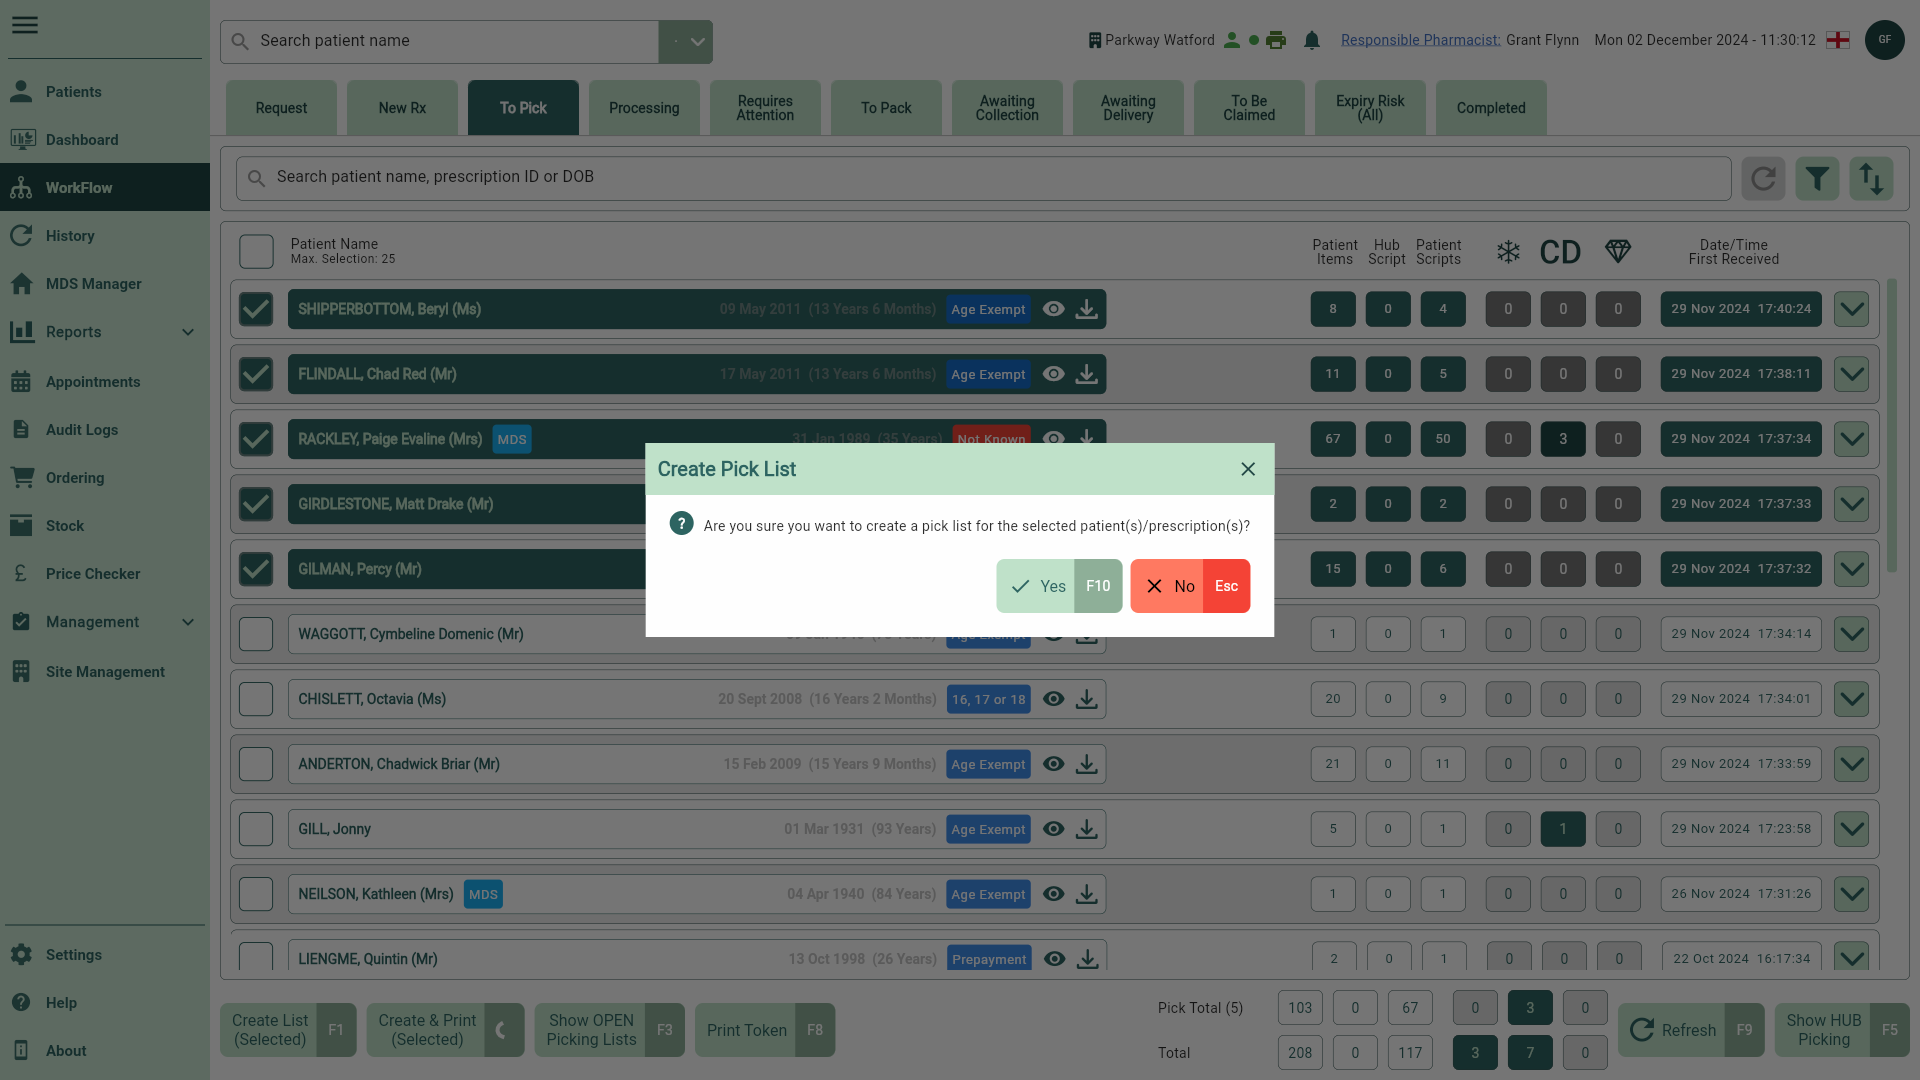
- Select the [Yes - F10] button to confirm. A snackbar displays confirming your pick list has been created successfully, and your pick list will be printed.
You can view the full picking list prior to printing by selecting [Export to PDF] when selecting a printer.
The printed report indicates whether split packs are necessary to fulfil the required quantity.
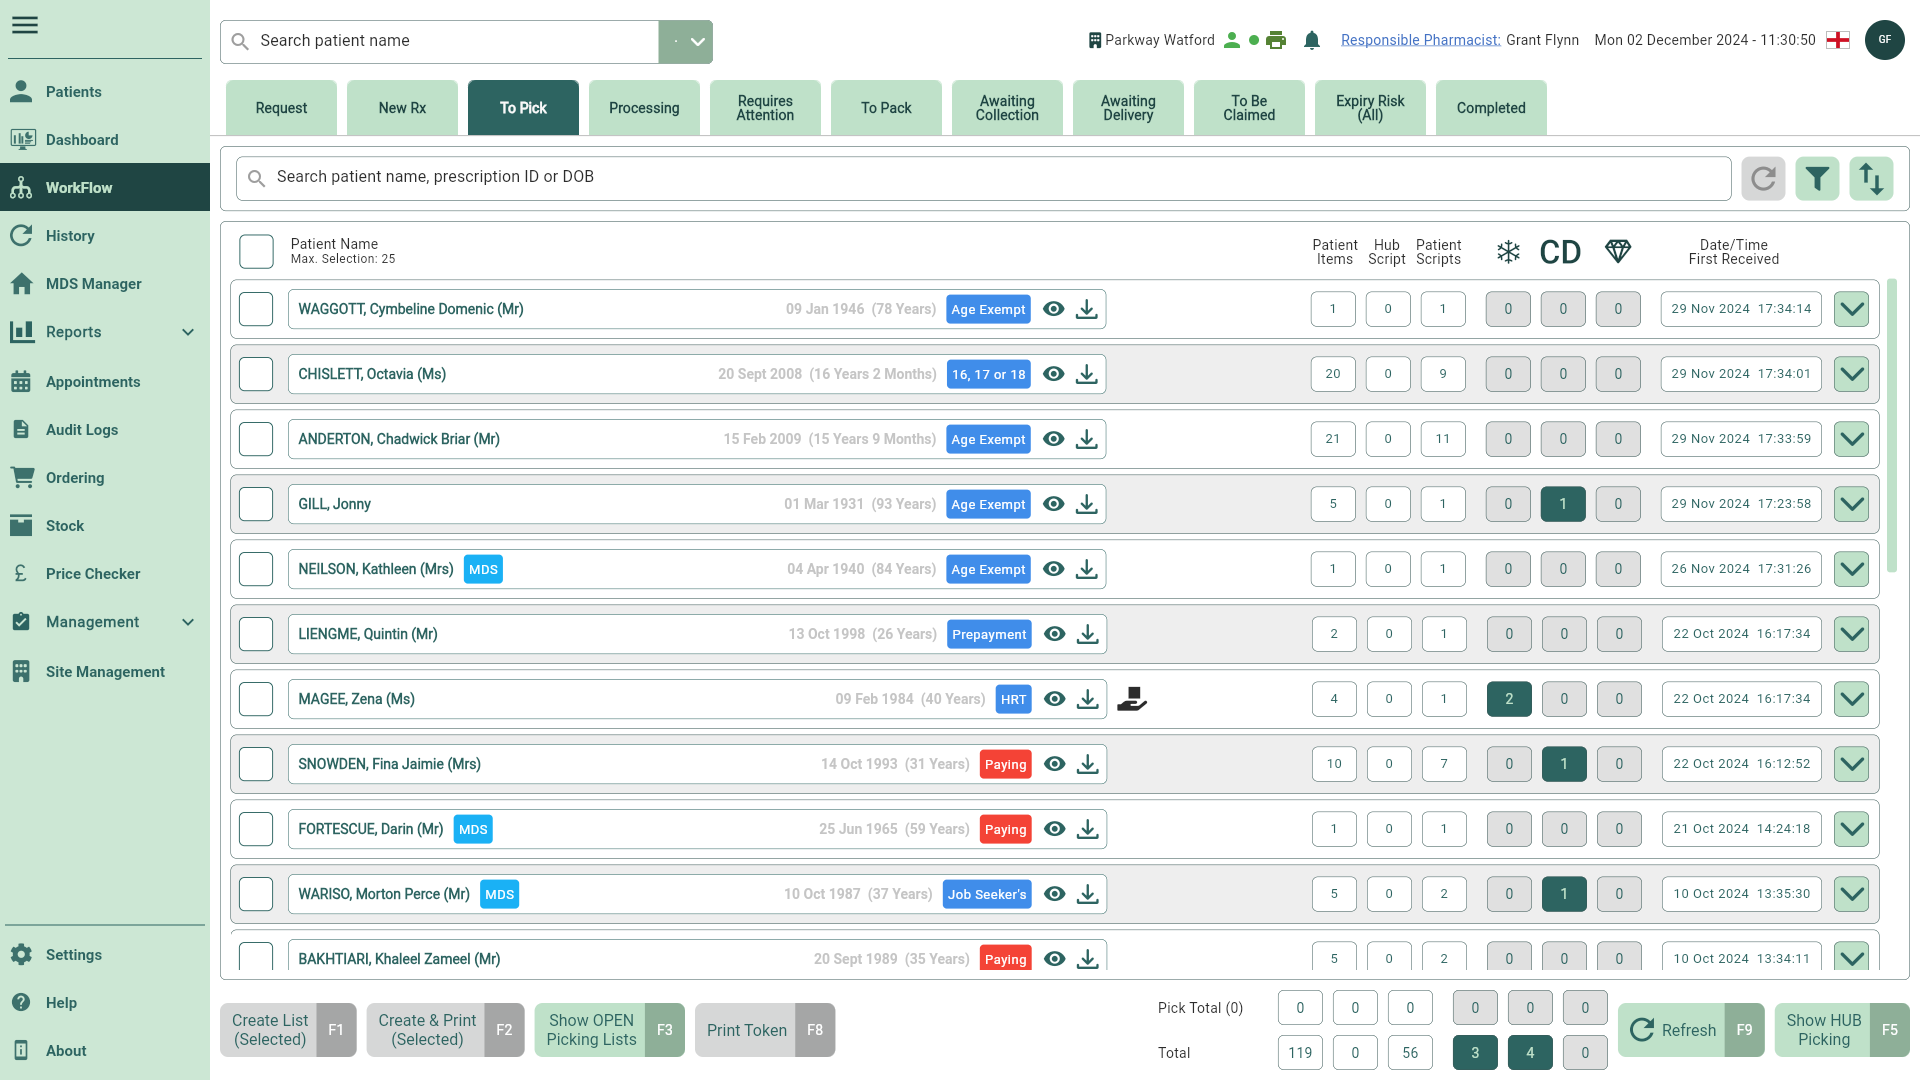
- You are returned to the To Pick tab, and your patient(s)/scripts have moved to the Processing tab.
Scan your pick list barcode(s) while working in Workflow to jump to the corresponding pick list(s) in the Processing tab.